Introduction
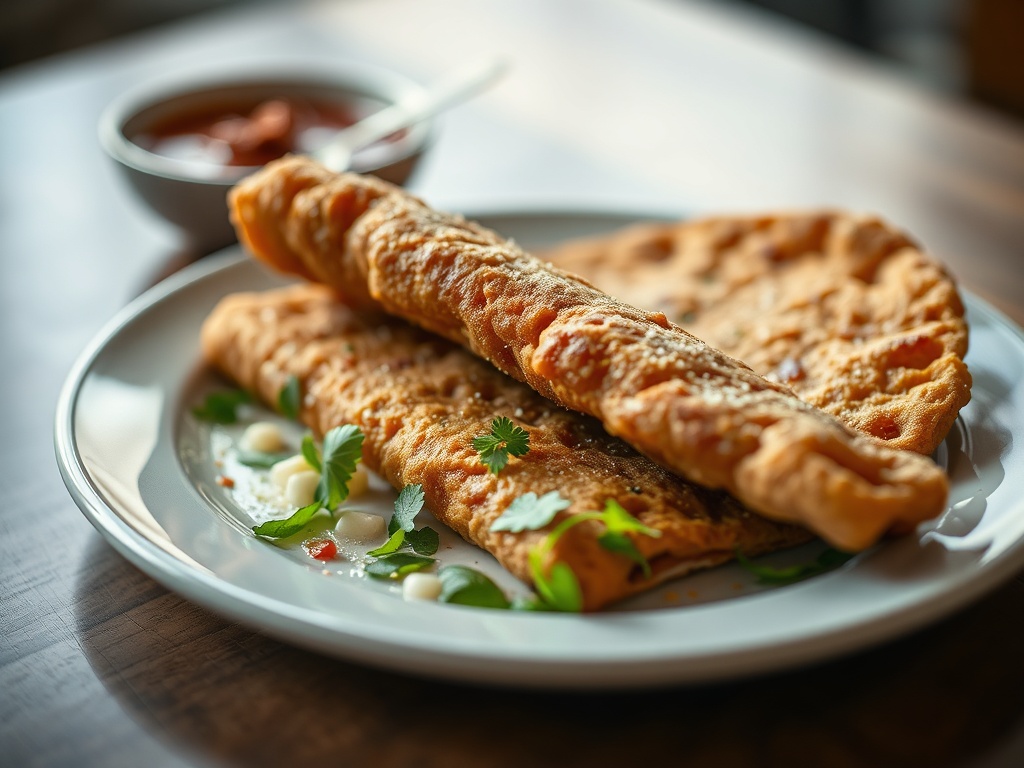
Imagine a golden, puffy cloud, warm and inviting, with a slightly crisp exterior giving way to a soft, chewy interior. That, my friends, is the magic of Indian Frybread – a beloved culinary staple that transcends mere sustenance to become a symbol of resilience, community, and comfort for many Indigenous peoples of North America. More than just a simple fried dough, this dish carries generations of stories within its airy folds, offering a taste of tradition that is both deeply satisfying and profoundly meaningful. It’s the kind of food that brings families together, graces powwows and gatherings, and turns an ordinary meal into a celebration.
While often associated with joyous occasions, the origins of Indian Frybread are rooted in a more challenging past. Born from necessity, it emerged as Native American tribes faced forced relocation and were provided with government rations of flour, lard, and sugar – ingredients far removed from their traditional diets. From these limited provisions, a culinary ingenuity transformed hardship into a beloved culinary tradition. It’s a testament to adaptability and the enduring spirit of a people who found a way to create something delicious and culturally significant from what was available. Today, it stands as a delicious bridge between past and present, a dish cherished by many, and one that every home cook can easily master.
Get ready to embark on a culinary journey that promises simple ingredients, straightforward steps, and a deeply satisfying reward. This recipe will guide you through crafting perfect Indian Frybread – fluffy, golden, and utterly irresistible. Whether you prefer it sweet with a drizzle of honey or savory as the base for a hearty “Indian Taco,” you’ll discover why this comfort food has held a special place in hearts and homes for so long. Prepare to fill your kitchen with the enticing aroma of freshly fried dough and your table with a taste of rich cultural heritage.
Nutritional Information
Per serving (approximate values):
- Calories: 350
- Protein: 7g
- Carbohydrates: 45g
- Fat: 16g
- Fiber: 2g
- Sodium: 320mg
Ingredients
- 3 cups all-purpose flour, plus more for dusting
- 1 tablespoon baking powder
- 1 teaspoon salt
- 1 tablespoon granulated sugar (optional, for a slightly sweeter dough)
- 1 ½ cups warm water (about 105-115°F / 40-46°C)
- 2 tablespoons vegetable oil (for the dough, optional, for added tenderness)
- 4-6 cups vegetable oil, canola oil, or lard (for frying)
Instructions
- Prepare Your Workspace and Ingredients: Gather all your ingredients and equipment. In a large mixing bowl, whisk together the all-purpose flour, baking powder, salt, and granulated sugar (if using). Ensure the baking powder is fresh for optimal puff.
- Form the Dough: Create a well in the center of the dry ingredients. Gradually pour in the warm water and the 2 tablespoons of vegetable oil (if using) into the well. Using a wooden spoon or your hands, gently mix the ingredients, drawing flour from the sides into the liquid, until a shaggy, cohesive dough forms. Avoid overmixing at this stage.
- Lightly Knead the Dough: Turn the dough out onto a lightly floured surface. Knead the dough gently for about 2-3 minutes, just until it comes together and feels smooth. The dough should be soft and slightly tacky, but not sticky. Do not over-knead, as this can develop too much gluten and result in tough frybread. Adjust with a tiny bit more flour if too sticky, or a few drops of water if too dry.
- Rest the Dough: Form the dough into a ball. Place it back into the mixing bowl, cover the bowl with a clean kitchen towel or plastic wrap, and let it rest at room temperature for at least 30 minutes. This crucial step allows the gluten to relax, making the dough easier to handle and ensuring a tender, fluffy frybread. You can rest it for up to an hour.
- Heat the Frying Oil: While the dough is resting, prepare your frying setup. Pour 4-6 cups of vegetable oil, canola oil, or lard into a large, heavy-bottomed skillet, Dutch oven, or cast-iron pot. The oil should be at least 1-2 inches deep. Heat the oil over medium-high heat until it reaches a temperature of 350-375°F (175-190°C). If you don’t have a thermometer, you can test the oil by dropping a tiny piece of dough into it; it should sizzle immediately and begin to brown within 30-45 seconds.
- Shape the Frybread: Once the dough has rested, gently punch it down. Divide the dough into 10-12 equal pieces. Lightly flour your hands. Take one piece of dough and gently flatten it into a round or oval shape, about 6-8 inches in diameter and ¼ to ⅓ inch thick. You can use a rolling pin for uniformity, but traditionally, it’s done by hand. For even cooking and to prevent excessive puffing in the center, you can poke a small hole in the center of each piece of dough (optional, but traditional).
- Fry the Frybread: Carefully slide 1-2 pieces of shaped dough into the hot oil, ensuring not to overcrowd the pan. Fry for 1-2 minutes per side, or until golden brown and puffed. The frybread should expand and become beautifully airy.
- Drain the Frybread: Using a slotted spoon or tongs, carefully remove the cooked frybread from the oil. Transfer it to a plate lined with paper towels or a wire rack set over a baking sheet to drain any excess oil.
- Serve Immediately: Repeat the frying process with the remaining dough, maintaining the oil temperature between batches. Serve the Indian Frybread immediately while it’s warm and fresh, either plain or with your favorite sweet or savory toppings.
Cooking Tips and Variations
Achieving perfect Indian Frybread is an art that comes with a little practice, but these tips will set you on the path to success. The key to truly delicious frybread lies in maintaining the right oil temperature and not overworking the dough. If your oil is too cool, the frybread will absorb too much oil and become greasy. If it’s too hot, it will brown too quickly on the outside while remaining raw in the middle. A consistent temperature, ideally monitored with a thermometer, is your best friend here. Don’t crowd the pan; fry in small batches to prevent the oil temperature from dropping too much. As for the dough, remember that gentle handling is paramount. Over-kneading develops gluten, leading to a tough, chewy result instead of the desired tender, airy texture. The resting period is not optional; it allows the gluten to relax, making the dough pliable and ensuring that signature puff.
For variations, consider experimenting with the liquid in your dough. Substituting warm milk or buttermilk for water will yield a richer, slightly softer frybread with a subtle tangy note. Some recipes even incorporate a small amount of cornmeal into the flour for a bit of texture and a unique flavor profile. If you enjoy a hint of sweetness in the dough itself, you can increase the sugar slightly. For a truly traditional flavor, consider frying in lard or shortening, which imparts a distinct richness that neutral oils can’t quite replicate. Just be mindful of the smoke point and adjust your heat accordingly. Once fried, the possibilities are endless! For a savory twist, consider adding a pinch of garlic powder or onion powder to the dry ingredients. You can also form the dough into smaller, bite-sized pieces for “frybread bites” which are perfect for dipping. Don’t be afraid to get creative and make this recipe your own, always remembering the heritage it represents.
Storage and Reheating
Indian Frybread is unequivocally best enjoyed fresh, hot, and straight from the frying pan. The fluffy texture and crisp exterior are at their peak immediately after cooking. However, if you find yourself with leftovers (a rare occurrence for most!), proper storage can help preserve them for a short period. Allow the frybread to cool completely on a wire rack before storing. Once cooled, place it in an airtight container or a resealable plastic bag. Store at room temperature for no more than 1-2 days. Beyond that, the texture tends to degrade significantly, becoming tougher and losing its characteristic lightness. Freezing is generally not recommended as it dramatically alters the texture upon thawing and reheating.
When it comes to reheating, avoid the microwave if at all possible, as it will make the frybread rubbery and tough. The best method for reheating is to use a dry skillet or a conventional oven. For a skillet, heat a non-stick pan over medium-low heat. Place the frybread directly in the pan and heat for 1-2 minutes per side, or until warmed through and slightly crisped. For an oven, preheat it to 300°F (150°C). Place the frybread directly on the oven rack or on a baking sheet and heat for 5-7 minutes, or until heated through. The goal is to warm it gently without drying it out or making it excessively hard. While reheated frybread won’t quite match the fresh experience, these methods will bring it closer to its original deliciousness.
Frequently Asked Questions
Why is my frybread tough or hard?
Tough or hard frybread is typically a result of over-kneading the dough or not allowing it to rest long enough. Over-kneading develops too much gluten, making the dough dense and inelastic. The rest period is crucial for the gluten to relax, which results in a tender and soft texture once fried. Ensure you knead just enough to bring the dough together, and always give it at least 30 minutes to rest.
My frybread is greasy. What went wrong?
Greasy frybread is almost always a sign that your frying oil was not hot enough. When the oil temperature is too low, the dough absorbs the oil instead of cooking quickly and forming a crisp exterior. Always ensure your oil is heated to the correct temperature (350-375°F / 175-190°C), ideally using a thermometer. Also, avoid overcrowding the pan, as this can cause the oil temperature to drop significantly.
Why isn’t my frybread puffing up?
If your frybread isn’t puffing, several factors could be at play. The most common culprit is old or inactive baking powder. Baking powder loses its potency over time, so ensure yours is fresh. Another reason could be oil that isn’t hot enough, which prevents the rapid expansion of gases created by the baking powder. Finally, if your dough is too thick or overworked, it might also inhibit proper puffing.
Can I make the dough ahead of time?
While frybread is best made fresh, you can prepare the dough a few hours in advance. After the initial rest, you can place the dough in an airtight container and refrigerate it for up to 2-3 hours. Allow the dough to come closer to room temperature for about 30 minutes before shaping and frying. This will help it puff properly. For the best texture, however, frying within an hour or two of making the dough is ideal.