Introduction
Step into the vibrant world of Morkovcha, also known as Korean-Style Grated Carrot Salad! This seemingly simple dish is a culinary marvel with a rich history, born from the resilience and ingenuity of the Koryo-saram – ethnic Koreans who were deported to Central Asia during the Soviet era. Faced with limited access to traditional Korean ingredients, they ingeniously adapted their culinary heritage, creating this iconic salad that perfectly blends Korean flavors with Central Asian influences. It quickly became a staple, celebrated for its bold taste and refreshing crunch, and is now a beloved dish across many former Soviet republics.
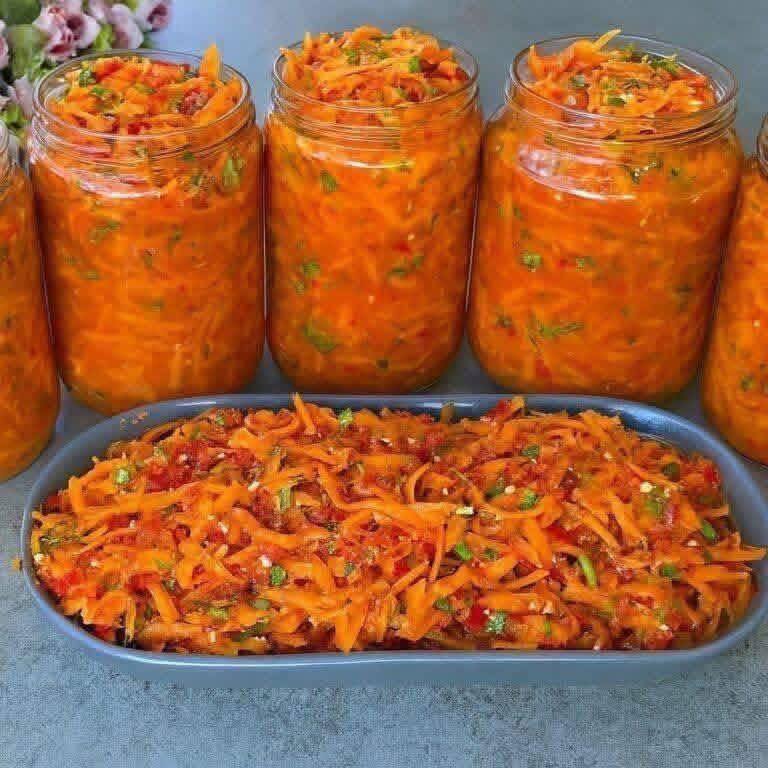
You’re about to discover why Morkovcha is so much more than just a carrot salad. Prepare your taste buds for an explosion of flavors: a tantalizing dance of tangy vinegar, zesty garlic, savory spices, and a delightful kick from Korean red pepper flakes, all balanced by a subtle sweetness. Its vibrant orange hue and glossy finish are as appealing to the eyes as its complex taste is to the palate. This salad is incredibly versatile, making it the perfect companion for a variety of meals – whether you need a bright side dish for grilled meats, a refreshing addition to a potluck spread, or a healthy, satisfying snack packed with flavor. It’s also fantastic for meal prep, as the flavors only deepen and improve with time, making it an ideal candidate for jarring and storing in the refrigerator.
Beyond its deliciousness, Morkovcha offers a wonderfully refreshing counterpoint to richer dishes and is surprisingly easy to make at home. It’s naturally vegan, gluten-free (if using tamari), and packed with the goodness of carrots and aromatic spices. Get ready to transform humble carrots into a dish that tells a story, excites the senses, and will undoubtedly become a new favorite in your kitchen. Let’s dive in and create this beautiful, flavorful, and historically significant Korean-Style Grated Carrot Salad!
Nutritional Information
Per serving (approximate values, based on 6 servings):
- Calories: 180 kcal
- Protein: 2g
- Carbohydrates: 15g
- Fat: 13g
- Fiber: 4g
- Sodium: 450mg
Ingredients
- 1.5 lbs (approx. 6-7 medium) carrots, peeled
- 1.5 teaspoons salt, divided (1 tsp for salting carrots, 0.5 tsp for dressing)
- 4-5 cloves garlic, minced
- 1/2 small onion, thinly sliced or finely minced (optional, for frying)
- 2 tablespoons Korean red pepper flakes (gochugaru), adjust to taste
- 1 teaspoon ground coriander
- 1/2 teaspoon black pepper
- 1/4 teaspoon ground cumin (optional)
- 1/4 cup neutral oil (such as vegetable, canola, or grapeseed)
- 3 tablespoons apple cider vinegar or white vinegar
- 1 tablespoon soy sauce or tamari (for gluten-free)
- 1 tablespoon granulated sugar
- 2 tablespoons fresh cilantro, chopped (or parsley)
- 1 tablespoon green onions or chives, thinly sliced (optional, for garnish)
Instructions
- Prepare the Carrots: Using a julienne peeler, a mandoline with a julienne blade, or a specific Morkovcha grater, shred the peeled carrots into long, thin matchstick-like strips. Aim for consistency in thickness for even marination.
- Salt and Rest the Carrots: Place the julienned carrots in a large bowl. Sprinkle 1 teaspoon of salt evenly over the carrots and toss well to coat. Let the carrots sit for 20-30 minutes. This step draws out excess moisture, which prevents a watery salad and helps the carrots absorb the dressing more effectively.
- Squeeze Out Liquid: After resting, firmly squeeze handfuls of the carrots to extract as much liquid as possible. You’ll be surprised how much water comes out! Discard the liquid. Return the squeezed carrots to the clean, dry bowl.
- Prepare the Aromatic Infusion: In a small, heatproof bowl, combine the minced garlic, Korean red pepper flakes, ground coriander, black pepper, and optional ground cumin. If using the optional sliced onion, have it ready.
- Heat the Oil: Heat the 1/4 cup neutral oil in a small saucepan or skillet over medium-high heat until it just begins to shimmer and is hot but not smoking. If using sliced onion, add it to the hot oil and fry until lightly golden and fragrant, about 1-2 minutes.
- Infuse the Spices: Carefully pour the hot oil (and fried onion, if using) directly over the spice mixture in the small heatproof bowl. You should hear a sizzling sound as the hot oil blooms the spices, releasing their aromatic compounds and intensifying their flavor and color. Stir immediately to combine.
- Combine Ingredients: Pour the hot oil and spice mixture over the squeezed carrots.
- Add Liquids and Sweetener: Add the apple cider vinegar, soy sauce (or tamari), granulated sugar, and the remaining 0.5 teaspoon of salt to the carrots.
- Mix Thoroughly: Using your hands (wearing gloves is recommended to avoid chili burn and staining) or tongs, thoroughly mix all the ingredients together. Massage the dressing into the carrots for a few minutes to ensure everything is evenly coated and the flavors begin to meld.
- Add Fresh Herbs: Stir in the chopped fresh cilantro (or parsley) and optional green onions/chives.
- Marinate and Chill: For the best flavor, transfer the Morkovcha to an airtight container or clean jars. Refrigerate for at least 2-4 hours, or ideally overnight. The marinating time allows the flavors to fully develop and meld, resulting in a much more delicious salad.
- Serve: Serve chilled as a vibrant side dish, appetizer, or healthy snack.
Cooking Tips and Variations
Achieving the perfect Morkovcha is all about attention to detail and personal preference. For an authentic texture, investing in a specific julienne peeler or a Morkovcha grater is highly recommended. These tools create the thin, long matchstick strips that are characteristic of the dish and allow the carrots to absorb the dressing beautifully. While a regular box grater can be used, the results might be too chunky, affecting the overall texture. Don’t skip the crucial step of salting the carrots and squeezing out the liquid; this concentrates their flavor and prevents a watery, diluted salad. The hot oil method is also key: pouring hot oil over the spices “blooms” them, releasing their essential oils and intensifying their aroma and flavor, making the dressing incredibly vibrant. Remember, patience is a virtue with Morkovcha – giving it several hours or even overnight to marinate in the refrigerator allows the flavors to fully develop and meld, transforming it into a truly spectacular dish.
Customizing your Morkovcha is part of the fun! Adjust the amount of Korean red pepper flakes (gochugaru) to suit your desired spice level; for a milder version, reduce it, or for a fiery kick, add more. The balance of sweet, sour, and salty can also be tweaked: add a touch more sugar for a sweeter profile, an extra splash of vinegar for more tang, or a pinch more salt to enhance all the flavors. For variations, consider adding thinly sliced bell peppers (red or yellow for extra color) for a different kind of crunch. A sprinkle of toasted sesame seeds before serving adds a nutty aroma and a lovely textural contrast. You could also experiment with other vegetables like daikon radish or cucumber, though they might require slight adjustments to the salting and squeezing steps. For an extra layer of umami, a tiny dash of toasted sesame oil can be added at the very end, just before serving, but be careful not to overpower the other flavors.
Storage and Reheating
Morkovcha is an excellent make-ahead dish, as its flavors deepen and improve with time. To store, transfer the salad to clean, airtight containers or glass jars. Ensure the carrots are submerged in the dressing as much as possible, as this helps with preservation and flavor absorption. Store the Morkovcha in the refrigerator for up to 5-7 days. It’s important to note that while the vinegar acts as a natural preservative, maintaining proper refrigeration is key for food safety. Always use clean utensils when serving to prevent contamination.
This salad is traditionally served chilled, directly from the refrigerator, so no reheating is necessary or recommended. Reheating would compromise the crisp texture of the carrots and the freshness of the herbs. If you’ve stored it in jars, simply open a jar and serve! If you’re planning to take it to a potluck or picnic, keep it in an insulated bag with ice packs until serving time to maintain its refreshing coolness.
Frequently Asked Questions
What kind of carrots are best for Morkovcha?
Standard orange carrots work perfectly for Morkovcha. Look for firm, fresh carrots without blemishes. While specialty heirloom varieties can be used, their flavor difference might be subtle once mixed with the strong dressing. The most important aspect is their freshness and ability to be julienned into long, thin strips.
Can I make Morkovcha without a special julienne grater?
Yes, you can. While a specific julienne grater or peeler is ideal for the authentic long, thin strips, you can carefully cut the carrots into matchsticks by hand. First, slice the carrots into thin rounds, then stack a few rounds and cut them into thin strips. It will be more time-consuming and might not be as uniform, but it will still yield a delicious result. Avoid using a standard box grater’s large holes, as they tend to produce shorter, thicker pieces that don’t absorb the dressing as well or provide the desired texture.
Why is it called “Korean-Style” if it originated in Central Asia?
The “Korean-Style” designation reflects its culinary heritage among the Koryo-saram, ethnic Koreans in the former Soviet Union. They brought their traditional Korean flavor preferences – particularly the love for garlic, vinegar, and red pepper – and applied them to locally available ingredients like carrots. So, while the dish itself was created in Central Asia, its flavor profile and the cultural background of its creators are distinctly Korean, leading to the “Korean-Style” descriptor.
Can I prepare Morkovcha ahead of time for entertaining?
Absolutely! Morkovcha is an ideal make-ahead dish. In fact, it tastes even better after marinating in the refrigerator for at least 4 hours, and ideally overnight, as this allows all the flavors to meld and deepen beautifully. You can prepare it up to 2-3 days in advance of your event, storing it in airtight containers in the refrigerator. Just give it a good stir before serving.