Introduction
There are some dishes so profoundly delicious, so undeniably satisfying, they earn a legendary status. Fried chicken is undoubtedly one of them, a culinary icon that evokes memories of family gatherings, outdoor picnics, and pure, unadulterated comfort. But then there’s “Slap Ya Momma” Fried Chicken – a name that doesn’t just promise good flavor, it guarantees an explosive, unforgettable experience. Imagine that first bite: the explosive crunch of a perfectly golden, craggy crust giving way to incredibly juicy, tender chicken, bursting with a symphony of savory spices. This isn’t just fried chicken; it’s a declaration of flavor, a dish so outrageously good, it might just make you want to holler!
What makes this particular recipe worthy of such a bold moniker? It’s a secret blend of spices that delivers a powerful kick, a meticulous preparation process that ensures unparalleled crispiness, and a passion for perfection that elevates humble drumsticks into a star-studded main course. This “Slap Ya Momma” Fried Chicken isn’t merely a meal; it’s an event, a celebration of Southern culinary tradition with a vibrant, modern twist. It’s the kind of dish that disappears from the platter almost as fast as you can make it, leaving everyone clamoring for more, convinced they’ve just tasted the best fried chicken of their lives.
Get ready to transform your kitchen into a temple of golden-brown glory. We’re going to walk you through every step, from selecting the perfect drumsticks to mastering the art of the perfect dredge and achieving that coveted, shatteringly crisp crust. Forget soggy, bland, or greasy fried chicken; this guide will equip you with all the knowledge and techniques to create restaurant-quality fried chicken right in your own home. Prepare to impress, prepare to delight, and prepare for a flavor sensation that truly earns its legendary name.
Nutritional Information
Per serving (approximate values, based on one drumstick):
- Calories: 420-480
- Protein: 30-35g
- Carbohydrates: 18-22g
- Fat: 25-30g
- Fiber: 1-2g
- Sodium: 600-800mg
Ingredients
- 8-10 large chicken drumsticks (about 3-3.5 pounds total)
- For the Buttermilk Brine:
- 4 cups buttermilk
- 2 tablespoons hot sauce (e.g., Tabasco, Frank’s RedHot)
- 1 tablespoon salt
- 1 teaspoon black pepper
- 1 teaspoon garlic powder
- 1 teaspoon onion powder
- For the Wet Dredge:
- 2 large eggs
- 1/4 cup milk (whole or 2%)
- 1 tablespoon hot sauce
- For the Dry Dredge:
- 2 cups all-purpose flour
- 1/2 cup cornstarch (or potato starch for extra crispiness)
- 2 tablespoons “Slap Ya Momma” Spice Blend (see below)
- 1 tablespoon smoked paprika
- 1 teaspoon cayenne pepper (adjust to desired heat level)
- 1 teaspoon baking powder (for extra lift and crispiness)
- 1 teaspoon salt
- 1 teaspoon black pepper
- 1/2 teaspoon garlic powder
- 1/2 teaspoon onion powder
- For the “Slap Ya Momma” Spice Blend (if not using pre-made):
- 2 tablespoons paprika
- 1 tablespoon cayenne pepper
- 1 tablespoon garlic powder
- 1 tablespoon onion powder
- 1 tablespoon dried oregano
- 1 tablespoon dried thyme
- 1 teaspoon black pepper
- 1 teaspoon white pepper
- 1 teaspoon salt
- 1/2 teaspoon celery salt
- For Frying:
- 4-6 cups peanut oil, vegetable oil, or canola oil (enough to submerge chicken)
- Optional for serving: Fresh parsley, lemon wedges
Instructions
- Prepare the Buttermilk Brine: In a large bowl or a resealable plastic bag, combine the buttermilk, 2 tablespoons hot sauce, 1 tablespoon salt, 1 teaspoon black pepper, 1 teaspoon garlic powder, and 1 teaspoon onion powder. Whisk well to combine.
- Brine the Chicken: Add the chicken drumsticks to the buttermilk mixture, ensuring they are fully submerged. Cover the bowl or seal the bag and refrigerate for at least 4 hours, or preferably overnight (up to 24 hours) for maximum tenderness and flavor.
- Set Up Your Dredging Stations:
- Wet Dredge: In a shallow dish or pie plate, whisk together the 2 large eggs, 1/4 cup milk, and 1 tablespoon hot sauce until well combined. This is your wet station.
- Dry Dredge: In another large, shallow dish or a sturdy resealable plastic bag, combine the all-purpose flour, cornstarch, “Slap Ya Momma” Spice Blend (or your homemade blend), smoked paprika, cayenne pepper, baking powder, 1 teaspoon salt, 1 teaspoon black pepper, 1/2 teaspoon garlic powder, and 1/2 teaspoon onion powder. Whisk or shake vigorously to ensure all ingredients are thoroughly mixed. This is your dry station.
- Prepare the Frying Station: Pour the peanut, vegetable, or canola oil into a heavy-bottomed pot or Dutch oven (at least 6-quart capacity) until it’s about 3-4 inches deep. Attach a deep-fry thermometer to the side of the pot, making sure the tip is submerged in the oil but not touching the bottom. Heat the oil over medium-high heat to 350°F (175°C). While the oil heats, place a wire rack over a baking sheet and set it aside; this will be for draining the fried chicken.
- Dredge the Chicken (Double Dredge Method): Remove the chicken drumsticks from the buttermilk brine, allowing any excess to drip off. Do not rinse the chicken.
- First, dip each drumstick into the wet dredge, ensuring it’s fully coated.
- Next, transfer the wet chicken to the dry dredge mixture. Press the flour mixture firmly onto all surfaces of the drumstick, ensuring a thick, even coating. For extra crispiness, you can repeat this step: dip the floured chicken back into the wet dredge (just briefly, to re-moisten the flour), then back into the dry dredge for a second, thicker coating. Set the fully dredged chicken aside on a clean plate or tray while you finish coating the rest.
- Fry the Chicken in Batches: Once the oil reaches 350°F (175°C), carefully lower 3-4 dredged drumsticks into the hot oil using tongs. Do not overcrowd the pot, as this will lower the oil temperature and result in greasy, soggy chicken.
- Maintain the oil temperature between 325-350°F (160-175°C) throughout the frying process. Adjust the heat as needed.
- Fry the drumsticks for 8-10 minutes per side, turning occasionally, until they are deep golden brown and cooked through. The internal temperature should reach 165°F (74°C) when checked with an instant-read thermometer at the thickest part of the drumstick, avoiding the bone.
- Drain and Season: Once cooked, carefully remove the drumsticks from the oil and place them on the prepared wire rack over the baking sheet to drain any excess oil. Immediately sprinkle with a pinch of extra salt or a light dusting of your “Slap Ya Momma” spice blend for an extra flavor boost.
- Repeat: Continue frying the remaining chicken in batches, ensuring the oil returns to the correct temperature before adding the next batch.
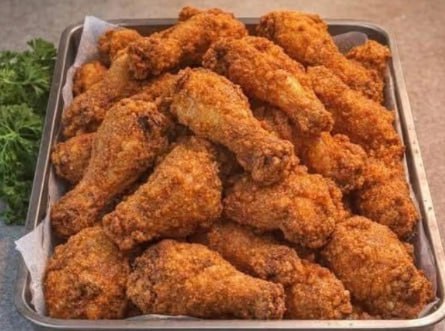
- Serve: Serve your “Slap Ya Momma” Fried Chicken hot, garnished with fresh parsley if desired, and get ready for rave reviews!
Cooking Tips and Variations
The Importance of Brining: Don’t skip the buttermilk brine! It’s the secret weapon for incredibly juicy and tender chicken. The lactic acid in the buttermilk helps to break down muscle fibers, while the salt and spices infuse flavor deep into the meat. Even an hour makes a difference, but overnight is truly optimal.
Mastering the Dredge: The double-dredge method is crucial for that iconic craggy, super-crispy crust. When you press the flour mixture onto the chicken, don’t be shy – really pack it on. The cornstarch in the dry dredge also contributes significantly to the crispiness and helps prevent sogginess.
Oil Temperature is King: This is arguably the most critical factor for perfect fried chicken. Too low, and your chicken will absorb too much oil and be greasy. Too high, and the outside will burn before the inside cooks through. Invest in a good deep-fry thermometer and keep a close eye on it, adjusting your stove’s heat as needed to maintain that sweet spot of 325-350°F (160-175°C).
Don’t Overcrowd the Pot: Frying in batches is non-negotiable. Adding too much cold chicken to the hot oil will drastically drop the temperature, leading to undercooked, greasy chicken. Give each piece space to fry properly.
Resting for Perfection: Placing the fried chicken on a wire rack allows air to circulate around it, preventing the bottom from becoming soggy. It also allows any residual oil to drain off, keeping your crust crisp.
Spice Level Control: The “Slap Ya Momma” title implies a kick! If you prefer less heat, reduce or omit the cayenne pepper from both the brine and the dry dredge. For more heat, feel free to add an extra dash of cayenne or a spicier hot sauce to the brine and wet dredge.
Different Cuts of Chicken: While drumsticks are fantastic, this recipe works beautifully with other cuts too. For chicken thighs, cooking time will be similar. For breasts, consider cutting them in half horizontally to create thinner cutlets, which will cook more evenly and quickly. Bone-in, skin-on pieces are generally preferred for fried chicken as they stay juicier. Adjust frying times accordingly for different sizes and cuts.
Gluten-Free Option: For a gluten-free version, substitute the all-purpose flour with a 1:1 gluten-free all-purpose flour blend (ensure it contains xanthan gum) and use cornstarch as directed. The results can be surprisingly similar in texture and crispiness.
Flavor Boosters: For an even deeper savory flavor, consider adding a teaspoon of MSG or nutritional yeast to your dry dredge. A pinch of dried mustard powder can also add a subtle tang.
Crispiness Insurance: A little baking powder in the dry dredge creates tiny air bubbles in the crust as it fries, contributing to an extra light and crispy texture.
Storage and Reheating
Storage: Leftover “Slap Ya Momma” Fried Chicken can be stored in an airtight container in the refrigerator for up to 3-4 days. While the skin may lose some of its initial crispness, the flavor will remain delicious.
Reheating for Crispness: To revive that delightful crispiness, avoid the microwave. Microwaving fried chicken will make it soggy. Instead, preheat your oven or a toaster oven to 375°F (190°C). Place the chicken pieces on a wire rack set over a baking sheet (this allows air circulation). Reheat for 15-20 minutes, or until heated through and the skin is crispy again. For an even crispier result, an air fryer at 350°F (175°C) for 8-12 minutes is an excellent option.
Reheating for Flavor (less crispness): If crispiness isn’t your top priority, you can reheat in a microwave for 1-2 minutes until warm, but expect a softer crust.
Frequently Asked Questions
Why is my fried chicken soggy?
Soggy fried chicken is usually a result of the oil temperature being too low, overcrowding the pot, or not draining the chicken properly after frying. Ensure your oil stays between 325-350°F, fry in small batches, and always place the cooked chicken on a wire rack, not directly on paper towels, to allow air to circulate and prevent steam buildup.
Can I use boneless chicken for this recipe?
Yes, you can use boneless chicken, but the cooking times will be significantly shorter. Boneless, skinless chicken breasts or thighs will cook in about 5-7 minutes. Be careful not to overcook them, as they can dry out quickly. Bone-in, skin-on pieces are generally recommended for fried chicken as the bone helps insulate the meat, keeping it juicier.
What kind of oil is best for frying?
For deep frying, choose an oil with a high smoke point and a neutral flavor. Peanut oil, vegetable oil, canola oil, and corn oil are all excellent choices. Avoid olive oil or butter, as they have low smoke points and will burn quickly, imparting an unpleasant flavor.
Can I make the spice blend ahead of time?
Absolutely! Preparing the “Slap Ya Momma” Spice Blend in advance is a great time-saver. Store it in an airtight container in a cool, dark place for up to 6 months. This way, you’ll always have your signature flavor ready to go for your next batch of incredible fried chicken.