Introduction
Craving something sweet, decadent, and incredibly easy? Look no further! These No-Bake Peanut Butter Cheesecake Balls are the answer to your dessert dreams. Imagine the rich, creamy goodness of cheesecake, perfectly blended with the irresistible flavor of peanut butter, all rolled into a delightful, bite-sized sphere. What makes them truly special is their “can’t stop grabbing” quality – each little ball is a perfect symphony of textures and tastes that will have you reaching for another, and another!
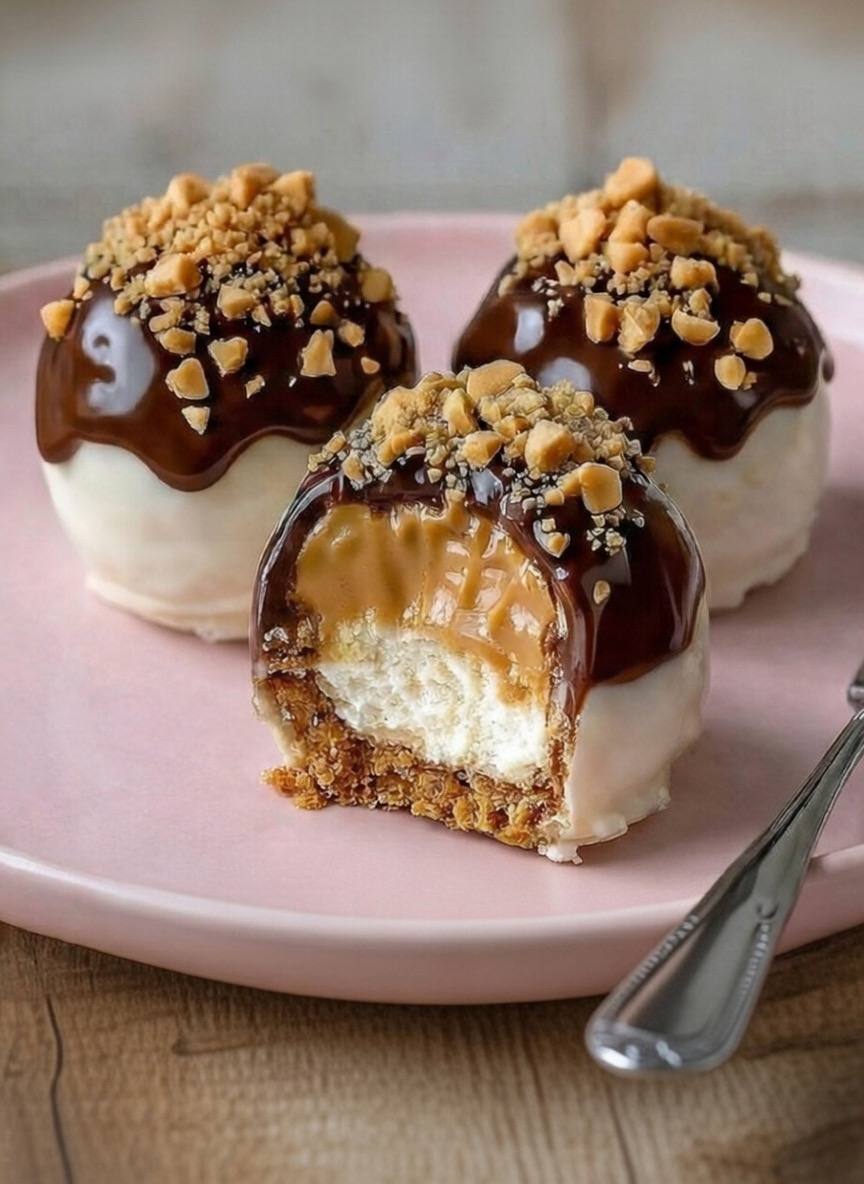
These aren’t just any dessert; they’re a celebration of convenience and flavor. The “no-bake” aspect means you get all the lusciousness of cheesecake without ever having to turn on your oven. Plus, they boast a delightful multi-layered experience: a crunchy cookie crust base, a smooth and tangy cheesecake layer, a rich peanut butter filling, and then enrobed in crisp chocolate coatings, all crowned with a sprinkle of crunchy peanuts. Whether you’re planning a party, looking for a thoughtful homemade gift, or simply treating yourself to a moment of pure indulgence, these peanut butter cheesecake balls are guaranteed to impress.
The beauty of this recipe lies in its simplicity and the incredible flavor payoff. They’re quick to assemble, require minimal effort, and the chilling time does all the heavy lifting. The combination of creamy, crunchy, sweet, and slightly salty notes creates an addictive profile that appeals to everyone. Get ready to discover your new favorite dessert that’s as fun to make as it is to devour!
Nutritional Information
Per serving (approximate values):
- Calories: 285
- Protein: 6g
- Carbohydrates: 25g
- Fat: 19g
- Fiber: 2g
- Sodium: 180mg
Ingredients
For the Crust Layer:
- 1 ½ cups (about 18-20 sheets) graham cracker crumbs (or digestive biscuit crumbs)
- ¼ cup (½ stick) unsalted butter, melted
- 2 tablespoons granulated sugar
For the Cheesecake Filling:
- 8 ounces (1 block) full-fat cream cheese, softened to room temperature
- ½ cup powdered sugar (confectioners’ sugar)
- 1 teaspoon vanilla extract
For the Peanut Butter Layer:
- ½ cup creamy peanut butter (not natural, stir before measuring if oily)
- ¼ cup powdered sugar
- 2 tablespoons unsalted butter, softened
For the Chocolate Coating & Topping:
- 1 cup white chocolate chips or melting wafers
- 1 tablespoon coconut oil (optional, for smoother melting)
- 1 cup semi-sweet or dark chocolate chips or melting wafers
- 1 tablespoon coconut oil (optional, for smoother melting)
- ¼ cup finely chopped roasted peanuts, for topping
Instructions
- Prepare the Crust Layer: In a medium bowl, combine the graham cracker crumbs, melted butter, and 2 tablespoons of granulated sugar. Mix until the crumbs are evenly moistened and resemble wet sand. Press this mixture firmly into the bottom of an 8×8 inch square baking dish lined with parchment paper, leaving an overhang on the sides for easy lifting. Place in the freezer to chill while preparing the other layers (about 10-15 minutes).
- Make the Cheesecake Filling: In a large bowl, using an electric mixer on medium speed, beat the softened cream cheese until smooth and creamy, about 2-3 minutes. Gradually add the ½ cup powdered sugar and vanilla extract, continuing to beat until fully incorporated and no lumps remain. Spread this cheesecake mixture evenly over the chilled graham cracker crust. Return the dish to the freezer for another 15-20 minutes to firm up.
- Prepare the Peanut Butter Layer: In a separate medium bowl, combine the creamy peanut butter, ¼ cup powdered sugar, and 2 tablespoons softened butter. Beat with an electric mixer until thoroughly combined, smooth, and creamy. This mixture should be thick and spreadable.
- Assemble the Layers: Carefully retrieve the dish from the freezer. Evenly spread the peanut butter mixture over the cheesecake layer. The layers should be firm enough to prevent them from mixing. Once all three layers are assembled, return the dish to the freezer for a minimum of 2-3 hours, or preferably overnight, until completely solid. This is crucial for easy handling.
- Cut and Shape the Balls: Once the layered slab is completely frozen solid, use the parchment paper overhang to lift it out of the baking dish onto a cutting board. Using a sharp knife, cut the slab into approximately 24-30 equal squares. Working quickly, roll each square into a smooth, compact ball. If the mixture becomes too soft, place it back in the freezer for a few minutes. Arrange the formed balls on a parchment-lined baking sheet and return them to the freezer for at least 30 minutes to firm up again before coating.
- Prepare White Chocolate Coating: In a microwave-safe bowl, combine the white chocolate chips with 1 tablespoon of coconut oil (if using). Microwave in 30-second intervals, stirring well after each, until completely melted and smooth. Be careful not to overheat.
- Dip in White Chocolate: Remove the chilled peanut butter cheesecake balls from the freezer. Dip the bottom half of each ball into the melted white chocolate, allowing any excess to drip off. Place the dipped balls back onto the parchment-lined baking sheet. Return them to the freezer for 10-15 minutes to set the white chocolate.
- Prepare Dark Chocolate Coating: While the white chocolate is setting, in another microwave-safe bowl, combine the dark chocolate chips with 1 tablespoon of coconut oil (if using). Microwave in 30-second intervals, stirring well after each, until completely melted and smooth.
- Dip and Drizzle with Dark Chocolate: Once the white chocolate is set, remove the balls from the freezer. Dip the top half of each ball into the melted dark chocolate, allowing it to drip slightly over the white chocolate for a beautiful two-tone effect. Alternatively, you can drizzle the dark chocolate over the top using a spoon or a piping bag with a small hole.
- Add Peanut Topping: Immediately after dipping or drizzling with dark chocolate, sprinkle the finely chopped peanuts generously over the wet dark chocolate. The chocolate will act as an adhesive.
- Final Chill: Return the finished No-Bake Peanut Butter Cheesecake Balls to the freezer for a final 15-20 minutes to allow the dark chocolate and peanuts to set completely.
- Serve and Enjoy: Once set, these cheesecake balls are ready to be served! They are best enjoyed slightly chilled, but not rock solid frozen.
Cooking Tips and Variations
For the best results with these delectable No-Bake Peanut Butter Cheesecake Balls, attention to a few details can make all the difference. Firstly, ensure your cream cheese and the 2 tablespoons of butter for the peanut butter layer are truly at room temperature. This is paramount for achieving a smooth, lump-free filling that blends beautifully. Cold cream cheese will result in a clumpy texture that’s difficult to spread evenly. When preparing your crust, pressing it down firmly is key; this prevents it from crumbling too easily when you cut and roll the balls later. You can use the bottom of a flat glass or a measuring cup to get a really compact layer.
Chilling time is your best friend in this recipe. Do not skimp on it! Each chilling step is crucial for the layers to firm up properly, which makes spreading subsequent layers easier and, most importantly, allows the final slab to be cut and rolled without becoming a sticky mess. If at any point your mixture becomes too soft to handle, simply pop it back into the freezer for 10-15 minutes. Patience here will yield perfectly shaped, stable cheesecake balls.
When it comes to melting chocolate, whether white or dark, low and slow is the way to go. Using a double boiler method (a heatproof bowl set over a pot of simmering water, ensuring the bowl doesn’t touch the water) is ideal for even melting without scorching. If using a microwave, use short bursts (30 seconds at a time) and stir thoroughly between each, even if the chocolate doesn’t look fully melted. Residual heat will continue to melt the chocolate. Adding a tablespoon of coconut oil (or a neutral oil like vegetable oil) to your melting chocolate isn’t strictly necessary but is highly recommended. It thins the chocolate slightly, making it smoother and easier to dip, and also helps create a less brittle, more pleasant coating when set.
For dipping the balls, a fork or a candy dipping tool is incredibly helpful. This allows excess chocolate to drip off easily, preventing pooling at the bottom and ensuring an even coating. Work with only a few balls at a time, keeping the rest in the freezer so they remain firm. Once dipped, immediately sprinkle with your desired topping before the chocolate sets.
Variations:
- Crust Alternatives: Instead of graham crackers, try using crushed chocolate sandwich cookies (like Oreos, filling removed), shortbread cookies, or even pretzel crumbs for a sweet and salty twist.
- Peanut Butter Swaps: While creamy peanut butter works best for texture, you could experiment with other nut butters like almond butter or cashew butter for a different flavor profile. Just ensure they are smooth and not overly oily.
- Chocolate Coatings: Feel free to customize your chocolate! Use milk chocolate instead of dark, or try all white chocolate. You could also tint white chocolate with food coloring for festive occasions.
- Topping Ideas: Beyond chopped peanuts, consider mini chocolate chips, sprinkles, toasted shredded coconut, a sprinkle of sea salt flakes, or even additional graham cracker crumbs for texture.
- Spice It Up: Add a pinch of cinnamon or nutmeg to the cheesecake filling for a subtle warmth, or a tiny pinch of cayenne pepper to the peanut butter layer for a surprising kick!
- Gluten-Free Option: Simply use gluten-free graham crackers or a gluten-free cookie for the crust.
Storage and Reheating
These No-Bake Peanut Butter Cheesecake Balls are fantastic for making ahead, which is a huge bonus for entertaining or meal prepping your desserts. Once they are fully set and the chocolate coating is firm, transfer them to an airtight container. You can layer them with parchment paper between layers to prevent them from sticking together. Store them in the refrigerator for up to 5-7 days. While they are safe to eat directly from the fridge, letting them sit at room temperature for 10-15 minutes before serving can allow the cheesecake and peanut butter layers to soften slightly, enhancing their creamy texture and flavor.
For longer storage, these cheesecake balls freeze beautifully. Once completely firm, arrange them in a single layer on a parchment-lined baking sheet and freeze for about an hour until solid. Then, transfer them to an airtight, freezer-safe container or a heavy-duty freezer bag, again using parchment paper between layers if stacking. They can be stored in the freezer for up to 2-3 months. To enjoy from frozen, simply transfer them to the refrigerator overnight to thaw, or let them sit at room temperature for about 20-30 minutes until they reach your desired consistency. Do not attempt to microwave or “reheat” them, as this will melt the chocolate and alter the texture of the fillings.
Frequently Asked Questions
How do I prevent my chocolate from seizing when melting?
Chocolate seizing (becoming thick, grainy, and unworkable) is usually caused by even a tiny drop of water getting into the chocolate, or by overheating. To prevent this, ensure all your bowls and utensils are completely dry. If using a double boiler, make sure the bottom of your bowl doesn’t touch the simmering water, and that no steam escapes into the chocolate. If microwaving, use low power and short intervals, stirring frequently to distribute heat evenly and prevent scorching.
Can I make these dairy-free or vegan?
Yes, with a few substitutions! You would need to use dairy-free cream cheese, a plant-based butter alternative (like vegan butter sticks), and dairy-free chocolate chips for both the white and dark coatings. Ensure your graham crackers are also dairy-free, as some brands may contain milk products. The texture might be slightly different but still delicious.
My cheesecake balls are too soft to roll. What should I do?
This is a common issue if the layers haven’t been chilled sufficiently. The key is to ensure the entire slab is completely frozen solid before you attempt to cut and roll. If they become too soft during the rolling process, simply place the cut squares or partially rolled balls back into the freezer for another 15-30 minutes until they firm up again. Working quickly is also helpful, and you might consider rolling them in batches, keeping the rest in the freezer.