Introduction
Imagine biting into a juicy, perfectly cooked burger, but instead of the usual store-bought bun that crumbles or gets soggy, it’s nestled between two halves of a cloud-like, golden, and subtly sweet bun you made yourself. That, my friends, is the magic we’re about to unlock. Homemade burger buns are not just an upgrade; they’re a revelation, transforming a simple backyard barbecue into an unforgettable culinary event. Forget everything you thought you knew about burger night because once you experience the soft, fluffy embrace of these golden beauties, there’s no going back.
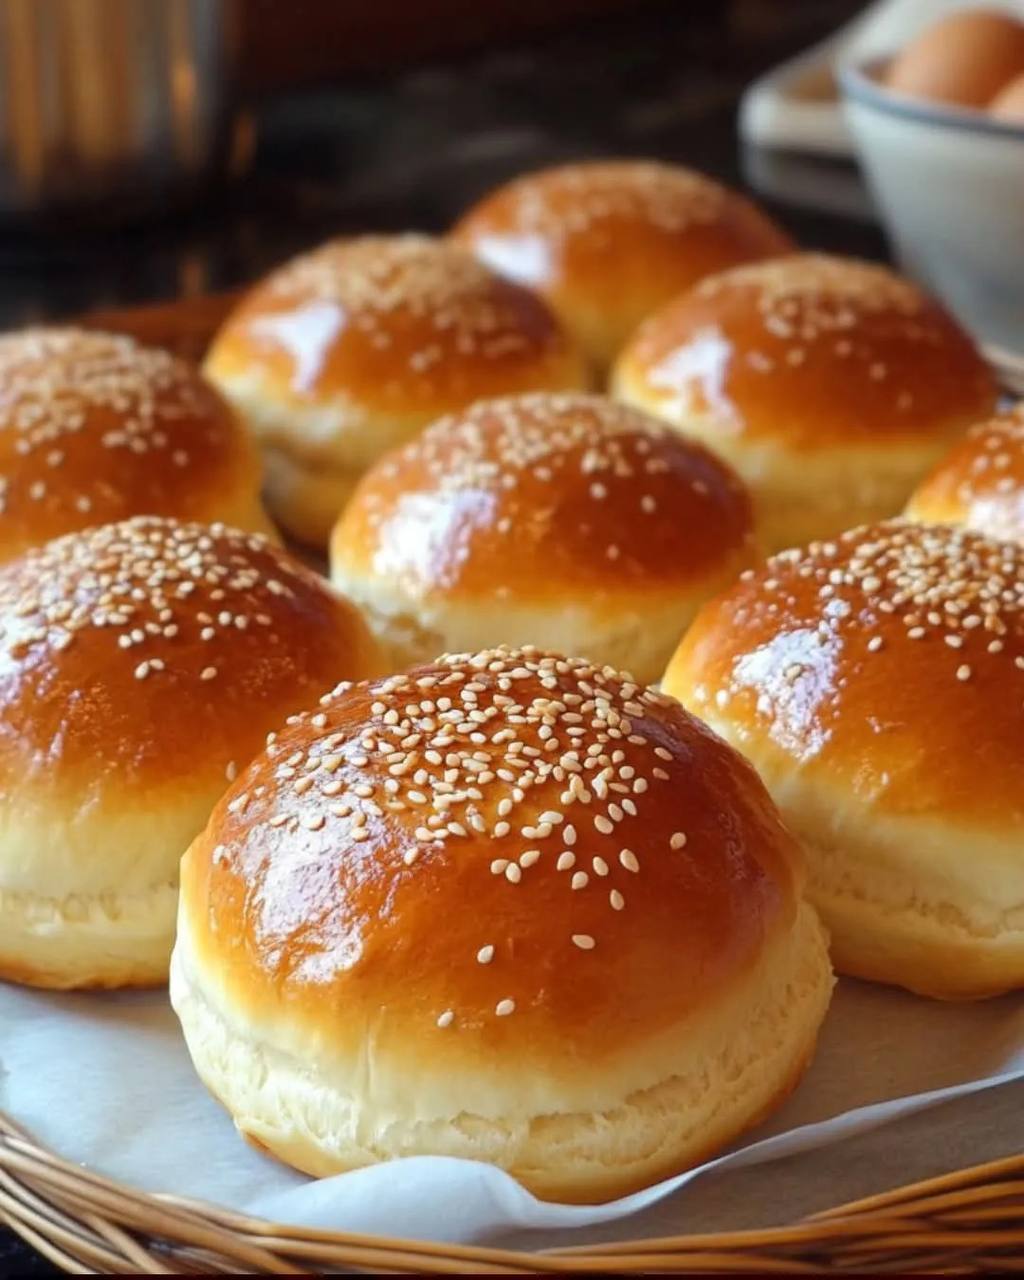
This recipe isn’t just about baking bread; it’s about elevating your entire burger game to a restaurant-quality experience right in your own kitchen. We’re talking about buns that boast an irresistible golden crust, a pillowy-soft interior that gently yields to every bite, and a rich, slightly sweet flavor that perfectly complements any savory patty and topping. The generous sprinkle of sesame seeds not only adds a classic aesthetic but also a delightful textural contrast. These aren’t just carriers for your burger; they’re an integral part of the flavor profile, designed to soak up those delicious burger juices without falling apart, ensuring every bite is pure bliss.
What makes these buns truly special is their perfect balance of richness and lightness. We’ll be using ingredients like whole milk and butter to achieve that signature brioche-style tenderness and golden hue, while careful proofing and baking techniques ensure an incredibly airy, fluffy texture. The result is a bun sturdy enough to hold the heftiest of burgers yet delicate enough to melt in your mouth. Get ready to impress your family and friends, because once they taste these homemade burger buns, they’ll be begging for your secret recipe.
Nutritional Information
Per serving (approximate values):
- Calories: 280
- Protein: 8g
- Carbohydrates: 45g
- Fat: 8g
- Fiber: 2g
- Sodium: 310mg
Ingredients
- 1 cup (240ml) whole milk, warmed to 105-115°F (40-46°C)
- 1/4 cup (60ml) warm water, 105-115°F (40-46°C)
- 2 1/4 teaspoons (1 packet or 7g) active dry yeast
- 1/4 cup (50g) granulated sugar, plus 1 teaspoon
- 1 large egg, plus 1 large egg for egg wash
- 1/4 cup (56g) unsalted butter, melted and cooled slightly
- 3 1/2 cups (420g) all-purpose flour, plus more for dusting
- 1 1/2 teaspoons (9g) fine sea salt
- 1 tablespoon water, for egg wash
- 2 tablespoons white sesame seeds
Instructions
- Activate the Yeast: In the bowl of a stand mixer fitted with the dough hook attachment (or a large bowl if kneading by hand), combine the warm milk, warm water, and 1 teaspoon of granulated sugar. Sprinkle the active dry yeast over the liquid. Let it sit for 5-10 minutes, or until the mixture becomes foamy. This indicates the yeast is active.
- Prepare the Dough: To the yeast mixture, add the remaining 1/4 cup (50g) granulated sugar, 1 large egg, and the melted and cooled butter. Mix briefly to combine.
- Add Dry Ingredients: In a separate medium bowl, whisk together the all-purpose flour and fine sea salt. Gradually add the dry ingredients to the wet ingredients in the stand mixer bowl, mixing on low speed until a shaggy dough forms.
- Knead the Dough: Increase the mixer speed to medium-low and knead for 8-10 minutes, or until the dough is smooth, elastic, and pulls away from the sides of the bowl. If kneading by hand, turn the dough out onto a lightly floured surface and knead vigorously for 10-15 minutes until it reaches the desired consistency. The dough should be slightly tacky but not sticky.
- First Rise (Bulk Fermentation): Lightly grease a large clean bowl with a little oil. Transfer the dough to the bowl, turning it once to coat all sides. Cover the bowl tightly with plastic wrap or a clean kitchen towel. Place it in a warm, draft-free place for 1 to 1 1/2 hours, or until the dough has doubled in size.
- Shape the Buns: Gently punch down the risen dough to release the air. Turn the dough out onto a lightly floured surface. Divide the dough into 8 equal pieces (about 90-95g each for standard-sized buns). To shape each bun, take one piece of dough and flatten it slightly. Fold the edges of the dough towards the center, pinching them together to create a smooth, taut top surface. Flip the dough over and roll it gently against the counter with the palm of your hand in a circular motion to create a perfectly round, smooth ball.
- Second Rise (Proofing): Line a large baking sheet with parchment paper. Arrange the shaped buns on the prepared baking sheet, leaving about 2-3 inches of space between them to allow for expansion. Loosely cover the buns with plastic wrap or a clean kitchen towel. Let them rise in a warm, draft-free place for another 30-45 minutes, or until they have visibly puffed up and are about 1.5 times their original size.
- Preheat Oven & Prepare Egg Wash: While the buns are proofing for the second time, preheat your oven to 375°F (190°C). In a small bowl, whisk together the remaining 1 large egg with 1 tablespoon of water to create the egg wash.
- Egg Wash & Topping: Once the buns have proofed, gently brush the tops of each bun with the egg wash. Be careful not to deflate them. Sprinkle the white sesame seeds generously over the tops of the buns.
- Bake the Buns: Bake for 15-18 minutes, or until the buns are deeply golden brown on top and sound hollow when tapped on the bottom. If they start to brown too quickly, you can loosely tent them with aluminum foil.
- Cool the Buns: Once baked, immediately transfer the buns to a wire rack to cool completely. Cooling is crucial as it allows the internal structure of the bread to set and prevents a gummy texture.
Cooking Tips and Variations
Achieving truly soft, fluffy, and golden burger buns requires attention to detail and a few expert tricks. Firstly, dough consistency is paramount. After kneading, your dough should be smooth, elastic, and slightly tacky to the touch, but it shouldn’t stick excessively to your hands or the bowl. If it’s too wet, add a tiny bit more flour, a tablespoon at a time. If it’s too dry and stiff, a teaspoon of water might help. This perfect consistency is what allows for optimal gluten development, which translates to that desirable chewy yet tender crumb.
Kneading is another critical step. Whether you’re using a stand mixer or your own two hands, the goal is to develop the gluten in the flour. This network of proteins gives the bread its structure and elasticity, making it capable of trapping gas from the yeast and rising beautifully. Don’t cut this step short; a well-kneaded dough will result in a much better texture. You can test for sufficient kneading by performing the “windowpane test”: gently stretch a small piece of dough. If it stretches thin enough to see light through it without tearing, your gluten is well-developed.
For successful proofing, creating the ideal environment is key. Yeast thrives in warmth and humidity. If your kitchen is cool, you can turn your oven on to its lowest setting for a few minutes, then turn it off and place the covered dough inside (making sure it’s not too hot!). Alternatively, a bowl of hot water placed in the oven with the dough can create a steamy, warm environment. Knowing when the dough is ready is also important: for the first rise, it should double in size. For the second rise, gently press a finger into the dough; if the indentation slowly springs back halfway, it’s ready. If it springs back immediately, it needs more time. If it stays indented, it might be over-proofed.
The beautiful golden shine and that classic “restaurant experience” look come from a proper egg wash. While a simple egg wash of whole egg and water is good, for an even deeper golden hue and gloss, consider using an egg yolk mixed with a tablespoon of milk or water. Gently brush the tops of the buns just before baking, ensuring an even coat without letting it pool at the sides, which can create a tough crust. And don’t forget the generous sprinkling of sesame seeds right after the egg wash; they’ll adhere perfectly and toast up beautifully in the oven.
To avoid dry buns, resist the urge to overbake. Keep an eye on them towards the end of the baking time. They should be deeply golden brown and sound hollow when tapped on the bottom. If they start to brown too quickly, a loose tent of aluminum foil can prevent scorching. Always cool them completely on a wire rack; slicing into hot buns can create a gummy texture and isn’t ideal for their structure.
These buns are incredibly versatile! For customization, you can swap out the white sesame seeds for black sesame seeds, poppy seeds, or even an “everything bagel” seasoning blend for a different flavor profile. For a savory twist, try adding a teaspoon of garlic powder or dried herbs like oregano or thyme to the flour mixture. If you want to make them dairy-free, you can substitute plant-based milk and vegan butter, though the texture might be slightly different. For a sweeter bun, you could increase the sugar by a tablespoon or two, making them ideal for pulled pork sandwiches or even as sweet breakfast rolls.
Storage and Reheating
Proper storage is essential to maintain the freshness and delightful texture of your homemade burger buns. Once completely cooled, store the buns in an airtight container or a large, sealable plastic bag at room temperature for up to 2-3 days. To keep them fresh for longer, you can wrap individual buns tightly in plastic wrap, then place them in a freezer-safe bag. They will keep well in the freezer for up to 2-3 months. Thaw frozen buns at room temperature for a few hours, or gently reheat them directly from frozen.
To reheat, for the best results, a brief toasting is recommended. If frozen, you can place them directly in a preheated oven at 300°F (150°C) for 5-7 minutes, or until warmed through and slightly crisp on the outside. Alternatively, slice the buns in half and lightly toast them in a toaster, on a griddle, or in a pan until golden brown and warm. This method helps to revive their soft interior and adds a lovely toasted flavor and texture, mimicking that freshly baked quality.
Frequently Asked Questions
What’s the difference between active dry yeast and instant yeast? Can I use instant yeast?
Active dry yeast typically needs to be “activated” or proofed in warm liquid first, as directed in this recipe, to ensure it’s alive and ready to work. Instant yeast, on the other hand, is finer and doesn’t require prior activation; it can be mixed directly with the dry ingredients. Yes, you can absolutely use instant yeast in this recipe. If using instant yeast, you can mix it directly with the flour and salt, then add the warm milk, water, sugar, egg, and butter. You might find the dough rises a bit faster with instant yeast, so keep an eye on it during the proofing stages.
My buns didn’t rise properly. What went wrong?
There are a few common culprits if your buns didn’t rise. The most frequent issue is inactive or expired yeast. Always check the expiration date on your yeast and ensure your liquids (milk and water) are at the correct temperature (105-115°F or 40-46°C); too hot will kill the yeast, too cold won’t activate it. Another factor could be a cold environment during proofing; yeast needs warmth to thrive. Lastly, if you added salt directly to the yeast mixture before the flour, salt can inhibit yeast activity, so it’s always best to mix salt with flour first.
Can I make these burger buns ahead of time?
Yes, these buns are excellent for making ahead! You can bake them completely and then store them at room temperature for a couple of days or freeze them for longer storage (up to 2-3 months). Another option is to prepare the dough up to the first rise. After the first rise, punch down the dough, shape the buns, and then place them on a parchment-lined baking sheet. Cover them tightly with plastic wrap and refrigerate overnight (up to 12-18 hours). The next day, let them come to room temperature for about 30-60 minutes before proceeding with the second rise, egg wash, and baking. This slow proofing can even enhance the flavor.
Why is cooling the buns completely important? Can I eat them warm?
While the aroma of warm, freshly baked bread is incredibly tempting, allowing the buns to cool completely on a wire rack is crucial for their final texture and structure. As bread cools, the starches inside continue to set, and moisture redistributes evenly throughout the crumb. Slicing into a hot bun can result in a gummy, dense texture because the starches haven’t fully set. While you can certainly enjoy them slightly warm, for the best, lightest, and fluffiest texture, waiting until they are entirely cool will yield superior results, especially if you plan to store them.