Introduction
Get ready to sink your teeth into the most succulent, fall-off-the-bone BBQ ribs you’ve ever made in your own kitchen! Our Baked BBQ Baby Back Ribs recipe is a true game-changer, promising tender, juicy pork bathed in a rich, sticky, and utterly irresistible BBQ sauce. Forget spending hours over a smoker or grill; this method harnesses the power of your oven to deliver unbelievably flavorful results with minimal fuss. It’s the ultimate comfort food that brings the classic American BBQ experience right to your dining table, perfect for family dinners, game day gatherings, or simply satisfying that deep craving for something truly delicious.
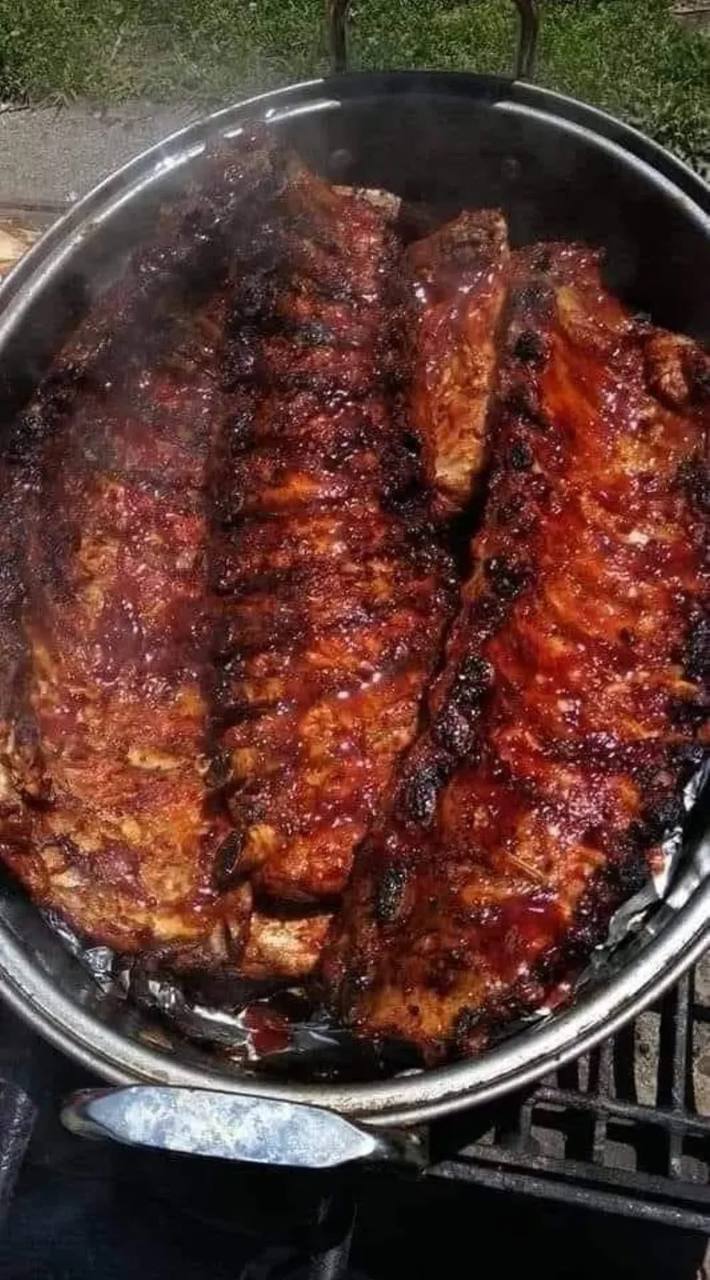
What makes these ribs so special? It’s the “low and slow” baking process combined with a strategic finishing touch. We’ll show you how to coax incredible tenderness from the baby back ribs, ensuring every bite is melt-in-your-mouth perfection. The magic happens as the ribs slowly cook in their own juices, creating a moist and flavorful foundation before being generously slathered with your favorite BBQ sauce and caramelized to sticky, slightly charred perfection. This dual-stage cooking ensures deep flavor and that coveted texture that only comes from patience and proper technique.
This recipe is designed for home cooks of all skill levels. We’ve broken down each step to make it approachable and enjoyable, from preparing the ribs to achieving that perfect glossy finish. While the title says “baked,” we incorporate a crucial finishing step that mimics the best parts of grilling or broiling, giving these ribs that authentic, caramelized BBQ crust you see in the best smokehouses. So, tie on your apron, gather your ingredients, and prepare to impress yourself and everyone lucky enough to share these incredible Baked BBQ Baby Back Ribs!
Nutritional Information
Per serving (approximate values for 1/2 rack of ribs, including sauce):
- Calories: 650 kcal
- Protein: 45g
- Carbohydrates: 30g
- Fat: 38g
- Fiber: 1g
- Sodium: 850mg
Ingredients
- 2 racks (about 2.5-3 pounds each) baby back pork ribs
- 2 tablespoons yellow mustard (for binder, optional)
- 2 tablespoons smoked paprika
- 1 tablespoon garlic powder
- 1 tablespoon onion powder
- 1 tablespoon brown sugar (packed)
- 1 teaspoon black pepper
- 1 teaspoon salt (or to taste)
- 1/2 teaspoon cayenne pepper (optional, for heat)
- 1/2 cup apple cider vinegar
- 1/2 cup water or apple juice
- 2 cups favorite BBQ sauce (store-bought or homemade)
- Aluminum foil
- Large roasting pan or Dutch oven
Instructions
- Prepare the Ribs: Begin by removing the membrane from the back of each rib rack. This thin, silverskin layer can make ribs tough and prevent seasoning from penetrating. To do this, slide a butter knife under the membrane at one end of the rack to loosen it. Grip the membrane firmly with a paper towel (for better grip) and pull it off in one swift motion. Trim off any excess fat from the ribs.
- Apply the Binder (Optional): If desired, lightly spread a thin layer of yellow mustard over both sides of the ribs. This acts as a binder, helping the dry rub adhere, and cooks off completely so you won’t taste it in the final product.
- Make the Dry Rub: In a small bowl, combine the smoked paprika, garlic powder, onion powder, brown sugar, black pepper, salt, and cayenne pepper (if using). Mix thoroughly until well combined.
- Season the Ribs: Generously sprinkle the dry rub over both sides of the ribs. Massage the rub into the meat, ensuring an even coating. For best flavor, allow the ribs to sit at room temperature for 30 minutes, or refrigerate for at least 2 hours (or overnight) to let the flavors meld.
- Preheat Oven: Preheat your oven to 275°F (135°C). This low temperature is crucial for the “low and slow” cooking method that yields tender ribs.
- Prepare for Baking: Line a large, sturdy roasting pan or a Dutch oven with heavy-duty aluminum foil, ensuring enough overhang to create a tight seal. Place the seasoned ribs in the foil-lined pan. You may need to cut the racks in half to fit. Pour the apple cider vinegar and water (or apple juice) into the bottom of the pan around the ribs. This liquid creates steam, helping to keep the ribs moist and tender.
- Seal and Bake: Bring the overhanging foil up and over the ribs, sealing it tightly to create a foil packet. If using a Dutch oven, ensure the lid is tightly sealed. Bake for 2.5 to 3 hours, or until the ribs are very tender. You should be able to gently twist a bone and feel it loosen from the meat.
- Check for Tenderness: After 2.5 hours, carefully open the foil packet (watch out for steam!) and check the tenderness. If they’re not quite there, reseal and continue baking for another 30-60 minutes.
- Prepare for Finishing: Once tender, carefully remove the ribs from the oven. Increase the oven temperature to 400°F (200°C) or preheat your grill to medium-high heat.
- Apply BBQ Sauce: Carefully remove the ribs from the foil packet and discard the liquid. Place the ribs directly onto a clean baking sheet (you can line it with foil for easier cleanup) or onto your preheated grill grates. Generously brush both sides of the ribs with your favorite BBQ sauce.
- Caramelize the Sauce: Return the ribs to the hot oven (or grill) and bake (or grill) for 15-20 minutes, brushing with more BBQ sauce every 5-7 minutes, until the sauce is caramelized, sticky, and slightly charred in spots. Keep a close eye on them to prevent burning, especially if using a sugary sauce. If using a broiler, broil for 3-5 minutes, watching constantly, until bubbly and slightly charred.
- Rest and Serve: Once the ribs have reached your desired level of caramelization, remove them from the oven or grill. Tent loosely with foil and let them rest for 10-15 minutes before slicing and serving. This allows the juices to redistribute, ensuring maximum tenderness and flavor.
Cooking Tips and Variations
For truly fall-off-the-bone ribs, the “low and slow” cooking method is non-negotiable. Don’t rush the baking process; patience is key here. To enhance moisture, some people add a sliced onion or garlic cloves to the foil packet with the ribs and liquid during the initial bake. If you prefer a smokier flavor without a smoker, a few drops of liquid smoke can be added to the apple cider vinegar and water mixture before baking. For a spicier kick, increase the cayenne pepper in the dry rub, or add a pinch of red pepper flakes to your BBQ sauce. You can also experiment with different types of dry rubs – a Memphis-style rub often includes more paprika and brown sugar, while a Texas-style rub might focus more on salt and black pepper. As for BBQ sauce, the possibilities are endless! Try a tangy vinegar-based sauce, a spicy habanero sauce, or a sweet and smoky Kansas City-style sauce to match your preference. If you’re feeling ambitious, making your own BBQ sauce from scratch allows for ultimate customization. For a truly crisp finish, consider finishing the ribs on a very hot grill directly over the flames for a few minutes per side, watching carefully to prevent burning.
Storage and Reheating
To store leftover Baked BBQ Baby Back Ribs, allow them to cool completely. Wrap the individual ribs or whole racks tightly in aluminum foil, then place them in an airtight container. Refrigerate for up to 3-4 days. For longer storage, ribs can be frozen for up to 3 months. To freeze, wrap them tightly in foil, then place them in a freezer-safe bag or container, removing as much air as possible. To reheat, the best method is to gently warm them in the oven. Preheat your oven to 275-300°F (135-150°C). Place the ribs (still wrapped in foil, or re-wrap if frozen) on a baking sheet and heat for 20-30 minutes for refrigerated ribs, or 45-60 minutes for frozen ribs, until heated through. You can also reheat them on a grill over indirect medium heat, brushing with extra BBQ sauce if desired, until warmed through and slightly caramelized again. Avoid microwaving, as it can make the ribs rubbery and dry.
Frequently Asked Questions
What is the difference between baby back ribs and spare ribs?
Baby back ribs come from the loin section of the hog, near the backbone. They are shorter, leaner, and more curved than spare ribs, with more meat between the bones. Spare ribs come from the belly section, are flatter, meatier overall, and contain more fat and cartilage. Baby back ribs tend to be more tender and cook faster.
Do I really need to remove the membrane?
Yes, absolutely! Removing the membrane (or silverskin) from the back of the ribs is a crucial step for achieving tender, fall-off-the-bone results. If left on, the membrane can become tough and chewy when cooked, preventing the ribs from fully tenderizing and preventing your delicious dry rub and sauce from penetrating the meat.
My BBQ sauce is burning in the oven. What am I doing wrong?
BBQ sauces, especially those with high sugar content, can burn easily if applied too early in the cooking process or if the oven temperature is too high. The key is to apply the sauce only during the final stage of cooking, after the ribs are already tender. This allows the sauce to caramelize and thicken without burning. If you’re still having trouble, try a slightly lower temperature for the finishing step (e.g., 375°F instead of 400°F) or keep a closer eye on them, brushing more frequently.
Can I prepare these ribs ahead of time?
Yes, you can! You can apply the dry rub to the ribs and refrigerate them for up to 24 hours before baking. You can also bake the ribs until they are tender (step 7), let them cool, and then refrigerate them in their foil packet for up to 2-3 days. When ready to serve, proceed with the saucing and finishing steps (steps 9-11) as directed. This makes them a fantastic option for entertaining.