Introduction
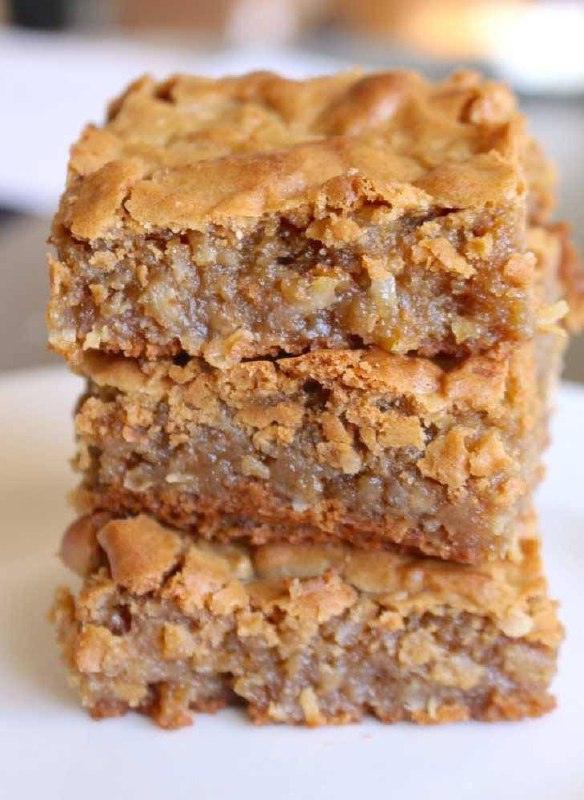
Prepare your taste buds for an unforgettable journey into the realm of chewy, sweet, and utterly irresistible treats: Coconut Chewies! These rustic bar cookies are not just a dessert; they are a warm embrace of tropical flavor and comforting texture, promising to become a cherished addition to your recipe repertoire. Imagine a buttery, golden crust providing the perfect foundation for a rich, dense, and intensely coconut-filled center, all baked to a caramelized perfection. Each bite delivers a delightful contrast—a slight crispness from the crust giving way to a wonderfully moist and sticky interior that lives up to its “chewy” name.
Coconut Chewies are the quintessential crowd-pleaser, effortlessly blending simplicity with gourmet appeal. Their charm lies in their straightforward preparation, making them accessible to bakers of all skill levels, yet yielding results that taste like they came straight from a professional bakery. Whether you’re seeking a quick and satisfying dessert for a weeknight, a portable treat for a picnic, or an impressive addition to a holiday platter, these bars tick all the boxes. They’re incredibly versatile, pairing beautifully with a morning coffee, an afternoon tea, or as the sweet finale to any meal. Get ready to fall in love with the golden-brown allure and the glorious chewiness that makes these Coconut Chewies truly special.
This recipe will guide you through creating these delightful bar cookies, starting with a simple yet sturdy crust, then layering on a luscious, coconut-packed filling that bakes into a gooey, caramelized dream. We’ll cover everything from essential ingredients and step-by-step instructions to expert tips for achieving that perfect chewy texture and ideas for customizing your creation. By the end, you’ll have a batch of golden, sweet, and wonderfully chewy bars that are guaranteed to disappear faster than you can say “coconut paradise.” Let’s dive in and bake some magic!
Nutritional Information
Per serving (approximate values):
- Calories: 320 kcal
- Protein: 3g
- Carbohydrates: 40g
- Fat: 18g
- Fiber: 2g
- Sodium: 150mg
Ingredients
- 1 ½ cups all-purpose flour
- ½ cup granulated sugar
- ½ teaspoon baking powder
- ¼ teaspoon salt
- ¾ cup (1 ½ sticks) unsalted butter, cold and cut into cubes
- 1 large egg yolk
- 1 teaspoon vanilla extract
- 2 large eggs
- ¾ cup packed light brown sugar
- ½ teaspoon vanilla extract
- ¼ teaspoon salt
- 2 cups (about 7 ounces) sweetened shredded coconut
Instructions
- Preheat your oven to 350°F (175°C). Line a 9×13-inch baking pan with parchment paper, leaving an overhang on the sides for easy removal later. Lightly grease the parchment paper.
- Prepare the Crust: In a large mixing bowl, whisk together the all-purpose flour, granulated sugar, baking powder, and ¼ teaspoon salt.
- Add the cold, cubed butter to the flour mixture. Using a pastry blender, your fingertips, or a food processor, cut the butter into the dry ingredients until the mixture resembles coarse crumbs with some pea-sized pieces of butter remaining.
- In a small bowl, whisk together the egg yolk and 1 teaspoon vanilla extract. Add this mixture to the flour and butter mixture. Mix until just combined and a soft dough forms. Be careful not to overmix.
- Press about two-thirds of the dough evenly into the bottom of the prepared baking pan. This will form your bottom crust.
- Prepare the Filling: In a separate medium bowl, whisk together the 2 large eggs, packed light brown sugar, ½ teaspoon vanilla extract, and ¼ teaspoon salt until well combined and smooth.
- Fold in the sweetened shredded coconut until it is evenly distributed throughout the egg mixture.
- Pour the coconut filling evenly over the pressed crust in the baking pan. Spread it gently with a spatula to ensure it covers the entire surface of the crust.
- Take the remaining one-third of the crust dough. Crumble it evenly over the top of the coconut filling. You can do this by pinching off small pieces of dough and sprinkling them over the surface.
- Bake the Coconut Chewies: Place the baking pan into the preheated oven. Bake for 25-30 minutes, or until the edges are golden brown and the coconut filling is set and lightly caramelized. The center should still look slightly soft but not jiggly.
- Remove the pan from the oven and place it on a wire rack to cool completely. This step is crucial for achieving the perfect chewy texture and for clean cuts. Do not attempt to cut the bars while they are warm, as they will be too soft and fall apart.
- Once completely cooled (this may take 1-2 hours at room temperature, or you can chill them in the refrigerator for faster cooling), use the parchment paper overhang to lift the entire slab of Coconut Chewies out of the pan.
- Place the slab on a cutting board and cut into desired bar sizes, typically 12-24 squares or rectangles, depending on your preference. Use a sharp knife for clean cuts.
- Serve and enjoy your homemade, irresistibly chewy Coconut Chewies!
Cooking Tips and Variations
Achieving the perfect “chew” in your Coconut Chewies is all about precision and patience. The most crucial tip is to avoid overbaking. The bars should be removed from the oven when the edges are golden brown and the center is set but still looks slightly soft. Overbaking will result in a dry, crumbly bar rather than the desired moist and chewy texture. Keep a close eye on them during the last 5-10 minutes of baking. Another key to chewiness is allowing them to cool completely. The filling needs ample time to set and firm up, which develops that signature dense, sticky chew. Rushing this step will lead to a messy, crumbly bar.
For an extra layer of flavor and texture in your crust, consider using a combination of all-purpose flour and a small amount of almond flour (replace about ¼ cup of all-purpose flour with almond flour). This will add a subtle nutty note and a tender crumb. Ensure your butter for the crust is cold; this helps create a flaky, tender base that won’t become tough. If you’re struggling to incorporate the cold butter, a food processor makes quick work of it, pulsing until coarse crumbs form. For the filling, using brown sugar is essential as its molasses content contributes significantly to the chewiness and rich, caramelized flavor. Don’t substitute with granulated sugar unless you want a less chewy, crisper bar.
There are numerous ways to customize your Coconut Chewies. For a chocolatey twist, sprinkle ½ cup of mini chocolate chips over the coconut filling before adding the top crumble. Dark chocolate chips pair wonderfully with coconut. If you love nuts, toasted chopped pecans or walnuts can be folded into the filling or sprinkled on top with the crumble for added crunch and flavor. For a citrusy brightness, add 1-2 teaspoons of lemon or lime zest to the filling mixture; the tang beautifully complements the sweetness of the coconut. Another delicious variation is to add a pinch of cinnamon or cardamom to the filling for a warm, spiced aroma. A dash of almond extract in the filling, alongside the vanilla, can also enhance the overall flavor profile, giving it a more complex, almost macaron-like taste. For a denser, richer filling, some recipes call for a small amount of sweetened condensed milk, which can be drizzled over the coconut layer before baking for an extra gooey result. Just be mindful that this will increase the sweetness and may require a slightly longer baking time to set.
When it comes to presentation, these bars are beautiful on their own, but a light dusting of powdered sugar just before serving can add an elegant touch. For gifting, cut them into uniform squares, arrange them in a decorative box, and tie with a ribbon. They make excellent homemade gifts for friends, family, or teachers. Serving suggestions are endless: enjoy them as a simple snack, pack them in lunchboxes for a sweet surprise, or serve them as part of a dessert platter. They are particularly delightful when paired with a hot cup of coffee or a cold glass of milk, making them ideal for a cozy afternoon treat. For a truly decadent experience, warm a bar slightly and serve it with a scoop of vanilla bean ice cream.
Storage and Reheating
Proper storage is key to maintaining the fresh taste and irresistible chewiness of your Coconut Chewies. Once completely cooled, store the bars in an airtight container at room temperature for up to 3-4 days. Placing a piece of parchment paper between layers of bars can prevent them from sticking together, especially if they are particularly moist. For longer storage, you can refrigerate them in an airtight container for up to one week. The texture might become a little firmer when cold, but they will still be delicious. Simply let them come to room temperature before serving for the best chewy experience.
Coconut Chewies also freeze exceptionally well, making them perfect for meal prepping or having a stash of treats on hand. To freeze, cut the cooled bars into individual portions. Wrap each bar tightly in plastic wrap, then place the wrapped bars in a freezer-safe airtight container or heavy-duty freezer bag. They can be stored in the freezer for up to 2-3 months. When you’re ready to enjoy them, simply remove the desired number of bars from the freezer and let them thaw at room temperature for an hour or two. There’s no need to reheat them, as they are best enjoyed at room temperature or slightly warmed. If you prefer them warm, you can gently heat them in a microwave for 10-15 seconds, but be careful not to overheat, as this can dry them out.
Frequently Asked Questions
Why are my Coconut Chewies dry and crumbly instead of chewy?
The most common reason for dry and crumbly bars is overbaking. Coconut Chewies should be removed from the oven when the edges are golden brown and the center is just set but still looks slightly soft. The residual heat will continue to cook them as they cool. Another factor could be too much flour or not enough moisture in the filling. Ensure you measure ingredients accurately, especially flour, and use brown sugar for its moisture-retaining properties.
Can I use unsweetened shredded coconut instead of sweetened?
While you can use unsweetened shredded coconut, it will significantly impact the flavor and sweetness of the bars. If you opt for unsweetened, you may want to increase the amount of brown sugar in the filling by ¼ to ½ cup, or add a drizzle of sweetened condensed milk to compensate for the lost sweetness and moisture. The texture might also be slightly less gooey. Sweetened shredded coconut typically yields the best results for this recipe.
Do I have to line the pan with parchment paper?
Yes, lining the pan with parchment paper (with an overhang) is highly recommended. It makes it incredibly easy to lift the entire slab of baked bars out of the pan, which is crucial for clean and neat cutting. Without parchment paper, the gooey, sticky nature of the coconut filling can make it very difficult to remove the bars from the pan without them breaking apart or sticking.
Can I make these ahead of time for a party?
Absolutely! Coconut Chewies are an excellent make-ahead dessert. They actually benefit from sitting for a few hours (or even overnight) as it allows the flavors to meld and the texture to fully set and become perfectly chewy. Prepare them a day or two in advance, store them properly in an airtight container at room temperature, and they will be ready to serve when your guests arrive.