Introduction
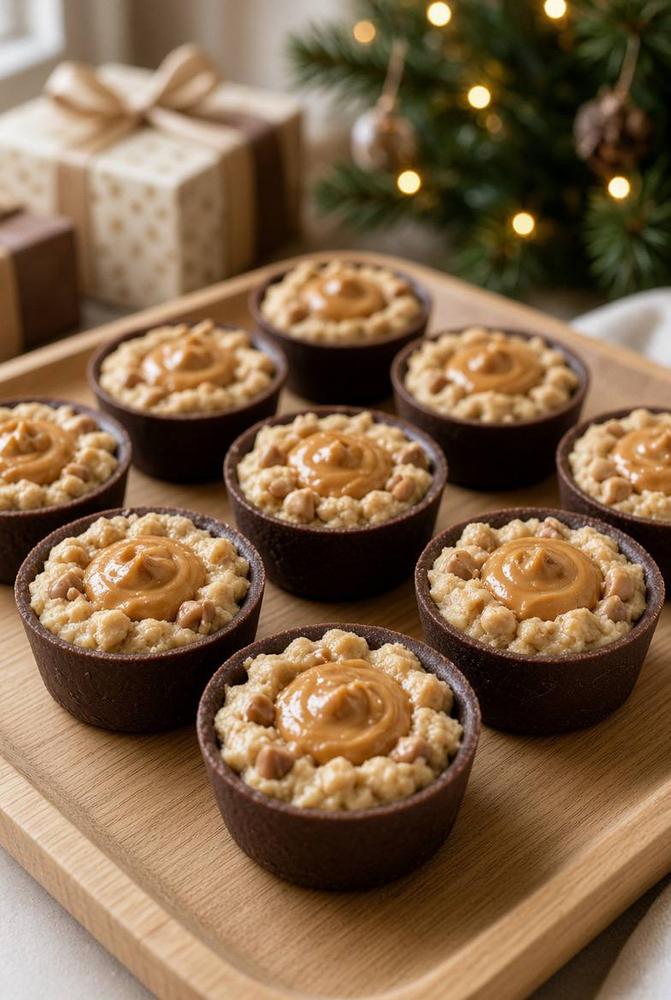
Get ready to embark on a journey of pure indulgence with our Cookie Dough Peanut Butter Cups! Imagine the rich, snap-able embrace of dark chocolate giving way to a dreamy, edible cookie dough center, all crowned with a luscious swirl of creamy peanut butter. This isn’t just a dessert; it’s a symphony of textures and flavors, a miniature masterpiece designed to captivate your taste buds and leave you utterly satisfied. Forget those store-bought treats; these homemade marvels elevate the classic peanut butter cup to an entirely new level, infusing it with the nostalgic comfort of raw cookie dough (without any of the worry!).
These no-bake wonders are more than just a sweet treat; they’re a celebration in every bite. Perfect for holiday gatherings, impromptu parties, or simply as a well-deserved personal reward, these Cookie Dough Peanut Butter Cups are guaranteed to be a showstopper. Their festive appearance, with the distinct layers and elegant peanut butter swirl, makes them an ideal candidate for homemade gifts that truly impress. The best part? They’re surprisingly easy to make, requiring no oven and just a bit of patience for chilling. Prepare to wow your friends, family, and most importantly, yourself, with this irresistible recipe that promises maximum flavor with minimal fuss.
What makes this recipe truly special is the harmonious blend of familiar favorites. We’re taking the universally loved combination of chocolate and peanut butter and introducing the playful, comforting element of edible cookie dough. Each cup offers a delightful contrast: the firm, slightly bitter notes of dark chocolate perfectly complement the sweet, slightly salty cookie dough base, which is studded with mini chocolate chips or peanut butter chips for an extra burst of flavor. The final touch of creamy peanut butter on top ties everything together, creating a perfectly balanced bite that’s both decadent and utterly addictive. Get ready to create some bliss!
Nutritional Information
Per serving (approximate values, based on 18 cups):
- Calories: 280-320
- Protein: 5-7g
- Carbohydrates: 25-30g
- Fat: 20-25g
- Fiber: 2-4g
- Sodium: 100-150mg
Ingredients
- 1 ½ cups (about 9 ounces) good quality dark chocolate, chopped or baking wafers
- 2 tablespoons refined coconut oil (optional, for melting chocolate)
- ½ cup (1 stick) unsalted butter, softened
- ½ cup granulated sugar
- ¼ cup packed light brown sugar
- 2 tablespoons milk (any kind: dairy, almond, oat)
- 1 teaspoon vanilla extract
- 1 ½ cups all-purpose flour, heat-treated (see instructions for how to do this safely)
- ½ teaspoon salt
- ½ cup mini chocolate chips (or mini peanut butter chips, or a mix)
- ½ cup creamy peanut butter, plus 2-3 tablespoons for swirling
Instructions
- Prepare the Heat-Treated Flour: Preheat your oven to 300°F (150°C). Spread the all-purpose flour evenly on a baking sheet. Bake for 5-7 minutes, stirring halfway through, until the flour reaches 160°F (71°C) on an instant-read thermometer. This step kills any potential bacteria, making the flour safe for raw consumption. Let it cool completely before using. Alternatively, you can microwave the flour in a microwave-safe bowl for 1-2 minutes, stirring every 30 seconds, until it reaches 160°F (71°C).
- Prepare Your Molds: Line a mini muffin tin with 18-24 paper liners, or use a silicone mini muffin mold. This recipe typically yields around 18 standard mini cups.
- Melt the Chocolate (First Batch): In a microwave-safe bowl, combine 1 cup of the chopped dark chocolate and 1 tablespoon of coconut oil (if using). Microwave in 30-second intervals, stirring well after each, until mostly melted and smooth. Be careful not to overheat. Alternatively, use a double boiler over simmering water.
- Create the Chocolate Shells: Spoon about 1-2 teaspoons of melted chocolate into the bottom of each mini muffin liner or mold. Using the back of the spoon, spread the chocolate up the sides of the liners to create a cup shape. You want a decent coating on the bottom and sides. Place the muffin tin in the refrigerator or freezer for 10-15 minutes to allow the chocolate shells to set completely.
- Make the Edible Cookie Dough: While the chocolate shells are chilling, prepare the cookie dough. In a medium bowl, cream together the softened unsalted butter, granulated sugar, and light brown sugar with an electric mixer until light and fluffy (about 2-3 minutes).
- Add Wet Ingredients to Dough: Beat in the milk and vanilla extract until well combined.
- Combine Dry Ingredients: Gradually add the heat-treated flour and salt to the wet ingredients, mixing on low speed until just combined and a soft dough forms. Do not overmix.
- Fold in Chips: Gently fold in the mini chocolate chips (and/or peanut butter chips) until evenly distributed throughout the dough.
- Press in the Cookie Dough Layer: Remove the chilled chocolate shells from the refrigerator/freezer. Take small spoonfuls of the edible cookie dough and gently but firmly press it into the bottom of each chocolate cup, filling it about halfway or slightly less, leaving space for the peanut butter layer and top chocolate layer. Ensure the dough is compacted well.
- Add the Peanut Butter Layer: Spoon about ½ teaspoon of creamy peanut butter onto the center of each cookie dough layer. Gently spread it out a bit, but don’t press too hard.
- Melt Remaining Chocolate (Second Batch): In a clean microwave-safe bowl, melt the remaining ½ cup of chopped dark chocolate with the remaining 1 tablespoon of coconut oil (if using), following the same microwave or double boiler method as before, until smooth.
- Top with Chocolate: Spoon the melted chocolate over the peanut butter layer, filling the cups to the top. Gently tap the muffin tin on the counter a few times to help the chocolate settle and smooth out any air bubbles.
- Add Peanut Butter Swirl: For the decorative swirl, warm the extra 2-3 tablespoons of creamy peanut butter slightly in the microwave (about 10-15 seconds) until it’s a bit more fluid. Drizzle or pipe small dollops of this warmed peanut butter onto the wet chocolate tops. Use a toothpick or the tip of a knife to gently swirl the peanut butter into the chocolate, creating a pretty pattern.
- Final Chill: Return the muffin tin to the refrigerator or freezer for at least 30-60 minutes, or until the chocolate is completely set and firm.
- Serve: Once fully set, carefully remove the Cookie Dough Peanut Butter Cups from the molds or peel off the paper liners. Serve immediately or store as directed.
Cooking Tips and Variations
Tips for Success:
- Quality Chocolate Matters: For the best results, use high-quality dark chocolate (60-70% cacao is ideal) or good quality chocolate melting wafers. This will ensure a smooth, shiny shell with a satisfying snap. If you’re not tempering your chocolate, adding a small amount of coconut oil helps with a smoother consistency and a slightly softer bite, making it easier to work with and preventing it from being too brittle.
- Heat-Treated Flour is Non-Negotiable: Always heat-treat your flour when making edible cookie dough. Raw flour can contain harmful bacteria. The oven or microwave method described in the instructions is quick and essential for food safety. Let it cool completely before mixing into the dough.
- Don’t Overmix the Cookie Dough: Once you add the flour, mix only until just combined. Overmixing can develop the gluten in the flour, leading to a tougher cookie dough texture.
- Chilling is Key: Don’t rush the chilling steps. Allowing each layer to set properly ensures clean layers, easy removal from molds, and a firm, stable final product. If your kitchen is warm, you might need slightly longer chilling times.
- Working with Chocolate: If your melted chocolate starts to thicken while you’re working, give it a quick 10-15 second zap in the microwave or a stir over the double boiler to re-melt it to a pourable consistency.
- Peanut Butter Consistency: For the top swirl, slightly warming the extra peanut butter makes it easier to drizzle and swirl beautifully. Use creamy peanut butter for the best aesthetic and texture in the swirl.
- Mold Choice: Silicone mini muffin molds are fantastic for easy removal without sticking. If using paper liners, make sure your chocolate shells are very firm before peeling them off.
Variations:
- Chocolate Type: Experiment with different types of chocolate! Milk chocolate will give you a sweeter, creamier cup, while white chocolate could offer a unique contrast. You could even do a mix of chocolates for a marbled effect on top.
- Nut Butter Alternatives: Not a peanut butter fan? Swap it for almond butter, cashew butter, or even sunflower seed butter for a nut-free option. Adjust the sweetness slightly if your chosen nut butter is unsweetened.
- Cookie Dough Flavors: Get creative with your cookie dough!
- Brownie Batter: Add a tablespoon of unsweetened cocoa powder to the flour mixture and a few extra drops of milk to maintain consistency.
- Oatmeal Raisin: Replace a portion of the flour with finely ground oats and add cinnamon and raisins.
- Funfetti: Fold in rainbow sprinkles for a festive look.
- Nutella Swirl: Replace the peanut butter swirl with a Nutella swirl for a hazelnut chocolate twist.
- Add-ins for Cookie Dough: Beyond mini chocolate chips, consider folding in:
- Crushed pretzels for a salty crunch.
- Toffee bits.
- Chopped nuts (pecans, walnuts).
- Mini M&Ms.
- Shredded coconut.
- Toppings Galore: Before the top chocolate layer sets, sprinkle with sea salt flakes for a gourmet touch, chopped nuts, extra mini chips, or even a dusting of cocoa powder.
- Spiced Cookie Dough: Add a pinch of cinnamon or nutmeg to the cookie dough for a warm, spiced flavor, especially good for holiday variations.
- Make it Vegan: Use vegan dark chocolate, plant-based butter (like a good quality vegan butter stick), and plant-based milk. Ensure your peanut butter is also vegan.
Storage and Reheating
Storage:
- Refrigerator: Cookie Dough Peanut Butter Cups are best stored in an airtight container in the refrigerator. They will last for up to 1-2 weeks. Storing them in the fridge keeps the chocolate firm and prevents the cookie dough from becoming too soft.
- Freezer: For longer storage, place the cups in a single layer in an airtight freezer-safe container, separated by parchment paper if stacking. They can be frozen for up to 2-3 months. Thaw them in the refrigerator for a few hours or at room temperature for about 15-30 minutes before serving for the best texture.
- Room Temperature: While they won’t spoil quickly at room temperature, the chocolate will soften, and the cups may lose their structural integrity and become a bit messy, especially in warmer environments. It’s best to keep them chilled.
Reheating:
- These are a no-bake, chilled dessert, so “reheating” isn’t necessary or recommended. They are meant to be enjoyed cold or at cool room temperature.
- If you prefer a slightly softer chocolate shell and cookie dough, simply let them sit out at room temperature for 10-15 minutes before serving after being refrigerated. If they were frozen, allow them to thaw completely in the refrigerator and then bring to cool room temperature if desired.
Frequently Asked Questions
What is heat-treated flour and why is it necessary?
Heat-treated flour is flour that has been heated to a temperature high enough to kill any potential bacteria, such as E. coli, that can sometimes be present in raw flour. Since this recipe uses raw cookie dough, it’s crucial for food safety to heat-treat the flour before mixing it into the dough. This ensures the cookie dough is safe to consume without baking.
Can I use a different type of chocolate for the shells?
Absolutely! While dark chocolate provides a wonderful contrast to the sweet filling, you can certainly use milk chocolate for a sweeter cup, or even white chocolate for a different flavor profile. Just be aware that white chocolate can be a bit more finicky to melt and temper. Adjust the sweetness of the cookie dough slightly if you opt for a much sweeter chocolate.
My chocolate seized! What went wrong and how can I fix it?
Chocolate seizes (becomes thick, lumpy, and unworkable) when even a tiny amount of water or steam gets into it while melting. Make sure your bowl and utensils are completely dry, and if using a double boiler, ensure the water isn’t boiling too vigorously and no steam escapes into the chocolate. If it seizes, sometimes you can try to rescue it by stirring in a teaspoon or two of hot vegetable oil or coconut oil, but it may not return to its original smooth texture. It’s often best to start over with fresh chocolate.
How far in advance can I make these Cookie Dough Peanut Butter Cups?
These cups are an excellent make-ahead dessert! You can prepare them up to a week in advance and store them in an airtight container in the refrigerator. They also freeze beautifully for up to 2-3 months. This makes them perfect for holiday preparations or when you need a delicious treat ready to go without last-minute fuss.