Introduction
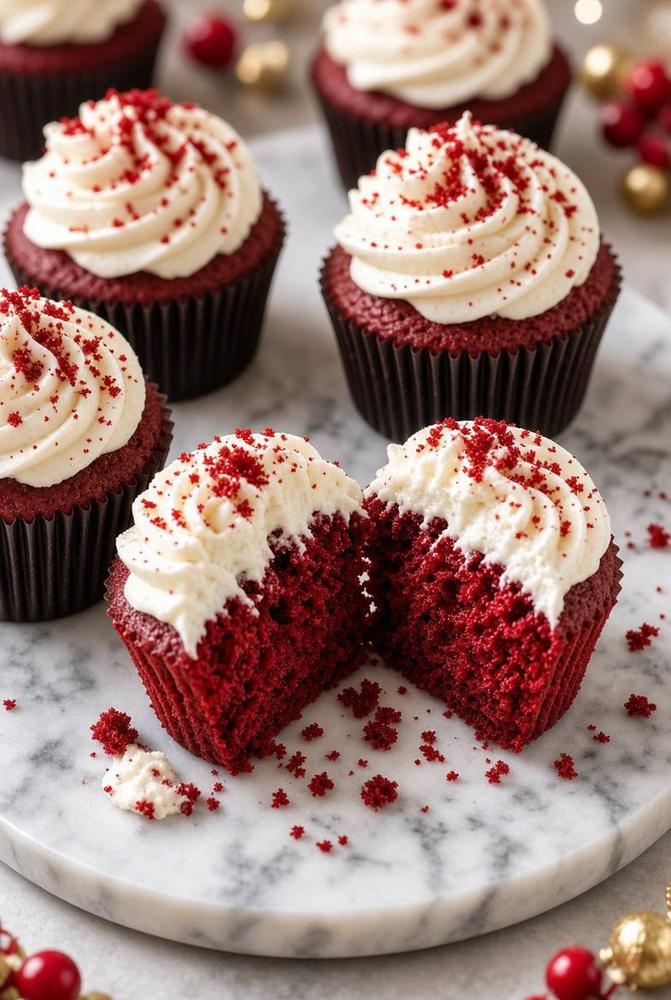
There are few desserts that capture hearts quite like the Red Velvet Cupcake. With its striking crimson crumb, subtle cocoa notes, and a crown of tangy, cloud-like cream cheese frosting, it’s a confection that promises both elegance and indulgence. More than just a pretty face, the Red Velvet Cupcake is a true classic, celebrated for its unique flavor profile that balances a hint of chocolate with a slight tang from buttermilk and vinegar, all culminating in a wonderfully moist and tender bite. It’s the kind of treat that feels simultaneously nostalgic and sophisticated, perfect for any occasion that calls for a touch of edible magic.
What makes these particular Red Velvet Cupcakes so special? Our recipe delivers on every front: an intensely vibrant red hue that’s visually stunning, a crumb so soft and plush it practically melts in your mouth, and a rich, yet perfectly balanced cream cheese frosting that’s not too sweet and holds its shape beautifully. Each cupcake is a miniature masterpiece, generously swirled with that iconic white frosting and often adorned with a sprinkle of red velvet crumbs or festive sprinkles, adding an extra layer of texture and visual appeal. Whether you’re planning a holiday gathering, a birthday party, or simply craving a luxurious treat, these cupcakes are guaranteed to impress and delight.
Baking these isn’t just about following a recipe; it’s about creating an experience. The aroma of cocoa and vanilla filling your kitchen, the anticipation of that first vibrant bite, and the joy of sharing these beauties with loved ones are all part of the charm. Our step-by-step guide ensures that even novice bakers can achieve Red Velvet perfection, guiding you through the process of creating a perfectly balanced batter and whipping up that essential, dreamy cream cheese frosting. Get ready to bake a batch of pure happiness – these Red Velvet Cupcakes are about to become your new favorite showstopper!
Nutritional Information
Per serving (approximate values):
- Calories: 380
- Protein: 4g
- Carbohydrates: 50g
- Fat: 20g
- Fiber: 1g
- Sodium: 280mg
Ingredients
For the Red Velvet Cupcakes:
- 2 ½ cups (300g) all-purpose flour, sifted
- 1 ½ cups (300g) granulated sugar
- 1 teaspoon baking soda
- 1 teaspoon salt
- 1 tablespoon unsweetened cocoa powder (natural, not Dutch-processed)
- 1 cup (226g) unsalted butter, softened
- 2 large eggs, at room temperature
- 1 teaspoon vanilla extract
- 1 cup (240ml) buttermilk, at room temperature
- 2 tablespoons red gel food coloring (high-quality, like Wilton or Americolor)
- 1 teaspoon white vinegar
For the Cream Cheese Frosting:
- 16 ounces (452g) cream cheese, softened
- 1 cup (226g) unsalted butter, softened
- 4-5 cups (480-600g) powdered sugar (confectioners’ sugar), sifted
- 1 teaspoon vanilla extract
- Pinch of salt
For Garnish (Optional):
- Red sprinkles or crumbled red velvet cake crumbs
Instructions
- Preheat your oven to 350°F (175°C). Line a 12-cup muffin pan with paper liners. This recipe makes approximately 24 cupcakes, so you will need two pans or bake in batches.
- In a large bowl, whisk together the sifted flour, granulated sugar, baking soda, salt, and cocoa powder. Make sure there are no lumps and the ingredients are well combined. Set aside.
- In a separate large bowl, using an electric mixer, cream together the softened butter until light and fluffy, about 2-3 minutes.
- Add the eggs one at a time, beating well after each addition until fully incorporated. Scrape down the sides of the bowl as needed.
- Stir in the vanilla extract.
- In a small bowl, combine the buttermilk, red gel food coloring, and white vinegar. Whisk until the color is evenly distributed.
- With the mixer on low speed, gradually add the dry ingredients to the wet ingredients in three additions, alternating with the buttermilk mixture in two additions, beginning and ending with the dry ingredients. Be careful not to overmix; mix just until combined and no streaks of flour remain. Overmixing can lead to tough cupcakes.
- Divide the batter evenly among the prepared muffin cups, filling each about two-thirds full.
- Bake for 18-22 minutes, or until a wooden skewer inserted into the center of a cupcake comes out clean.
- Remove the cupcakes from the oven and let them cool in the muffin pans for a few minutes before transferring them to a wire rack to cool completely. It is crucial that the cupcakes are completely cool before frosting.
- While the cupcakes are cooling, prepare the Cream Cheese Frosting. In a large bowl, using an electric mixer, beat the softened cream cheese and softened butter together until smooth and creamy, about 2-3 minutes.
- Gradually add the sifted powdered sugar, one cup at a time, beating on low speed until combined, then increasing to medium-high speed until light and fluffy.
- Stir in the vanilla extract and a pinch of salt. Beat for another minute until the frosting is smooth and has a good, spreadable consistency. If the frosting is too thick, add a tiny splash of milk or cream. If it’s too thin, add more sifted powdered sugar, one tablespoon at a time.
- Once the cupcakes are completely cool, transfer the frosting to a piping bag fitted with your favorite tip (a large star tip works wonderfully for a classic swirl). Pipe a generous swirl of frosting onto each cupcake.
- Optionally, garnish with red sprinkles or crumbled red velvet cake crumbs for an extra touch of elegance and flavor.
- Serve immediately and enjoy your beautiful, delicious Red Velvet Cupcakes!
Cooking Tips and Variations
To achieve the most vibrant red color, always opt for a high-quality gel food coloring. Liquid food coloring can dilute your batter and won’t give you the deep, rich hue characteristic of true red velvet. Add the coloring to the wet ingredients, specifically with the buttermilk, to ensure it’s evenly dispersed throughout the batter. For the most tender and moist cupcakes, avoid overmixing the batter. Once you add the wet and dry ingredients together, mix just until combined. Overmixing develops the gluten in the flour, leading to a tougher texture. Always ensure your butter, eggs, and buttermilk are at room temperature before you start. This allows them to emulsify better, creating a smoother, more uniform batter and a lighter, fluffier texture in the finished cupcakes and frosting.
When making the cream cheese frosting, the key to a perfect consistency is using softened, but not melted, cream cheese and butter. If your cream cheese is too cold, it will be lumpy. If it’s too warm, the frosting will be runny. Beat the cream cheese and butter together until completely smooth before adding the powdered sugar. For a truly smooth frosting, sift your powdered sugar to remove any lumps. If your frosting seems too thin, you can add more sifted powdered sugar a tablespoon at a time until it reaches your desired consistency. If it’s too thick, a tiny splash of milk or heavy cream can help loosen it up. For a beautiful presentation, use a piping bag with a large star tip (like a Wilton 1M) to create an elegant swirl of frosting on top of each cupcake. If you don’t have a piping bag, a knife or small offset spatula can also be used to spread the frosting.
For a delightful variation, consider adding a hint of almond extract to the frosting along with the vanilla for a slightly different flavor profile. You can also experiment with different garnishes; instead of sprinkles, try making extra red velvet crumbs by baking a small amount of batter separately, crumbling it, and sprinkling it over the frosting. For a truly decadent treat, you could even core the center of each cupcake and fill it with a dollop of cream cheese frosting or a rich chocolate ganache before topping it with the main frosting swirl. Another idea is to make mini red velvet cupcakes by using a mini muffin tin and adjusting baking time, perfect for bite-sized party treats. Remember to always let your cupcakes cool completely on a wire rack before frosting. Frosting warm cupcakes will cause the frosting to melt and slide off, creating a messy result.
Storage and Reheating
Red Velvet Cupcakes, especially with their cream cheese frosting, are best stored in an airtight container in the refrigerator. This helps to keep the frosting firm and prevents the cupcakes from drying out. They will stay fresh for up to 3-4 days when stored this way. If you prefer to eat them at room temperature, simply take them out of the refrigerator about 30-60 minutes before serving to allow the frosting to soften slightly and the cake to lose its chill. Do not leave them at room temperature for extended periods, especially in warm environments, due to the dairy in the frosting.
For longer storage, Red Velvet Cupcakes can be frozen. If freezing unfrosted cupcakes, allow them to cool completely, then wrap each cupcake individually in plastic wrap and place them in an airtight freezer-safe bag or container. They can be stored in the freezer for up to 2-3 months. Thaw them at room temperature for a few hours before frosting. If freezing frosted cupcakes, it’s best to flash freeze them first: place the frosted cupcakes on a baking sheet in the freezer for about an hour until the frosting is firm. Then, individually wrap each cupcake in plastic wrap, followed by aluminum foil, and store in an airtight container. This prevents the frosting from getting squished. Thaw them unwrapped in the refrigerator overnight or at room temperature for a few hours. Reheating is not typically recommended for cupcakes, as it can dry them out. They are best enjoyed at room temperature or slightly chilled after thawing.
Frequently Asked Questions
Why is my red velvet cake not very red?
The vibrancy of your red velvet cake largely depends on the type and amount of food coloring used. For the iconic deep red hue, it’s crucial to use a high-quality gel food coloring (like Wilton or Americolor) rather than liquid food coloring. Gel colors are much more concentrated and won’t thin out your batter as much. Also, ensure you’re using the recommended amount in the recipe. Some recipes also rely on the reaction between natural cocoa powder and acidic ingredients (buttermilk, vinegar) to enhance the red color, but a good amount of gel coloring is still essential for that truly vivid shade.
What is the difference between red velvet and chocolate cake?
While both contain cocoa powder, red velvet cake has a distinct flavor profile that sets it apart from traditional chocolate cake. Red velvet cake typically uses a smaller amount of cocoa powder, resulting in a subtle chocolate flavor rather than an intense one. The combination of buttermilk and vinegar gives red velvet its characteristic tang and contributes to its moist, tender crumb. The red color, of course, is also a key differentiator. Chocolate cake, on the other hand, usually features a higher concentration of cocoa or melted chocolate for a robust chocolate flavor, and typically lacks the tangy notes and vibrant color of red velvet.
Can I make red velvet cupcakes ahead of time?
Yes, red velvet cupcakes are an excellent dessert to prepare in advance. You can bake the cupcakes one day ahead, let them cool completely, and store them in an airtight container at room temperature. Prepare the cream cheese frosting separately, store it in an airtight container in the refrigerator, and bring it to room temperature for about 30 minutes before re-whipping and frosting the cupcakes on the day of serving. This allows the flavors to meld beautifully and ensures the frosting is fresh and perfectly piped.
Why did my cream cheese frosting turn out runny?
Runny cream cheese frosting is a common issue, often caused by using cream cheese or butter that is too warm or over-beating the frosting. Ensure both your cream cheese and butter are softened, but still cool to the touch – not melted or greasy. If they are too warm, the frosting will be thin and won’t hold its shape. Over-beating can also incorporate too much air, causing it to become unstable. If your frosting is runny, try chilling it in the refrigerator for 30 minutes to an hour, then re-whipping it. If it’s still too thin, gradually add more sifted powdered sugar until it reaches the desired consistency.