Introduction
There are some flavor combinations so iconic, so utterly perfect, that they transcend mere ingredients and become a culinary legend. Peanut butter and chocolate stand proudly at the top of that list. The rich, creamy, slightly salty notes of peanut butter dancing with the deep, sweet bitterness of chocolate is a symphony for the senses, a pairing that evokes childhood nostalgia and sophisticated indulgence all at once. It’s the kind of dynamic duo that has inspired countless desserts, from humble cookies to elaborate cakes, and for good reason: it’s simply irresistible.
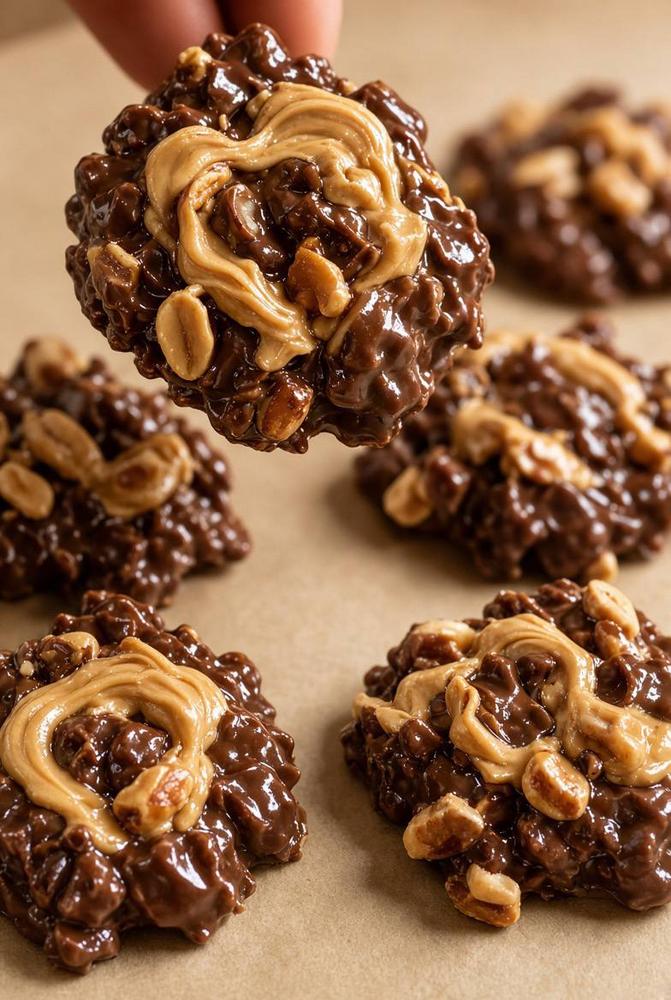
Today, we’re diving into the delightful world of Peanut Butter Chocolate Clusters – a quick, easy, and incredibly satisfying no-bake treat that brings this beloved flavor combination to the forefront. Imagine a chewy, crunchy, and utterly decadent bite-sized dessert, brimming with hearty oats, rich chocolate, and generous swirls of creamy peanut butter, all studded with crunchy peanuts. These clusters are the epitome of fuss-free deliciousness, requiring no oven, minimal effort, and delivering maximum flavor. They’re the perfect solution for those sudden sweet cravings, a fantastic addition to any party spread, or an ideal homemade gift that will surely impress.
What makes these clusters truly special isn’t just their incredible taste, but their remarkable versatility and ease of preparation. Whether you’re a seasoned baker or a kitchen novice, you’ll find joy in whipping up a batch of these beauties. Their chewy texture, thanks to the oats, contrasts beautifully with the occasional crunch of a whole peanut, while the glossy chocolate base provides a luxurious canvas for the signature peanut butter swirl. Get ready to discover your new favorite no-bake dessert that’s as fun to make as it is to devour!
Nutritional Information
Per serving (approximate values):
- Calories: 210
- Protein: 5g
- Carbohydrates: 25g
- Fat: 11g
- Fiber: 3g
- Sodium: 90mg
Ingredients
- 1/2 cup (1 stick) unsalted butter
- 1/2 cup milk (dairy or non-dairy like almond milk)
- 2 cups granulated sugar
- 1/2 cup unsweetened cocoa powder
- 1/4 teaspoon salt
- 1/2 cup creamy peanut butter (divided)
- 1 teaspoon vanilla extract
- 3 cups quick-cooking rolled oats
- 1/2 cup chopped roasted peanuts (optional, for mixing in)
- 1/4 cup whole or halved roasted peanuts (optional, for topping)
Instructions
- Prepare Your Workspace: Line two large baking sheets with parchment paper. This will prevent the clusters from sticking and make for easy cleanup. Set aside.
- Combine Wet Ingredients: In a large, heavy-bottomed saucepan, combine the unsalted butter, milk, granulated sugar, unsweetened cocoa powder, and salt. Place the saucepan over medium heat.
- Bring to a Boil: Stir the mixture constantly with a whisk or wooden spoon until the butter is completely melted and the sugar has dissolved. Bring the mixture to a rolling boil, which means bubbles are breaking consistently over the entire surface, not just around the edges. Allow it to boil for exactly 1 minute, continuing to stir to prevent scorching. This crucial step helps create the right texture for your clusters.
- Remove from Heat: Immediately remove the saucepan from the heat after the 1-minute boil.
- Stir in Peanut Butter and Vanilla: Quickly add 1/4 cup of the creamy peanut butter and the vanilla extract to the hot chocolate mixture. Stir vigorously until the peanut butter is fully melted and incorporated, creating a smooth, glossy chocolate base.
- Add the Oats and Optional Peanuts: Pour the quick-cooking rolled oats into the saucepan. If using, add the 1/2 cup of chopped roasted peanuts now. Stir well with a sturdy spoon or spatula until the oats are thoroughly coated with the chocolate-peanut butter mixture. Ensure there are no dry spots.
- Form the Clusters: Working quickly while the mixture is still warm and pliable (it will start to set as it cools), drop spoonfuls of the mixture onto the prepared parchment-lined baking sheets. Use a tablespoon or a small cookie scoop to create uniform clusters, about 1.5 to 2 inches in diameter. Leave a little space between each cluster.
- Add the Signature Swirl and Toppings: While the clusters are still soft, take the remaining 1/4 cup of creamy peanut butter. If it’s too thick to drizzle, microwave it in a small microwave-safe bowl for 10-15 seconds until slightly softened and pourable. Using a spoon, drizzle or swirl the softened peanut butter over the top of each cluster. For an extra crunch and visual appeal, scatter the whole or halved roasted peanuts over the wet peanut butter swirl.
- Chill to Set: Transfer the baking sheets with the formed clusters to the refrigerator. Chill for at least 30 minutes to 1 hour, or until the clusters are completely firm and set. This step is essential for them to hold their shape and achieve the desired chewy-crunchy texture.
- Serve and Enjoy: Once firm, carefully peel the Peanut Butter Chocolate Clusters off the parchment paper. Arrange them on a platter and serve immediately, or store them for later enjoyment.
Cooking Tips and Variations
To ensure your Peanut Butter Chocolate Clusters turn out perfectly every time, pay close attention to a few key details. Firstly, the quality of your ingredients truly matters. Opt for a good quality creamy peanut butter (natural or conventional, but consistent in texture) and unsweetened cocoa powder for the best flavor. When bringing the mixture to a boil, make sure it’s a full rolling boil for the entire minute; this helps the sugar dissolve properly and contributes to the clusters setting correctly. Don’t overcook it past a minute, or your clusters might become too dry and crumbly. Conversely, undercooking means they might not set firm enough. Work quickly once you add the oats, as the mixture will begin to thicken and cool, making it harder to form the clusters.
For uniform clusters, consider using a small cookie scoop or a measuring tablespoon. This not only makes them look more appealing but also ensures consistent portion sizes. When adding the peanut butter swirl, if your peanut butter is very thick, warm it slightly in the microwave for 10-15 seconds to make it more pourable. A small zip-top bag with the corner snipped off can also create a neater drizzle than a spoon. Always allow ample chilling time; rushing this step will result in soft, messy clusters. They need that time in the fridge to firm up and fully set.
The beauty of these clusters lies in their adaptability. Feel free to experiment with different types of chocolate – a mix of dark and milk chocolate cocoa powder can create a nuanced flavor. For a richer, more intense chocolate flavor, you can melt in a few ounces of good quality dark chocolate chips along with the butter and milk. If you’re not a fan of peanuts, swap them out for other nuts like chopped almonds, walnuts, or pecans. You could also add shredded coconut for a tropical twist, or mini chocolate chips for an extra chocolatey punch. For a different topping, instead of a peanut butter swirl, try a drizzle of melted white chocolate or a sprinkle of flaky sea salt to enhance the flavors. A pinch of cinnamon or a dash of espresso powder in the chocolate base can also add delightful complexity. These clusters are your canvas, so get creative!
Storage and Reheating
Storing your Peanut Butter Chocolate Clusters properly is key to maintaining their fresh taste and perfect texture. Once fully set, transfer the clusters to an airtight container. You can layer them with parchment paper in between to prevent sticking, especially if stacking multiple layers. Store the container in the refrigerator for up to 1 week. The cool temperature helps them retain their firm, chewy consistency and prevents the chocolate from becoming too soft. While they are safe to eat at room temperature for a short period, especially if it’s not too warm, prolonged exposure to heat will make them soft and potentially sticky.
For longer storage, these clusters freeze beautifully. Place the firm, chilled clusters in a single layer on a baking sheet and freeze for about 1-2 hours, or until solid. Once frozen, transfer them to a freezer-safe airtight container or a heavy-duty freezer bag, again layering with parchment paper if needed. They can be stored in the freezer for up to 2-3 months. When you’re ready to enjoy them, simply take out the desired number of clusters and let them thaw at room temperature for about 15-30 minutes, or in the refrigerator for an hour or so. There’s no need to “reheat” them in the traditional sense, as they are a no-bake treat meant to be enjoyed chilled or at room temperature. In fact, some people even enjoy them straight from the freezer for an extra firm, fudgy bite!
Frequently Asked Questions
What kind of peanut butter works best for these clusters?
Creamy peanut butter is generally recommended for its smooth texture and ease of mixing into the chocolate base and for creating a neat swirl. While natural peanut butter can be used, ensure it’s well-stirred and not too oily or separated, as this can affect the final consistency. Avoid crunchy peanut butter for the base, as the added texture might make the clusters too crumbly, but it can be used for the swirl or as an additional topping for extra crunch.
Can I make these clusters gluten-free?
Absolutely! The primary ingredient that might contain gluten is the oats. To make these clusters gluten-free, simply ensure you use certified gluten-free rolled oats. All other ingredients like butter, milk, sugar, cocoa powder, peanut butter, vanilla, and salt are typically naturally gluten-free, but it’s always wise to check labels for any hidden gluten-containing additives if you have a severe allergy.
Why are my clusters not setting properly or too crumbly?
There are a few common reasons for this. If they’re too soft and not setting, it’s likely the mixture wasn’t boiled long enough (less than 1 minute) or didn’t reach a full rolling boil. This prevents the sugar from fully dissolving and caramelizing slightly, which is crucial for the setting process. If they’re too crumbly, the mixture might have been boiled for too long (more than 1 minute), causing too much moisture to evaporate and making the sugar mixture too stiff. It’s also important to work quickly once the oats are added, as the mixture starts to set as it cools, making it harder to form cohesive clusters.
Can I use old-fashioned rolled oats instead of quick-cooking oats?
While quick-cooking oats are generally preferred for their finer texture, which blends more seamlessly into the clusters, you can use old-fashioned rolled oats. However, the clusters might have a chewier, more substantial texture, and you might need to stir them into the chocolate mixture for a minute or two longer to ensure they are fully softened and coated. The overall appearance and chewiness will be slightly different, but still delicious!