Introduction
There are some desserts that just sing of sunshine and happiness, and these Lemon Crumb Bars are absolutely one of them. Imagine a perfect harmony of sweet and tart, all wrapped up in a delightful, multi-textured package. These bars are a beloved classic for a reason: they’re incredibly easy to make, transport beautifully, and are guaranteed to be a crowd-pleaser at any gathering. Whether you’re planning a spring picnic, a summer barbecue, or just craving a bright treat to chase away the blues, these lemon crumb bars are your answer. They offer that unmistakable tangy zest of fresh lemons balanced with a comforting sweetness, making each bite an invigorating and satisfying experience.
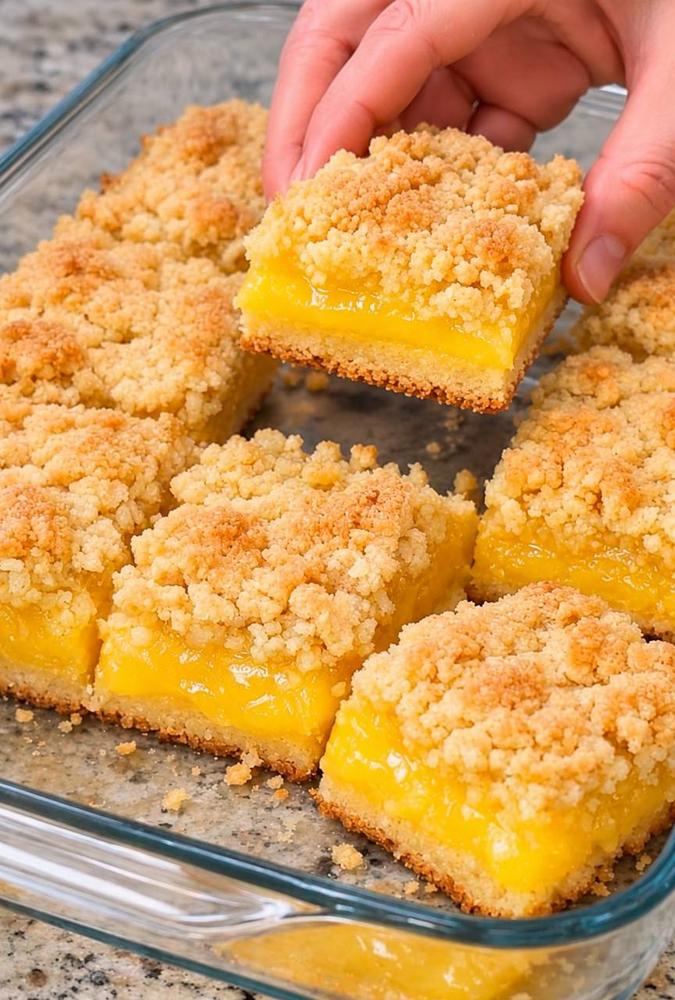
What truly sets these Lemon Crumb Bars apart is their ingenious construction. Each bar is a masterpiece of layers, starting with a sturdy, buttery shortbread crust that provides the perfect foundation. This base is robust enough to hold up to the luscious lemon filling, which is vibrant yellow, smooth, and bursting with a bright, zesty flavor that will make your taste buds tingle. And to top it all off? A golden-brown, slightly crisp, and wonderfully crumbly streusel topping that adds a delightful textural contrast. This isn’t just a dessert; it’s an experience – a comforting, yet exhilarating journey for your palate that captures the very essence of sunny days in every delicious square.
So, get ready to transform simple ingredients into an extraordinary treat. We’re going to walk you through creating these perfectly balanced bars, ensuring that each layer contributes to an unforgettable dessert. From the moment you zest your first lemon to the satisfying moment you cut into those neat, golden squares, you’ll discover why Lemon Crumb Bars are a timeless favorite, promising a burst of sunshine and pure joy with every bite.
Nutritional Information
Per serving (approximate values for 16 bars):
- Calories: 320 kcal
- Protein: 4g
- Carbohydrates: 45g
- Fat: 15g
- Fiber: 1g
- Sodium: 120mg
Ingredients
- 2 ½ cups all-purpose flour, divided
- 1 ½ cups granulated sugar, divided
- ¾ teaspoon salt, divided
- 1 cup (2 sticks) unsalted butter, very cold and cut into ½-inch cubes
- 4 large eggs
- ½ cup fresh lemon juice (from 3-4 medium lemons)
- 2 tablespoons lemon zest (from 2-3 lemons)
- 2 tablespoons cornstarch
Instructions
- Preheat your oven to 375°F (190°C). Line a 9×13 inch baking dish with parchment paper, leaving an overhang on the sides to easily lift the bars out later. Lightly grease the parchment paper.
- Prepare the Crumb Mixture: In a large mixing bowl, combine 2 cups of the all-purpose flour, 1 cup of the granulated sugar, and ½ teaspoon of the salt. Whisk these dry ingredients together thoroughly.
- Add the very cold, cubed butter to the dry ingredients. Using a pastry blender, two knives, or your fingertips, cut the butter into the flour mixture until it resembles coarse crumbs with some pea-sized pieces remaining. It’s crucial for the butter to stay cold to achieve a tender, crumbly texture.
- Form the Crust: Reserve about 1 ½ cups of the crumb mixture for the topping. Press the remaining crumb mixture evenly and firmly into the bottom of the prepared 9×13 inch baking dish. Use the bottom of a glass or your hands to ensure it’s tightly packed.
- Bake the crust for 15-18 minutes, or until it’s lightly golden brown around the edges. This pre-baking step helps create a crispier base and prevents it from becoming soggy when the lemon filling is added. Remove from the oven and set aside while you prepare the filling.
- Prepare the Lemon Filling: In a medium mixing bowl, whisk together the remaining ½ cup of granulated sugar, the remaining ½ cup of all-purpose flour, and the remaining ¼ teaspoon of salt. This helps prevent lumps when adding the wet ingredients.
- In a separate bowl, whisk the 4 large eggs until they are well combined. Add the fresh lemon juice and lemon zest to the eggs and whisk until thoroughly incorporated.
- Gradually pour the wet egg and lemon mixture into the dry sugar and flour mixture, whisking continuously until smooth and lump-free. The mixture should be bright yellow and slightly thickened.
- Assemble the Bars: Carefully pour the lemon filling over the pre-baked crust in the baking dish. Spread it evenly using a spatula if needed.
- Evenly sprinkle the reserved 1 ½ cups of crumb mixture over the lemon filling. Try to distribute it so that it covers the filling as much as possible, creating that signature crumbly topping.
- Bake the Bars: Return the baking dish to the preheated oven. Bake for 25-30 minutes, or until the lemon filling is set (it should only jiggle slightly in the center when gently shaken) and the crumb topping is golden brown. Be careful not to overbake, as the filling will continue to set as it cools.
- Cool and Cut: Remove the bars from the oven and place the dish on a wire rack to cool completely. This is a critical step! The bars need to cool for at least 2-3 hours at room temperature. For the cleanest cuts, it’s highly recommended to chill the bars in the refrigerator for an additional 1-2 hours after they’ve cooled to room temperature.
- Once completely cooled and chilled, use the parchment paper overhang to carefully lift the entire slab of bars out of the baking dish. Transfer to a cutting board and slice into 16 (or more, depending on desired size) even squares using a sharp knife. Wipe the knife clean between cuts for the neatest edges.
- Serve and enjoy your bright and delicious Lemon Crumb Bars!
Cooking Tips and Variations
Achieving the perfect Lemon Crumb Bar is all about attention to a few key details. Firstly, always use fresh lemons for both the juice and the zest. Bottled lemon juice simply won’t deliver the vibrant, authentic flavor that makes these bars shine. When zesting, be sure to only get the yellow part of the peel, avoiding the bitter white pith underneath. For the best crumb texture, ensure your butter is very cold when you’re cutting it into the flour mixture. Cold butter creates pockets of steam during baking, leading to a tender, flaky crumb rather than a dense, cookie-like one. If your kitchen is warm, you can even pop the bowl of crumb mixture into the refrigerator for 10-15 minutes before pressing it into the pan or sprinkling it over the filling.
Another crucial tip is not to overbake the lemon filling. It might still appear slightly wobbly in the center when you pull it out of the oven, but it will continue to set as it cools. Overbaking can lead to a rubbery or dry filling, so err on the side of slightly underdone. And perhaps the most important tip for beautifully presented bars: patience is a virtue! Allow the bars to cool completely at room temperature, then chill them in the refrigerator for at least an hour or two before cutting. This firming-up period ensures that the lemon filling is fully set and allows for clean, sharp slices, preventing the filling from oozing out and creating messy edges. When cutting, use a sharp, non-serrated knife and wipe the blade clean with a damp cloth between each cut to maintain those pristine lines.
These Lemon Crumb Bars are fantastic as is, but they also lend themselves beautifully to variations. For a different citrus twist, you could substitute lime juice and zest for a Key Lime Crumb Bar, or even orange for a sweeter, milder flavor profile. A combination of lemon and lime can also be delightfully zesty. If you love a hint of warmth, add a teaspoon of vanilla extract to your crumb mixture. For an added layer of texture and flavor, consider folding finely chopped nuts like almonds, pecans, or walnuts into your crumb topping before sprinkling it over the filling. This adds a lovely crunch and nutty depth. For those who enjoy an extra touch of sweetness and visual appeal, a simple lemon glaze made from powdered sugar and a touch of lemon juice can be drizzled over the cooled bars. Or, for a truly decadent treat, serve them with a dollop of freshly whipped cream and a few fresh berries on the side. The possibilities are endless for customizing these delightful bars to your taste!
Storage and Reheating
Proper storage is key to keeping your Lemon Crumb Bars fresh and delicious. Once the bars have completely cooled and been cut into squares, they should be stored in an airtight container. At room temperature, they will keep well for up to 2-3 days, especially if your home isn’t too warm or humid. For longer freshness, or if your kitchen tends to be warm, storing them in the refrigerator is recommended. In an airtight container in the fridge, these bars will stay fresh and vibrant for up to one week. The chilling also helps maintain the firm texture of the lemon filling and allows for even cleaner cuts if you’re serving them over several days.
For even longer storage, Lemon Crumb Bars freeze beautifully. To freeze, first ensure the bars are completely cooled and chilled. Cut them into individual squares. You can then wrap each bar tightly in plastic wrap, or place them in a single layer in an airtight freezer-safe container, separated by parchment paper to prevent sticking. They can be frozen for up to 2-3 months. When you’re ready to enjoy them, simply thaw the desired number of bars in the refrigerator overnight, or at room temperature for a few hours. There’s generally no need to reheat these bars; they are absolutely delicious served chilled straight from the refrigerator, as the cool temperature enhances the refreshing tang of the lemon filling. If you prefer them at room temperature, just let them sit out for 15-30 minutes after thawing or refrigerating before serving.
Frequently Asked Questions
What makes my crumb topping not crumbly enough?
The key to a perfectly crumbly topping is using very cold butter and not overworking the mixture. When you cut the butter into the flour and sugar, you want it to resemble coarse crumbs with some pea-sized pieces of butter still visible, not a uniform dough. If the butter melts too much or the mixture is over-mixed, it can become more like a paste than a crumb, resulting in a less distinct, less crumbly topping. If your kitchen is warm, chill your butter and even the flour mixture before combining them.
Why did my lemon filling turn out runny?
There are a few common reasons for a runny lemon filling. The most frequent culprit is not baking it long enough. The filling should be set with only a slight jiggle in the very center when you gently shake the pan. It will continue to firm up considerably as it cools. Another reason could be an incorrect ratio of thickener (cornstarch or flour) to liquid, or not using enough eggs, which help set the custard-like filling. Ensure you’re using fresh, large eggs and measuring your ingredients accurately. Also, make sure your oven temperature is calibrated correctly; an oven that runs too cool will prevent the filling from setting properly.
Can I make these bars ahead of time?
Absolutely! Lemon Crumb Bars are an excellent make-ahead dessert. They actually benefit from chilling for several hours, or even overnight, before serving, as this allows the filling to fully set and makes for much cleaner cuts. You can bake them a day or two in advance and store them in an airtight container in the refrigerator. This makes them perfect for parties, potlucks, or meal prepping your weekly treats, as they’re ready to go when you are, and their flavor often deepens slightly with a little time.
How do I get clean cuts when slicing the bars?
Getting clean, sharp cuts is all about proper cooling and the right technique. First and foremost, ensure the bars are completely cooled at room temperature, and then chilled in the refrigerator for at least 1-2 hours. This firming up of the filling is critical. When cutting, use a long, sharp, non-serrated knife. Press down firmly and make one clean cut, rather than sawing back and forth. After each cut, wipe the knife blade clean with a damp cloth or paper towel to remove any sticky filling or crumbs. This prevents residue from transferring to the next slice and keeps your edges pristine.