Introduction
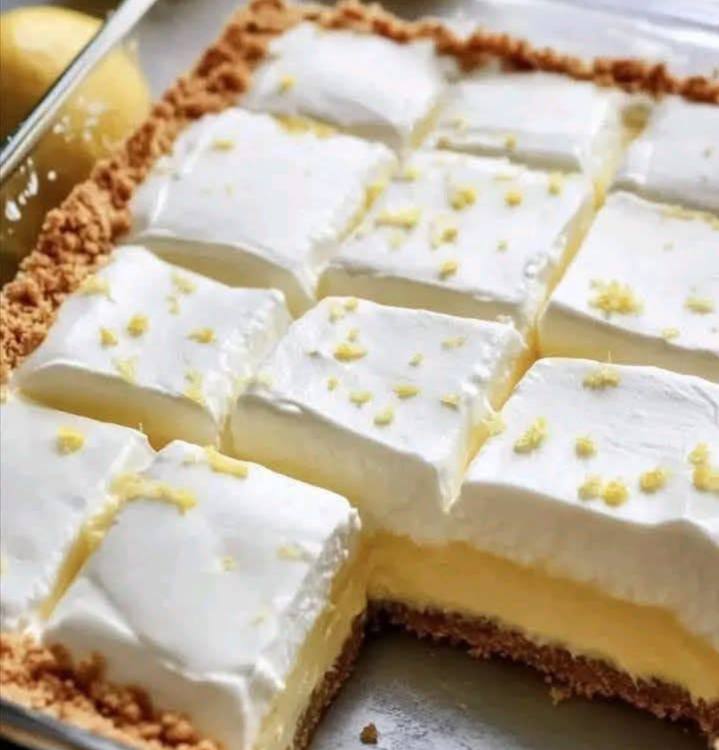
Forget everything you thought you knew about classic Italian desserts for just a moment, because today we’re diving into a different kind of timeless treat – one that combines sunshine, tang, and pure bliss in every bite. While the name “Torta della Nonna” might conjure images of pine nuts and creamy custard under a pastry crust, the delightful creation we’re celebrating today is a vibrant, zesty sensation that will instantly brighten your day: Lemon Meringue Bars. Imagine the perfect harmony of a buttery, crumbly base, a lusciously tart lemon filling, and a cloud-like meringue topping, all dusted with fresh lemon zest. These bars are a symphony of textures and flavors, offering a refreshing escape with every square.
Lemon Meringue Bars are a beloved classic for a reason. They embody the essence of comfort food with an elegant twist, making them suitable for casual gatherings, sophisticated brunches, or simply as a delightful pick-me-up. The contrast between the sweet meringue and the tangy lemon curd is truly addictive, while the sturdy crust provides the perfect foundation for this layered masterpiece. Easy to transport and serve, these bars are a fantastic alternative to a traditional pie, offering all the joy with added convenience. Get ready to impress your taste buds and your guests with this universally adored dessert.
What makes these bars truly special is their ability to deliver a complex flavor profile with relatively straightforward preparation. Each layer plays a crucial role: the crust offers a satisfying crunch and richness, the lemon filling provides that essential bright, pucker-worthy tang, and the meringue adds a delicate sweetness and airy texture that lightens the entire experience. Garnished with fresh lemon zest, they’re not just a treat for the palate but also a feast for the eyes, promising a burst of sunshine with every bite. Let’s embark on the journey to create these irresistible Lemon Meringue Bars!
Nutritional Information
Per serving (approximate values for one 2×2 inch bar, assuming 24 bars from a 9×13 pan):
- Calories: 280-320
- Protein: 4-6g
- Carbohydrates: 40-45g
- Fat: 12-15g
- Fiber: 1-2g
- Sodium: 150-200mg
Ingredients
For the Crumb Crust:
- 2 cups (about 250g) graham cracker crumbs (from about 15-18 full sheets)
- 1/2 cup (113g) unsalted butter, melted
- 1/4 cup (50g) granulated sugar
- 1/4 teaspoon salt
For the Lemon Filling:
- 1 1/2 cups (300g) granulated sugar
- 1/4 cup (30g) all-purpose flour
- 1/4 cup (25g) cornstarch
- 1/4 teaspoon salt
- 1 1/2 cups (360ml) fresh lemon juice (from 6-8 medium lemons)
- 1/2 cup (120ml) cold water
- 6 large egg yolks
- 1/2 cup (113g) unsalted butter, cut into cubes
- 2 tablespoons fresh lemon zest (from 2-3 lemons)
For the Meringue Topping:
- 6 large egg whites (leftover from the filling)
- 1/2 teaspoon cream of tartar (optional, but recommended for stability)
- 1 cup (200g) granulated sugar
- 1 teaspoon vanilla extract
- Pinch of salt
For Garnish:
- Fresh lemon zest
Instructions
- Prepare the Crust: Preheat your oven to 350°F (175°C). Line a 9×13-inch baking pan with parchment paper, allowing an overhang on the sides to easily lift the bars out later. Grease the parchment lightly.
- In a medium bowl, combine the graham cracker crumbs, melted butter, granulated sugar, and salt. Stir until the crumbs are evenly moistened.
- Press the mixture firmly and evenly into the bottom of the prepared baking pan. Use the bottom of a glass or a flat measuring cup to get a compact layer.
- Bake the crust for 10-12 minutes, or until lightly golden brown. Remove from the oven and let cool slightly while you prepare the filling. Reduce oven temperature to 325°F (160°C).
- Prepare the Lemon Filling: In a large saucepan (preferably non-reactive, like stainless steel), whisk together the granulated sugar, all-purpose flour, cornstarch, and salt.
- Gradually whisk in the fresh lemon juice and cold water until smooth.
- In a separate small bowl, lightly whisk the 6 large egg yolks.
- Slowly pour about 1 cup of the lemon mixture into the egg yolks, whisking constantly to temper the yolks (this prevents them from scrambling).
- Pour the tempered yolk mixture back into the saucepan with the remaining lemon mixture.
- Cook the mixture over medium heat, whisking constantly, until it thickens to the consistency of pudding and just begins to bubble, about 8-10 minutes. Do not boil vigorously.
- Remove the saucepan from the heat. Stir in the cubed unsalted butter, one cube at a time, until fully melted and incorporated.
- Stir in the fresh lemon zest.
- Pour the hot lemon filling over the warm, baked crust in the pan. Spread evenly with an offset spatula.
- Bake the lemon filling for 15-20 minutes at 325°F (160°C), or until the filling is just set and no longer jiggly in the center.
- Remove the pan from the oven and let it cool completely on a wire rack at room temperature.
- Prepare the Meringue Topping: While the bars are cooling (or once they are cool), prepare the meringue. Ensure your mixing bowl and whisk attachment are impeccably clean and grease-free.
- In the bowl of a stand mixer fitted with the whisk attachment (or using a hand mixer), beat the egg whites on medium speed until foamy.
- Add the cream of tartar (if using) and salt. Increase speed to medium-high and continue beating until soft peaks form.
- Gradually add the granulated sugar, about 1 tablespoon at a time, beating well after each addition. Continue beating until the meringue is glossy, thick, and forms stiff peaks (when you lift the whisk, the peak stands straight up).
- Beat in the vanilla extract for the last 30 seconds.
- Assemble and Bake Meringue: Carefully spread the meringue over the cooled lemon filling, making sure it reaches the edges of the pan to seal the filling. You can create decorative swirls and peaks with the back of a spoon or an offset spatula.
- Return the pan to the 325°F (160°C) oven and bake for 20-25 minutes, or until the meringue is lightly golden brown on top and set. Alternatively, you can use a kitchen torch to brown the meringue for a classic look without further baking.
- Cool and Serve: Let the bars cool completely on a wire rack. For best results and clean cuts, chill the bars in the refrigerator for at least 4 hours, or preferably overnight.
- Once thoroughly chilled, use the parchment paper overhang to lift the entire slab of bars out of the pan.
- Place the slab on a cutting board and use a sharp, hot knife (wiped clean between cuts) to cut into desired squares or rectangles.
- Garnish with extra fresh lemon zest just before serving.
Cooking Tips and Variations
For the brightest, most vibrant lemon flavor, always use fresh lemons, not bottled lemon juice. The zest is also crucial for that intense citrus aroma, so don’t skip it!
To avoid a grainy lemon filling, make sure the flour and cornstarch are thoroughly whisked with the sugar before adding liquids. Cook the filling gently over medium heat, stirring constantly, to prevent scorching and ensure even thickening. If you find your filling isn’t thickening enough, it might need a few more minutes on the heat, but avoid a rapid boil.
When making the meringue, the cleanliness of your bowl and whisk is paramount. Any trace of grease can prevent the egg whites from whipping up properly. Room temperature egg whites also whip to a greater volume than cold ones. If you’re concerned about raw egg whites, you can opt for a Swiss or Italian meringue, which involves heating the egg whites and sugar over a double boiler, or simply bake the meringue until fully cooked.
For perfectly clean cuts, ensure the bars are thoroughly chilled before slicing. Use a long, sharp knife, and run it under hot water, then wipe it dry before each cut. This helps to melt through the layers cleanly without dragging.
Variations:
- Lime or Orange Bars: Substitute lemon juice and zest with fresh lime or orange juice and zest for a delightful tropical or sweeter citrus twist.
- Different Crusts: Instead of graham cracker crumbs, try a shortbread crust (equal parts flour, butter, and sugar, pressed and baked) or even an almond flour crust for a gluten-free option.
- Whipped Cream Topping: If you’re not a fan of meringue or want a quicker alternative, top the cooled lemon bars with sweetened whipped cream just before serving.
- Berry Swirl: Before baking the lemon filling, swirl in a few tablespoons of raspberry or blueberry puree for a fruity marbled effect.
- Coconut Boost: Add 1/2 cup of shredded coconut to the crust mixture for a tropical flavor profile.
Storage and Reheating
Lemon Meringue Bars are best enjoyed chilled. Store any leftover bars in an airtight container in the refrigerator for up to 3-4 days. The meringue can sometimes “weep” (release moisture) over time, especially if not fully baked or if exposed to humidity, but the bars will still be delicious.
Freezing is generally not recommended for meringue-topped bars, as the meringue can become rubbery or separate upon thawing. However, if you’ve made plain lemon bars (without meringue), they can be frozen for up to 2 months. Wrap individual bars tightly in plastic wrap, then place them in an airtight container or freezer-safe bag. Thaw in the refrigerator overnight before serving.
These bars are typically served cold, so reheating is not necessary or recommended. The cold temperature enhances the refreshing tang of the lemon and provides a lovely contrast with the crust and meringue.
Frequently Asked Questions
How do I prevent my meringue from weeping?
Weeping meringue, where the meringue releases liquid, is a common issue. To minimize it, ensure your meringue is baked until fully set and lightly golden, which cooks the sugar and stabilizes the egg whites. Using cream of tartar helps, as does adding sugar gradually and beating until very stiff, glossy peaks form. Also, avoid overcooking the meringue, as this can also cause weeping. Serving the bars within a day or two of making them and storing them in an airtight container in the refrigerator also helps.
Can I make these bars ahead of time?
Yes, Lemon Meringue Bars are an excellent make-ahead dessert! You can prepare them a day in advance. In fact, chilling them overnight often improves their flavor and makes them much easier to cut cleanly. If you’re concerned about the meringue, you can prepare the lemon bars (crust and filling) a day ahead, chill them, and then add and bake/torch the meringue topping just a few hours before serving.
Why did my lemon filling not set?
Several factors can cause a runny lemon filling. The most common reasons are not cooking it long enough or not using enough thickeners (flour/cornstarch). Ensure you cook the filling over medium heat, stirring constantly, until it visibly thickens and coats the back of a spoon, and just begins to bubble. It should resemble a thick pudding. Also, make sure your measurements for flour and cornstarch are accurate. Sometimes, too much liquid (lemon juice or water) can dilute the thickeners, so precise measuring is key.
Can I use a different type of sugar for the meringue?
While granulated sugar is standard for meringue, superfine (caster) sugar can be used. It dissolves more quickly, which can result in a smoother meringue. Powdered sugar (confectioners’ sugar) is generally not recommended for meringue as it contains cornstarch, which can interfere with the egg whites whipping properly and affect the texture. Stick to granulated or superfine sugar for the best results in your meringue.