Introduction
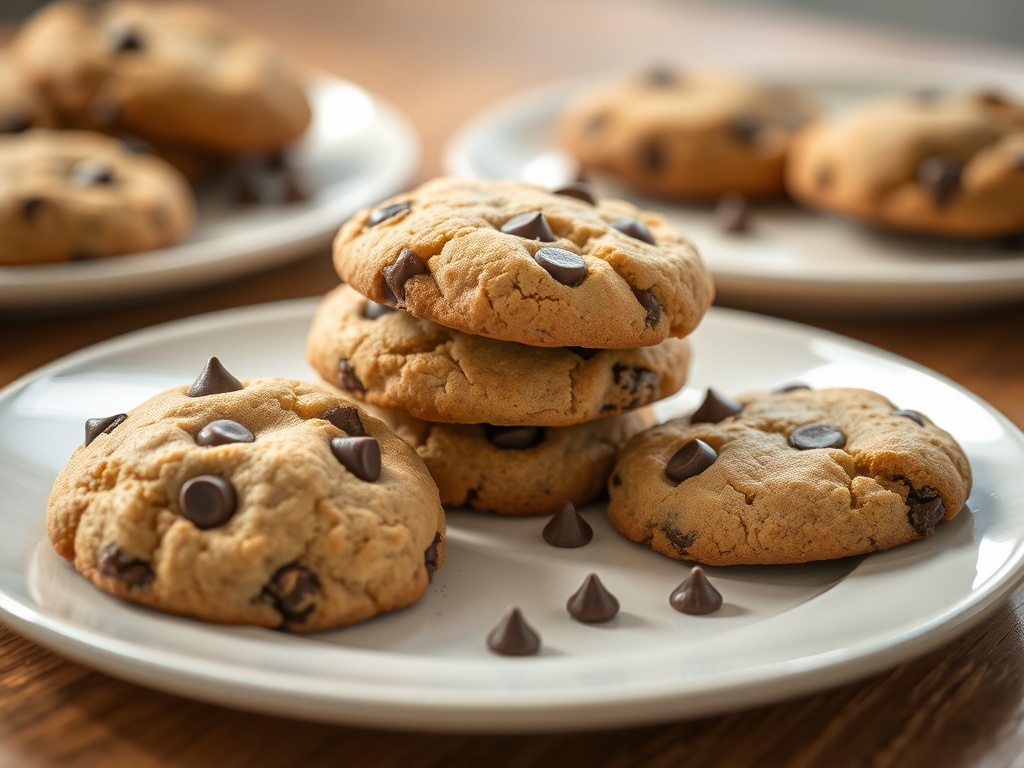
Ah, the humble chocolate chip cookie. Is there any treat more universally beloved, more deeply ingrained in our collective culinary consciousness? From childhood memories of warm cookies fresh from the oven to the comforting aroma that signals a truly happy home, chocolate chip cookies are more than just a dessert; they’re a feeling, a hug in edible form. But while countless recipes promise perfection, not all deliver. Too often, we’re left with cookies that are flat, cakey, or simply lacking that certain je ne sais quoi. Our quest for the “best” chocolate chip cookie isn’t just about a recipe; it’s about unlocking the secrets to that ultimate balance of crisp edges, a gloriously chewy center, and an explosion of rich, molten chocolate in every bite.
Today, we’re ending that quest. This isn’t just another chocolate chip cookie recipe; it’s a deep dive into the art and science of baking, meticulously crafted to deliver cookies that will redefine your expectations. We’re talking about cookies with unparalleled flavor depth, thanks to a careful selection of ingredients, and a texture that strikes the perfect balance between soft and chewy. We’ll demystify the roles of butter, sugar, and flour, and reveal the crucial techniques that transform good cookies into truly extraordinary ones. Prepare to impress friends, delight family, and finally find your new, unwavering go-to recipe for the best chocolate chip cookies you’ll ever bake.
What makes *these* cookies the best, you ask? It’s a combination of meticulous attention to ingredient quality, precise measurements, and a few expert techniques that elevate them far beyond the ordinary. We’ll delve into the magic of chilling dough, the importance of the right baking temperature, and the visual cues that tell you your cookies are perfectly done. Get ready to master a classic, because by the end of this guide, you’ll not only have a recipe, but a profound understanding of what makes a chocolate chip cookie truly exceptional, ensuring every batch you bake is nothing short of cookie nirvana.
Nutritional Information
Per serving (approximate values, based on 24 cookies per batch):
- Calories: 220 kcal
- Protein: 3g
- Carbohydrates: 28g
- Fat: 12g
- Fiber: 1g
- Sodium: 120mg
Ingredients
- 1 cup (226g) unsalted butter, softened to room temperature (about 67°F/19°C)
- ¾ cup (150g) granulated sugar
- 1 cup (200g) packed light brown sugar
- 2 large eggs, room temperature
- 2 teaspoons pure vanilla extract
- 2¼ cups (270g) all-purpose flour
- 1 teaspoon baking soda
- ½ teaspoon salt (fine sea salt or table salt)
- 1½ cups (255g) semi-sweet chocolate chips or chopped chocolate bar (high quality recommended)
Instructions
- In a large bowl, or the bowl of a stand mixer fitted with the paddle attachment, cream together the softened butter, granulated sugar, and light brown sugar on medium speed until light and fluffy, about 2-3 minutes. This step is crucial for incorporating air, which contributes to a lighter texture.
- Add the eggs one at a time, mixing well after each addition. Make sure to scrape down the sides of the bowl with a rubber spatula to ensure everything is fully incorporated. Stir in the vanilla extract.
- In a separate medium bowl, whisk together the all-purpose flour, baking soda, and salt until well combined.
- Gradually add the dry ingredients to the wet ingredients, mixing on low speed until just combined. Be careful not to overmix, as this can develop gluten and lead to tough cookies. Stop mixing as soon as no streaks of flour are visible.
- Fold in the chocolate chips or chopped chocolate by hand using a spatula until evenly distributed throughout the dough.
- Cover the bowl with plastic wrap and refrigerate the dough for at least 3 hours, or preferably overnight (up to 72 hours). Chilling the dough is a critical step that allows the flavors to meld and prevents the cookies from spreading too much during baking, resulting in a thicker, chewier cookie.
- When ready to bake, preheat your oven to 375°F (190°C). Line two large baking sheets with parchment paper.
- Scoop rounded tablespoons of dough (a 1.5-inch cookie scoop works perfectly) onto the prepared baking sheets, leaving about 2 inches between each cookie. For a professional look, you can press a few extra chocolate chips onto the top of each dough ball before baking.
- Bake one sheet at a time for 9-12 minutes, or until the edges are golden brown and the centers still look slightly soft and underbaked. This “underbaked” secret is key to achieving that perfect chewy center.
- Remove from the oven and immediately transfer the baking sheet to a wire rack. Let the cookies cool on the baking sheet for 5-10 minutes. This allows them to set up and continue cooking slightly without becoming overbaked.
- After 5-10 minutes, carefully transfer the cookies from the baking sheet directly to the wire rack to cool completely.
- Repeat with the remaining dough. Enjoy your perfectly baked chocolate chip cookies!
Cooking Tips and Variations
To truly achieve cookie nirvana, pay attention to the details. Firstly, butter temperature is paramount; softened butter, not melted or rock-hard, creams best with sugars to create crucial air pockets for a lighter, chewier cookie. Brown sugar, especially dark brown, is your secret weapon for chewiness and a rich, caramel-like flavor due to its molasses content, while granulated sugar contributes to crispness and spread. Don’t skip the chilling step; it’s not just about preventing spread, it allows flavors to deepen and the flour to fully hydrate, leading to a more complex and satisfying texture. When you finally add the flour, mix only until just combined; overmixing develops gluten, which is the enemy of a tender cookie. For an extra gourmet touch, consider using a good quality chopped chocolate bar instead of chips, as it melts more beautifully and provides pockets of molten chocolate. Finally, master the visual cues for doneness: cookies should have slightly golden edges but still look a little soft and underbaked in the center. They will continue to set as they cool on the hot baking sheet, ensuring that coveted chewy interior.
Beyond the perfect base, there’s a world of variations to explore. For an elevated flavor boost, sprinkle a touch of flaky sea salt on top of the dough balls just before baking – it brilliantly balances the sweetness and enhances the chocolate. A teaspoon of instant espresso powder added to the dry ingredients can deepen the chocolate flavor without making the cookies taste like coffee. Citrus zest, like orange or lemon, can add a bright, unexpected note. For chocolate swaps, experiment with white chocolate, milk chocolate, or a mix of dark and semi-sweet for varying levels of sweetness and bitterness. Beyond chocolate, consider adding toasted nuts like walnuts or pecans for crunch, toffee bits for a buttery caramel kick, or dried fruits like cranberries or cherries for a chewy, tart contrast. You can also play with size: make mini cookies for bite-sized delights or giant cookies for an extra indulgent treat, adjusting baking times accordingly. Remember, this recipe is a foundation; feel free to customize and make it your own!
Storage and Reheating
To keep your amazing chocolate chip cookies fresh, store them in an airtight container at room temperature for up to 3-4 days. For optimal softness, you can place half a slice of plain bread inside the container with the cookies; the cookies will absorb moisture from the bread, keeping them soft and chewy. Avoid storing them in the refrigerator, as this can dry them out. If you want to enjoy a warm, just-baked cookie experience even days later, you can gently reheat them in a preheated oven at 300°F (150°C) for 5-7 minutes, or in a microwave for 10-15 seconds until warmed through. Be careful not to overheat in the microwave, as this can make them tough. For longer storage, baked cookies can be frozen in an airtight freezer-safe container or bag for up to 3 months. Thaw them at room temperature or reheat from frozen in the oven for a few extra minutes.
You can also freeze the raw cookie dough for future baking. Scoop the dough into individual balls and place them on a parchment-lined baking sheet. Freeze until solid, then transfer the frozen dough balls to a freezer-safe bag or container. They can be stored for up to 3 months. When you’re ready to bake, you can bake them directly from frozen; simply add an extra 2-4 minutes to the baking time, keeping an eye on them for those golden edges and slightly soft centers. This is a fantastic way to always have fresh, warm cookies on demand!
Frequently Asked Questions
Why did my cookies spread too much and come out flat?
This is a common issue with several potential culprits. The most likely reasons are: the butter was too warm or melted, you didn’t chill the dough long enough (or at all), your oven temperature was too low, or you used too much butter or not enough flour. Ensure your butter is softened, not melted, and always chill the dough for at least 3 hours. Also, make sure your oven temperature is accurate by using an oven thermometer.
Can I make these cookies gluten-free or dairy-free?
While this recipe is optimized for traditional ingredients, you can experiment with substitutions. For gluten-free, use a 1:1 gluten-free all-purpose flour blend that contains xanthan gum. For dairy-free, use a high-quality plant-based butter substitute (like Miyoko’s Kitchen or Earth Balance sticks) and dairy-free chocolate chips. Be aware that the texture and flavor may vary slightly from the original recipe.
What’s the best type of chocolate to use?
The “best” chocolate is subjective, but quality makes a huge difference. For classic cookies, semi-sweet chocolate chips (around 40-50% cocoa) are standard. However, for a richer, more complex flavor and better melt, we highly recommend using a high-quality chocolate bar chopped into chunks. This provides varying sizes of chocolate pieces that melt beautifully. You can also mix different types, like milk chocolate and dark chocolate, for a layered flavor profile.
My cookies are tough and dry, what went wrong?
Tough and dry cookies are usually a sign of overmixing the dough once the flour has been added, or overbaking. Once you add the dry ingredients, mix only until just combined – as soon as you no longer see streaks of flour, stop. Overmixing develops gluten, leading to a tough texture. Additionally, make sure you’re pulling the cookies from the oven when the edges are golden but the centers still look slightly underbaked; they will continue to set as they cool.