Introduction
There’s something undeniably comforting about a classic butter cake. It’s not flashy or overly complicated, but its rich, tender crumb and pure, sweet vanilla flavor speak volumes. This Simple Vanilla Butter Cake recipe embodies everything you love about this timeless dessert: it’s incredibly easy to make, uses everyday ingredients, and delivers a moist, buttery slice that’s perfect for any occasion. Whether you’re a seasoned baker or just starting your culinary journey, this recipe is designed for success, promising a delightful treat that will become a staple in your kitchen.
What makes this particular butter cake so special is its simplicity and versatility. We’re focusing on highlighting the star of the show: rich butter and aromatic vanilla. The result is a cake that’s moist, dense, and deeply satisfying, without being heavy. It’s the kind of cake that pairs perfectly with a morning coffee, an afternoon tea, or as a fuss-free dessert after dinner. Forget complicated techniques or exotic ingredients; this recipe is all about celebrating the pure, unadulterated joy of home baking.
This recipe is perfect for everyday indulgence, casual potlucks, or simply when you crave a taste of home. You’ll learn how to achieve that perfect golden crust, a tender interior, and a flavor profile that sings with vanilla. Get ready to impress yourself and your loved ones with a dessert that proves sometimes, the simplest things are truly the best.
Nutritional Information
Per serving (approximate values):
- Calories: 350
- Protein: 4g
- Carbohydrates: 45g
- Fat: 18g
- Fiber: 1g
- Sodium: 250mg
Ingredients
- 1 cup (2 sticks) unsalted butter, softened to room temperature
- 1 ¾ cups granulated sugar
- 3 large eggs, at room temperature
- 1 tablespoon pure vanilla extract
- 2 ½ cups all-purpose flour
- 1 tablespoon baking powder
- ½ teaspoon salt
- 1 cup whole milk, at room temperature
- Powdered sugar, for dusting (optional)
Instructions
- Preparation: Preheat your oven to 350°F (175°C). Grease and flour a 9×13 inch baking dish, or line it with parchment paper leaving an overhang on the sides for easy removal.
- Cream Butter and Sugar: In a large mixing bowl, using an electric mixer (handheld or stand mixer with paddle attachment), beat the softened butter and granulated sugar together on medium-high speed until light and fluffy, about 3-5 minutes. Scrape down the sides of the bowl as needed. This step incorporates air, which contributes to the cake’s tender texture.
- Add Eggs and Vanilla: Add the eggs one at a time, beating well after each addition until fully incorporated. Stir in the pure vanilla extract. The mixture may look slightly curdled at this point, which is normal.
- Combine Dry Ingredients: In a separate medium bowl, whisk together the all-purpose flour, baking powder, and salt.
- Alternate Dry and Wet Ingredients: With the mixer on low speed, gradually add the dry ingredients to the wet ingredients in three additions, alternating with the milk in two additions. Begin and end with the dry ingredients. For example, add about one-third of the flour mixture, mix until just combined, then half of the milk, mix, then another third of flour, mix, remaining milk, mix, and finally the last third of flour, mixing until just combined.
- Mix Gently: Be careful not to overmix the batter once the flour is added. Overmixing can develop the gluten in the flour, leading to a tough cake. Mix only until no streaks of flour remain.
- Pour into Pan: Pour the cake batter evenly into the prepared 9×13 inch baking dish. Spread the batter gently with a spatula to create an even layer.
- Bake: Bake for 30-35 minutes, or until a wooden skewer or toothpick inserted into the center of the cake comes out clean. The top of the cake should be golden brown and spring back lightly when touched.
- Cooling: Once baked, remove the cake from the oven and let it cool in the baking dish on a wire rack for about 15-20 minutes. This allows the cake to set and prevents it from breaking when handled.
- Finish Cooling: If desired, you can carefully invert the cake onto the wire rack to cool completely, or simply let it finish cooling in the pan.
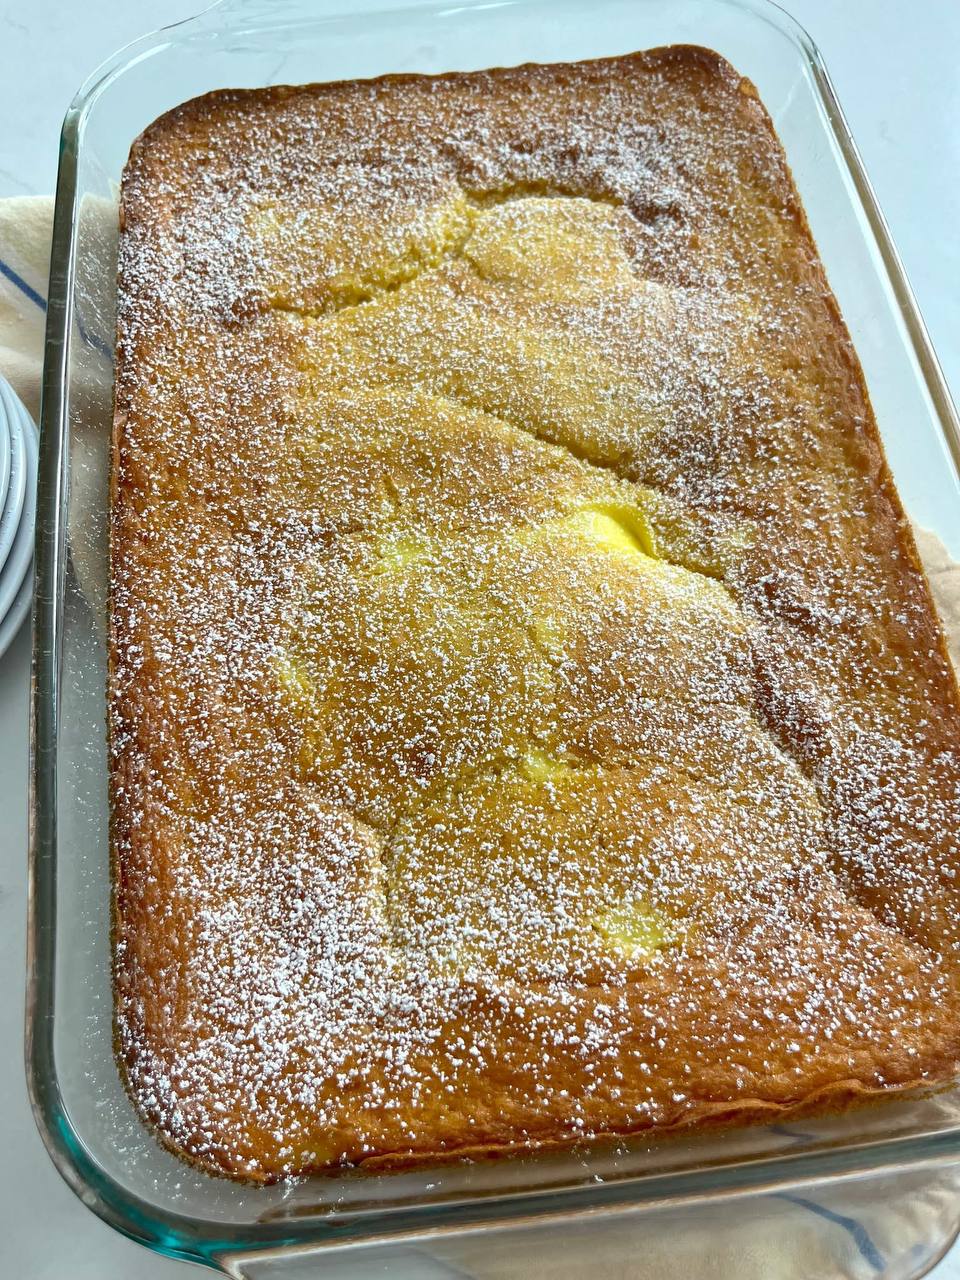
- Serve: Once completely cooled, dust generously with powdered sugar just before slicing and serving.
Cooking Tips and Variations
Achieving a perfect butter cake is all about attention to a few key details. Firstly, always ensure your butter and eggs are at room temperature. This isn’t just a suggestion; it’s crucial for proper emulsification. Room temperature butter creams beautifully with sugar, incorporating air that gives the cake its light texture, while cold butter can lead to a dense, heavy cake. Similarly, room temperature eggs integrate more smoothly into the batter, preventing a curdled appearance and ensuring a uniform crumb. Use good quality unsalted butter and pure vanilla extract for the best flavor; these are the stars of this simple cake, so don’t skimp on them. When measuring flour, spoon it into your measuring cup and level it off with a straight edge rather than scooping directly from the bag, which can compact the flour and lead to a dry cake.
Another critical tip is to avoid overmixing. Once you add the flour, mix the batter only until just combined. Overmixing develops gluten, making the cake tough and chewy instead of tender and moist. As soon as you see no more streaks of dry flour, stop mixing. For checking doneness, the toothpick test is your best friend. Insert a wooden skewer or toothpick into the center of the cake; if it comes out clean or with a few moist crumbs attached, the cake is ready. If it comes out with wet batter, continue baking for a few more minutes and test again.
While this vanilla butter cake is delicious on its own, it’s also a fantastic canvas for variations. For a citrus twist, add the zest of one lemon or orange to the butter and sugar mixture. This brightens the flavor beautifully. You could also fold in ½ cup of mini chocolate chips or sprinkles with the last addition of flour for a fun, kid-friendly version. For a nutty flavor, try adding ½ teaspoon of almond extract along with the vanilla. If you prefer a slightly richer texture, substitute half of the milk with buttermilk; the acidity in buttermilk can also contribute to a more tender crumb. Serve slices with fresh berries, a dollop of whipped cream, or a simple fruit compote to elevate the dessert. For an easy glaze, whisk together 1 cup of powdered sugar with 2-3 tablespoons of milk or lemon juice until smooth, then drizzle over the cooled cake.
Storage and Reheating
Proper storage is key to keeping your Simple Vanilla Butter Cake fresh and delicious for as long as possible. Once the cake has completely cooled to room temperature, it’s best stored in an airtight container. This prevents it from drying out and absorbing odors from your refrigerator. You can also wrap individual slices tightly in plastic wrap before placing them in the airtight container for even better preservation and easy grab-and-go portions. Stored at room temperature, the cake will stay fresh for 2-3 days. If you need to keep it longer, store it in the refrigerator, where it will last for up to 5-7 days. Remember that refrigeration can sometimes alter the texture of cakes, making them slightly drier, so bring it back to room temperature before serving for the best experience.
For longer storage, this butter cake freezes beautifully. Once completely cooled, wrap the entire cake (or individual slices) tightly in plastic wrap, then an additional layer of aluminum foil. Place the wrapped cake in a freezer-safe bag or container. It can be frozen for up to 2-3 months. To thaw, simply remove the cake from the freezer and let it sit at room temperature, still wrapped, for several hours or overnight until fully defrosted. Thawing it while wrapped helps to trap moisture and prevent it from drying out.
Reheating this butter cake is usually not necessary, as it’s best enjoyed at room temperature. However, if you prefer a warm slice, especially if you’re serving it with ice cream or a warm sauce, you can gently warm individual slices. Place a slice on a microwave-safe plate and heat for 15-30 seconds, or until just warm through. Be careful not to overheat, as this can dry out the cake. Alternatively, you can warm slices in a preheated oven at 250°F (120°C) for about 5-10 minutes, covered loosely with foil to prevent further browning and drying. Always ensure the cake is fully thawed before attempting to reheat it.
Frequently Asked Questions
Why do my butter cakes sometimes turn out dry or dense?
Dryness and density in butter cakes are often due to overmixing the batter or using ingredients that are too cold. Overmixing develops gluten in the flour, leading to a tough, dense texture. Mixing only until the ingredients are just combined is crucial. Additionally, ensure your butter and eggs are at room temperature. Cold butter doesn’t cream properly with sugar, which means less air is incorporated into the batter, resulting in a heavier, denser cake. Incorrect flour measurement (too much flour) can also contribute to a dry cake, so spoon and level your flour rather than scooping.
Can I make this butter cake dairy-free or gluten-free?
While this recipe is specifically designed for a classic butter cake with dairy, you can experiment with dairy-free alternatives. Use a high-quality plant-based butter substitute (stick form, not spread) and a dairy-free milk alternative like almond milk or soy milk. The texture might vary slightly but it can still be delicious. For gluten-free, substitute the all-purpose flour with a 1:1 gluten-free baking flour blend that contains xanthan gum. Again, the texture may be slightly different, but many gluten-free blends work very well in butter cake recipes.
How can I tell if my butter cake is fully baked without opening the oven too much?
The best way to tell if your butter cake is fully baked is by using the classic toothpick or wooden skewer test. Insert a toothpick into the very center of the cake; if it comes out clean or with a few moist crumbs attached, the cake is done. If it comes out with wet batter, continue baking for another 3-5 minutes and retest. You can also gently press the top of the cake with your fingertip; if it springs back, it’s usually a good sign. The edges should also be golden brown and pulling slightly away from the sides of the pan. Avoid opening the oven door too frequently during the first 20-25 minutes of baking, as this can cause the temperature to drop and the cake to sink.