Buttermilk Pancakes
Introduction
There are few things as comforting and universally loved as a stack of warm, fluffy pancakes. The aroma alone can transport you back to childhood mornings or lazy weekend brunches. While there are many pancake recipes out there, none quite capture the magic and delightful texture of a perfectly made buttermilk pancake. These aren’t just any pancakes; they’re an experience – a golden-brown canvas ready to be adorned with your favorite toppings, promising a start to your day that’s both satisfying and utterly delicious.
What sets buttermilk pancakes apart from their ordinary counterparts is a secret ingredient that’s not so secret: buttermilk itself! This humble dairy product introduces a subtle tang that beautifully balances the sweetness of the batter, creating a more complex and incredibly appealing flavor profile. Buttermilk isn’t just for taste; it’s a powerhouse for texture, reacting with baking soda to create an extraordinary lift, resulting in pancakes that are remarkably light, airy, and incredibly fluffy. Each bite is a testament to the simple elegance of this classic recipe, delivering a tender crumb that practically melts in your mouth.
Whether you’re planning a leisurely weekend breakfast, a festive brunch with friends, or simply craving a comforting treat, these buttermilk pancakes are surprisingly easy to whip up. With just a few common pantry staples and our straightforward instructions, you’ll be serving up stacks of golden perfection in no time. Get ready to impress your taste buds and those of your loved ones with these irresistible pancakes, perfectly complemented by a pat of melting butter, a generous drizzle of maple syrup, and a side of fresh, vibrant fruit.
Nutritional Information
Per serving (approximate values for 2 medium pancakes, without toppings):
- Calories: 280
- Protein: 8g
- Carbohydrates: 40g
- Fat: 10g
- Fiber: 2g
- Sodium: 450mg
Ingredients
- 1 ½ cups all-purpose flour
- 2 tablespoons granulated sugar
- 1 teaspoon baking powder
- ½ teaspoon baking soda
- ½ teaspoon salt
- 1 ¼ cups buttermilk, at room temperature
- 1 large egg, at room temperature
- 2 tablespoons unsalted butter, melted and slightly cooled, plus more for greasing the griddle
- 1 teaspoon vanilla extract (optional)
- For serving: Maple syrup, fresh strawberries, extra butter
Instructions
- In a large bowl, whisk together the all-purpose flour, granulated sugar, baking powder, baking soda, and salt. Make sure there are no lumps and the dry ingredients are well combined.
- In a separate medium bowl, whisk together the buttermilk, large egg, melted butter, and vanilla extract (if using) until thoroughly combined. It’s important for the buttermilk and egg to be at room temperature, as this helps create a smoother batter and more evenly cooked pancakes.
- Pour the wet ingredients into the bowl with the dry ingredients. Stir gently with a whisk or spatula until just combined. The batter will be lumpy, and that’s perfectly okay – in fact, it’s desired! Overmixing the batter will develop the gluten in the flour, leading to tough, chewy pancakes instead of light and fluffy ones. A few streaks of flour are acceptable.
- Allow the batter to rest for 5-10 minutes. This resting period allows the flour to fully hydrate and gives the baking powder and baking soda time to start working, which contributes to the pancakes’ impressive rise and tender texture.
- While the batter rests, heat a non-stick griddle or large frying pan over medium-low heat. It’s crucial to get the temperature right – too hot, and your pancakes will burn on the outside before cooking through; too cool, and they won’t brown properly or become fluffy. To test if the griddle is ready, sprinkle a few drops of water on the surface; they should sizzle and evaporate quickly.
- Lightly grease the griddle with a small amount of butter or cooking spray. If using butter, wipe off any excess with a paper towel to prevent burning.
- Pour about ¼ cup of batter for each pancake onto the hot griddle. Leave some space between each pancake to allow for spreading and easy flipping.
- Cook the pancakes for 2-3 minutes per side. You’ll know they’re ready to flip when bubbles start to appear on the surface of the pancake, and the edges look set and slightly dry. The underside should be golden brown.
- Using a thin spatula, carefully flip each pancake and cook for another 1-2 minutes on the second side, or until golden brown and cooked through. Avoid pressing down on the pancakes with your spatula, as this can press out the air and make them dense.
- Transfer the cooked pancakes to a plate. To keep them warm while you cook the remaining batter, you can place them on a baking sheet in a preheated oven set to its lowest temperature (around 200°F / 95°C).
- Repeat with the remaining batter, greasing the griddle lightly between batches if necessary.
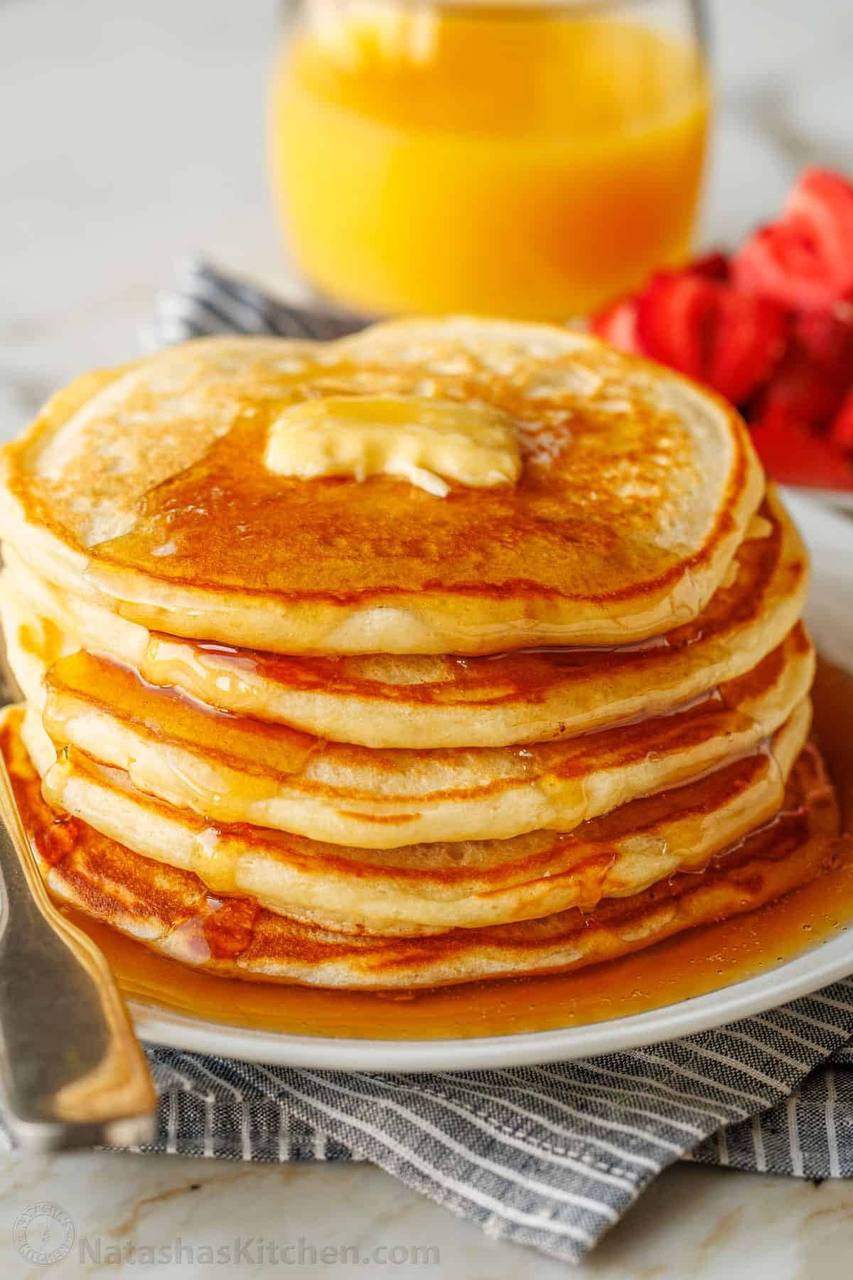
- Serve the warm buttermilk pancakes immediately, stacked high, with a generous pat of butter melting on top, a drizzle of maple syrup, and a side of fresh strawberries or your favorite fruit. A glass of orange juice makes the perfect accompaniment.
Cooking Tips and Variations
Achieving pancake perfection is all about understanding a few key principles. First and foremost, resist the urge to overmix your batter. Lumps are your friend here! Overmixing develops gluten, leading to tough pancakes. A few quick stirs until the wet and dry ingredients are just combined is all you need. The resting period for the batter is also crucial; it allows the flour to fully hydrate and the leavening agents to begin their work, resulting in a lighter and fluffier end product. Don’t skip it!
Temperature control is another secret weapon. A medium-low heat on your griddle is ideal. Too hot, and you’ll get burnt exteriors and raw centers. Too cool, and your pancakes will be pale and dense. Look for those tell-tale bubbles on the surface and set edges before flipping; this indicates the pancake is ready and will result in that beautiful golden-brown finish. And remember, flip only once! Constant flipping can deflate your pancakes and prevent them from cooking evenly.
While this classic recipe is divine on its own, don’t hesitate to get creative with variations. For a burst of fruit, fold in ½ cup of fresh blueberries or sliced bananas into the batter just before cooking. For a richer flavor, you can replace a tablespoon of the melted butter with brown butter. If you don’t have buttermilk on hand, you can make a substitute by adding 1 tablespoon of white vinegar or lemon juice to a measuring cup, then filling the rest with regular milk to make 1 ¼ cups. Let it sit for 5-10 minutes until it curdles slightly. For a touch of spice, add a pinch of cinnamon or nutmeg to the dry ingredients. Chocolate chip pancakes are always a hit; simply sprinkle a handful of chocolate chips onto the pancakes after pouring the batter onto the griddle, before flipping.
Storage and Reheating
These buttermilk pancakes are best enjoyed fresh off the griddle, but sometimes you might have leftovers, or you might want to make a big batch for quick breakfasts throughout the week. Properly stored, cooked pancakes can be a real time-saver!
To store leftover pancakes, allow them to cool completely to room temperature. This prevents condensation from forming and making them soggy. Once cooled, stack the pancakes with a piece of parchment paper or wax paper between each one to prevent sticking. Place the stack in an airtight container or a freezer-safe bag. They can be stored in the refrigerator for up to 3-4 days.
For longer storage, pancakes freeze beautifully. Again, ensure they are completely cool. Stack them with parchment paper in between, then place the stack in a freezer-safe bag or airtight container. They will keep well in the freezer for up to 2-3 months. Label the bag with the date so you know when they were made.
Reheating pancakes is simple and can be done in a few ways:
- Microwave: This is the quickest method for a single serving. Place 1-2 pancakes on a microwave-safe plate and heat for 30-60 seconds, or until heated through. Be careful not to overheat, as they can become rubbery.
- Toaster or Toaster Oven: For a slightly crisper exterior, pop frozen or refrigerated pancakes directly into a toaster or toaster oven on a medium setting for 1-3 minutes, or until warmed and lightly crispy.
- Oven: If you’re reheating a larger batch, preheat your oven to 350°F (175°C). Place the pancakes in a single layer on a baking sheet, cover loosely with foil to prevent drying out, and heat for 5-10 minutes, or until warmed through.
- Griddle/Frying Pan: For results closest to freshly made, reheat pancakes on a lightly greased griddle or frying pan over medium-low heat for 1-2 minutes per side, until warm and slightly golden.
No matter how you reheat them, these buttermilk pancakes will still be a delicious and convenient breakfast option!
Frequently Asked Questions
What if I don’t have buttermilk? Can I still make these pancakes?
Absolutely! While real buttermilk is best for flavor and texture, you can easily make a substitute at home. For 1 ¼ cups of buttermilk, simply pour 1 tablespoon of white vinegar or lemon juice into a liquid measuring cup, then fill the rest of the way with regular milk (dairy or non-dairy works). Stir it gently and let it sit for 5-10 minutes until it curdles and thickens slightly. This “sour milk” will react with the baking soda similarly to buttermilk, giving you fluffy pancakes.
Why are my pancakes not fluffy? They come out flat and dense.
The most common culprit for flat pancakes is overmixing the batter. When you overmix, you develop the gluten in the flour, which makes the pancakes tough and prevents them from rising. Another reason could be expired leavening agents (baking powder or baking soda). Always check their freshness. Lastly, ensure your griddle isn’t too hot, as this can cook the exterior too quickly before the leavening agents have a chance to properly lift the pancake.
How do I know when to flip the pancakes?
The perfect time to flip is when you see bubbles forming and popping on the surface of the pancake, and the edges appear set and slightly dry. The underside should be a beautiful golden brown. Resist the urge to peek or flip too early, as this can disrupt the cooking process and prevent an even rise.
Can I make the batter ahead of time?
While it’s generally best to cook buttermilk pancakes with freshly made batter for optimal fluffiness (due to the active leavening agents), you can prepare the dry ingredients and wet ingredients separately and store them in the refrigerator overnight. Then, combine them just before cooking. If you combine the full batter and store it, the leavening agents will lose some of their potency, resulting in slightly less fluffy pancakes, but they will still be delicious.