Introduction
Oh, cauliflower. For so long, it was the bane of my existence, especially when it came to my precious grandchildren. They’d eye it with suspicion, push it around their plates, and sometimes, if I was lucky, offer a polite but firm “no thank you.” I tried everything – steaming, mashing, even hiding it in sauces. Nothing worked. It was a culinary battle I seemed destined to lose, until one glorious day, something truly magical happened. I stumbled upon a recipe, tweaked it, experimented, and created a cauliflower dish that doesn’t just get eaten; it gets devoured! I’m talking about a full-on, crazy-eyed, “Grandma, can I have more?!” kind of love affair. This isn’t just a side dish; it’s a game-changer, a veggie victory, and honestly, the only way my grandkids will willingly, happily, and enthusiastically eat cauliflower.
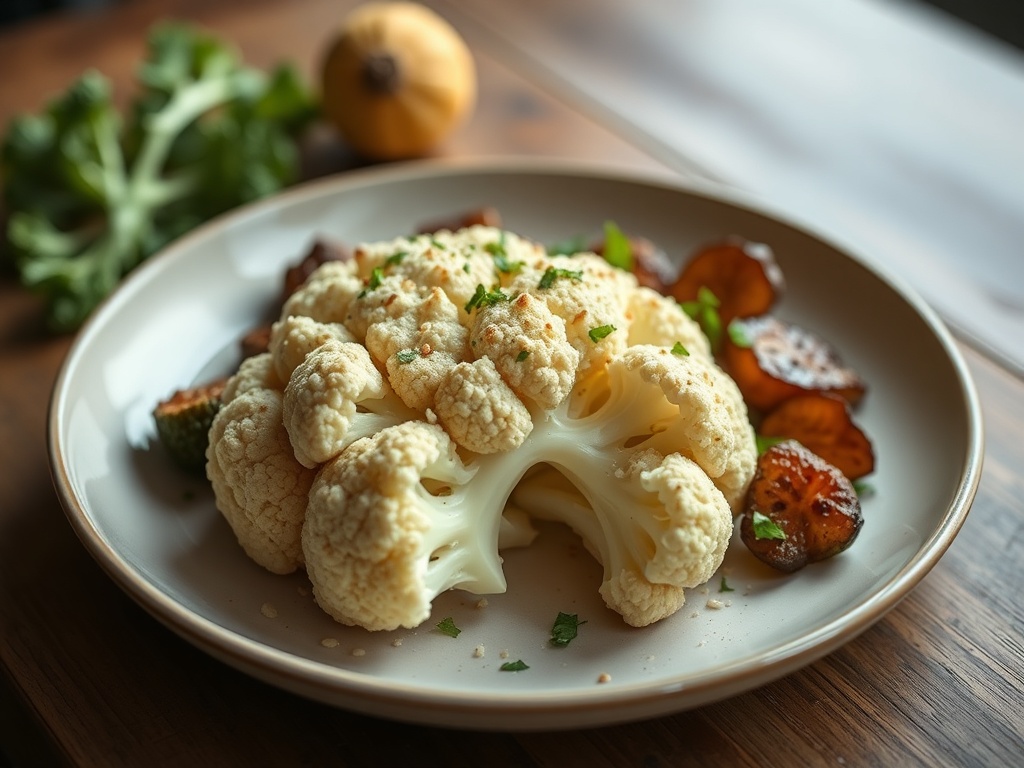
What makes this cauliflower so revolutionary, you ask? It’s all about the transformation. We’re taking that often-maligned, sometimes-bland vegetable and turning it into something utterly irresistible. Imagine tender-crisp florets, kissed with a savory, slightly sweet, and unbelievably addictive crust. It’s got an umami depth that makes you crave another bite, a subtle tang that brightens every mouthful, and a texture that’s satisfyingly crunchy on the outside and wonderfully tender within. This isn’t your grandma’s boiled cauliflower – unless I’m your grandma, in which case, this IS my cauliflower, and it’s going to blow your mind and, more importantly, the minds of any picky eaters at your table. It’s the kind of dish that makes you forget you’re eating a vegetable, and instead, you’re just enjoying something incredibly delicious.
My motivation for developing this recipe was simple: I wanted to sneak more wholesome goodness into my grandkids’ diets without them even realizing it. What started as a “happy accident” in my kitchen, combining a few favorite flavors and a high-heat roasting technique, quickly became a weekly staple. The first time my grandson, Leo, who previously considered cauliflower his sworn enemy, asked for a second helping, I nearly fell out of my chair. Now, when I tell them “cauliflower for dinner,” there are cheers, not groans. This recipe is proof that with a little culinary creativity, even the most stubborn veggie-skeptics can be won over. Get ready to witness a cauliflower craze in your own home!
Nutritional Information
Per serving (approximate values):
- Calories: 185
- Protein: 7g
- Carbohydrates: 15g
- Fat: 12g
- Fiber: 5g
- Sodium: 310mg
Ingredients
- 1 large head cauliflower (about 2-2.5 lbs), cut into bite-sized florets
- 3 tablespoons olive oil
- 1 tablespoon nutritional yeast (optional, but highly recommended for umami)
- 1 teaspoon smoked paprika
- 1/2 teaspoon garlic powder
- 1/2 teaspoon onion powder
- 1/4 teaspoon ground cumin
- 1/4 teaspoon turmeric powder (for color and subtle earthy notes)
- 1/4 teaspoon black pepper, freshly ground
- 1/4 teaspoon sea salt (or to taste)
- 1 tablespoon maple syrup or honey (for caramelization and sweetness)
- 1 tablespoon apple cider vinegar or lemon juice (for brightness)
- 2 tablespoons fresh parsley, chopped (for garnish, optional)
Instructions
- Preheat your oven to 400°F (200°C). Line a large baking sheet (or two, if needed) with parchment paper for easy cleanup and to prevent sticking.
- Prepare the cauliflower: Wash the cauliflower head thoroughly and pat it very dry. It’s crucial for crispiness that the florets are as dry as possible. Cut the cauliflower into uniform, bite-sized florets. Aim for pieces roughly 1-1.5 inches in size to ensure even cooking.
- In a large mixing bowl, combine the olive oil, nutritional yeast (if using), smoked paprika, garlic powder, onion powder, ground cumin, turmeric powder, black pepper, and sea salt. Whisk these ingredients together until well combined, forming a thick paste-like coating.
- Add the cauliflower florets to the bowl with the spice mixture. Toss vigorously until every floret is evenly coated. Use your hands to really get in there and ensure the spices adhere well to all surfaces.
- Arrange the seasoned cauliflower florets in a single layer on the prepared baking sheet(s). Make sure not to overcrowd the pan. If the florets are too close together, they will steam instead of roast, leading to a softer texture rather than crispy. Use two baking sheets if necessary, giving each floret plenty of space.
- Roast the cauliflower for 15 minutes.
- Remove the baking sheet from the oven. Drizzle the maple syrup (or honey) and apple cider vinegar (or lemon juice) over the cauliflower. Toss gently to redistribute the florets and ensure they are coated with the added liquids. The sugars in the syrup will aid in caramelization, while the acid brightens the flavors.
- Return the cauliflower to the oven and continue roasting for another 15-20 minutes, or until the cauliflower is tender-crisp and deeply golden brown, with some deliciously charred edges. Keep a close eye on it during the last few minutes to prevent burning, as ovens can vary. The florets should be fork-tender but still offer a slight resistance.
- Once cooked to perfection, remove the cauliflower from the oven.
- If desired, sprinkle with fresh chopped parsley for a burst of freshness and color.
- Serve immediately as a delightful side dish, a healthy snack, or even as a topping for grain bowls or salads. Enjoy the crazy-good cauliflower!
Cooking Tips and Variations
To achieve the best results with this “crazy” cauliflower, a few key techniques are essential. First and foremost, thoroughly drying your cauliflower florets after washing is non-negotiable. Excess moisture will steam the cauliflower rather than allowing it to roast and caramelize, preventing that coveted crispy exterior. A salad spinner works wonders here, or simply pat them dry with paper towels until no visible moisture remains. Secondly, don’t overcrowd your baking sheet. This is a common mistake that leads to soggy cauliflower. Give each floret its space so the hot air can circulate around it, ensuring even cooking and browning. If you have a large head of cauliflower, it’s always better to use two baking sheets than to cram everything onto one. High heat is your friend; 400°F (200°C) is ideal for achieving that beautiful caramelization and tender-crisp texture. Flipping the florets halfway through the roasting process, after adding the maple syrup and vinegar, ensures all sides get a chance to brown and develop that irresistible crust.
This recipe is also incredibly versatile, allowing for endless customization to suit your taste or what you have on hand. For those who love a little heat, a pinch of cayenne pepper or red pepper flakes added with the other spices will give it a nice kick. If you’re out of smoked paprika, regular paprika can be used, though you’ll miss a bit of that smoky depth. Feel free to experiment with different spice blends – a touch of curry powder could add an interesting twist, or an Italian herb blend for a Mediterranean flair. For an extra layer of umami and richness, sprinkle some grated Parmesan cheese over the cauliflower during the last 5-10 minutes of roasting. The cheese will melt and become wonderfully crisp. If you prefer a nuttier flavor, a tablespoon of tahini whisked into the olive oil mixture can add a creamy depth. And don’t forget fresh herbs! While parsley is a classic, fresh cilantro, chives, or even a sprinkle of dill can add a vibrant finish and different flavor profiles. A squeeze of lime juice instead of lemon can also bring a different kind of brightness. The beauty of this recipe is its adaptability; once you master the basic technique, the flavor possibilities are endless!
Storage and Reheating
This roasted cauliflower is definitely at its peak when served fresh, straight from the oven, when the florets are wonderfully crispy and the flavors are vibrant. However, if you do find yourself with leftovers, they can be stored and reheated. To store, allow the cauliflower to cool completely to room temperature. Transfer the cooled florets to an airtight container and refrigerate for up to 3-4 days. While the texture won’t be quite as crispy as when it was first made, the flavors will still be delicious.
When it comes to reheating, avoid the microwave if you want to retain any semblance of crispiness. Microwaving will steam the cauliflower, making it soft and potentially soggy. The best way to reheat is in an oven or an air fryer. To reheat in the oven, preheat your oven to 375°F (190°C). Spread the leftover cauliflower in a single layer on a baking sheet. Reheat for 8-12 minutes, or until heated through and lightly re-crisped. For an air fryer, preheat to 350°F (175°C) and air fry for 5-7 minutes, shaking the basket halfway through, until hot and crispy again. You can also quickly pan-fry the cold florets in a hot, lightly oiled skillet for a few minutes until warmed through and re-crisped.
Frequently Asked Questions
Why isn’t my cauliflower getting crispy?
The most common reasons for non-crispy cauliflower are excess moisture and overcrowding the baking sheet. Ensure your florets are thoroughly dry after washing, even patting them with paper towels. Also, spread the cauliflower in a single layer on the baking sheet, leaving space between florets. If the pan is too crowded, the cauliflower will steam instead of roast, preventing it from getting crispy.
Can I make this recipe ahead of time?
While the cauliflower is best enjoyed fresh, you can prep some components ahead. You can cut the cauliflower into florets and store them in an airtight container in the refrigerator for up to 2-3 days. You can also mix the dry spices together in a small bowl. When you’re ready to cook, simply combine the oil, wet ingredients, and cauliflower with the spice blend and proceed with roasting. Roasting itself should ideally be done just before serving.
What if I don’t have nutritional yeast?
Nutritional yeast adds a fantastic cheesy, umami depth that really elevates this dish, making it more addictive. If you don’t have it, the recipe will still be delicious, but it might lack that specific “crazy” flavor boost. If you’re not vegan, a sprinkle of finely grated Parmesan cheese during the last few minutes of roasting can offer a similar umami kick.
Can I use frozen cauliflower for this recipe?
While fresh cauliflower is highly recommended for the best texture and crispiness, you can use frozen cauliflower in a pinch. However, you’ll need to adjust the process slightly. Do not thaw the frozen cauliflower; roast it directly from frozen. It will release more water, so it’s even more crucial to spread it in a single layer and potentially roast for a longer time, perhaps 30-40 minutes total, to allow the moisture to evaporate and for the florets to brown. The texture might be slightly softer than with fresh cauliflower, but the flavors will still be great.