Instructions
- Preheat your oven to 350°F (175°C). Grease and flour a 9×13 inch baking pan, or line with parchment paper.
- In a medium bowl, whisk together the all-purpose flour, baking powder, baking soda, and salt. Set aside.
- In a large bowl, using an electric mixer, cream together the softened unsalted butter and granulated sugar until light and fluffy, about 3-5 minutes.
- Add the eggs one at a time, beating well after each addition. Scrape down the sides of the bowl as needed.
- Stir in the vanilla extract and coconut extract until just combined.
- In a separate small bowl, whisk together the full-fat coconut milk and buttermilk.
- Gradually add the dry ingredients to the wet ingredients in three additions, alternating with the coconut milk mixture, beginning and ending with the dry ingredients. Mix on low speed until just combined after each addition, being careful not to overmix.
- Pour the cake batter into the prepared baking pan and spread evenly.
- Bake for 30-35 minutes, or until a wooden skewer inserted into the center comes out clean.
- Remove the cake from the oven and let it cool in the pan on a wire rack for 15 minutes. Then, carefully invert the cake onto the wire rack to cool completely.
- While the cake cools, prepare the Coconut Cream Filling. Open the chilled cans of full-fat coconut milk without shaking them. Scoop out the thick coconut cream that has solidified at the top into a large mixing bowl. Reserve the clear liquid for another use or discard.
- Add the chilled heavy cream, sifted powdered sugar, vanilla extract, and coconut extract to the bowl with the coconut cream.
- Using an electric mixer with a whisk attachment, beat the mixture on high speed until light, fluffy, and stiff peaks form. Be careful not to overbeat, as it can separate.
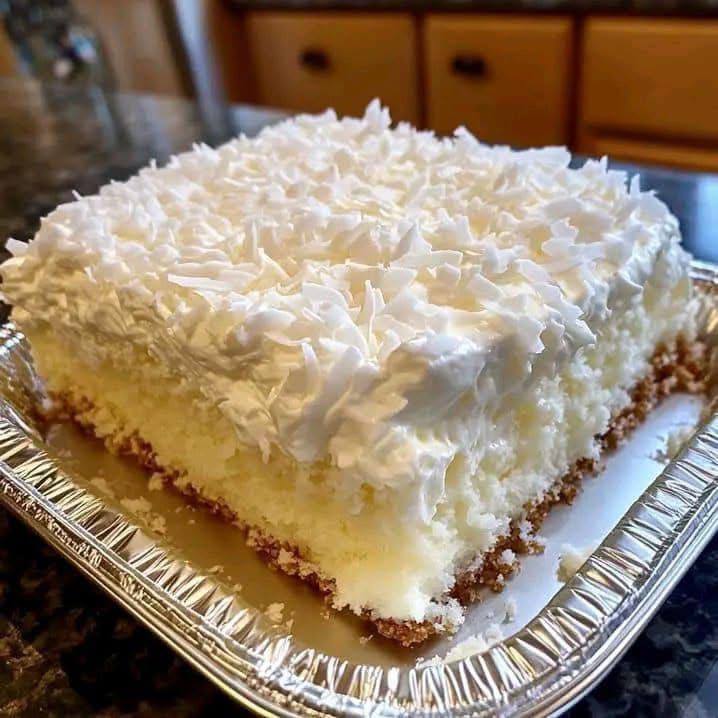
- Once the cake is completely cooled, spread the entire coconut cream filling evenly over the top of the cake.
- Generously sprinkle the sweetened shredded coconut over the top of the cream filling, pressing gently to adhere.
- Cover the cake loosely with plastic wrap and refrigerate for at least 2 hours before serving, or preferably overnight, to allow the flavors to meld and the cream to set.
Cooking Tips and Variations
To achieve the most incredibly moist cake, it’s crucial not to overmix your batter. Overmixing develops the gluten in the flour too much, leading to a tough, dry cake. Mix just until the ingredients are combined, leaving a few small lumps is perfectly fine. Using room temperature ingredients for the cake batter, especially the butter and eggs, helps them emulsify better, creating a smoother, more uniform batter and a more tender crumb. For an extra boost of moisture and a slightly tangy flavor that complements the coconut beautifully, do not skip the buttermilk. If you don’t have buttermilk on hand, you can make a quick substitute by adding 1 tablespoon of white vinegar or lemon juice to a liquid measuring cup, then filling the rest with regular milk to equal ½ cup. Let it sit for 5 minutes before using.
Working with coconut cream for the filling requires a bit of patience and proper preparation. The key is to chill your full-fat coconut milk cans in the refrigerator overnight (or at least 8 hours). This allows the thick, creamy coconut solids to separate and rise to the top, leaving the watery liquid at the bottom. When you open the can, be gentle and scoop out only the thick cream, leaving the liquid behind. If your kitchen is warm, you might want to chill your mixing bowl and whisk attachment for 10-15 minutes before whipping the cream, as this helps the cream whip up faster and hold its shape better. When whipping the coconut cream and heavy cream together, watch it carefully. It can go from perfectly whipped to slightly grainy if overbeaten. Stop once stiff peaks form.
For an elevated flavor and texture experience, consider toasting a portion of your shredded coconut topping. Spread about half a cup of the shredded coconut on a baking sheet and toast in a preheated 300°F (150°C) oven for 5-10 minutes, stirring occasionally, until golden brown and fragrant. Let it cool completely before sprinkling on the cake. This adds a lovely nutty depth and an appealing crunch. You can also vary the extracts; try adding a touch of almond extract to the cake batter for a subtle complexity, or a hint of rum extract for a more tropical, boozy note. For a truly tropical twist, consider folding in 1 cup of finely diced, well-drained canned pineapple into the cake batter before baking. This adds a burst of tangy sweetness that pairs wonderfully with the coconut. If you’re looking for an even richer filling, you can fold in a small amount of cream cheese (softened) into your whipped coconut cream for a cheesecake-like texture and flavor.
Storage and Reheating
This Coconut Cream Dream Cake is best enjoyed chilled, and its flavors tend to improve even more after a day in the refrigerator. To store, cover the cake loosely with plastic wrap or place it in an airtight cake carrier. It will keep well in the refrigerator for up to 3-4 days. Because of its creamy topping, this cake does not hold up well at room temperature for extended periods, especially in warm climates. Always keep it refrigerated.
Reheating is generally not recommended for this type of cake, as the whipped coconut cream topping can lose its texture and become watery when heated. The cake is designed to be served cold or at cool room temperature. If you prefer your cake slightly less cold, you can remove a slice from the refrigerator about 15-20 minutes before serving to allow it to come closer to room temperature, but avoid prolonged exposure to warmth.
Frequently Asked Questions
What kind of coconut milk should I use for the filling?
You absolutely must use full-fat canned coconut milk for the filling, not the refrigerated beverage kind or light coconut milk. The full-fat version contains the necessary solids that separate and firm up when chilled, allowing you to scoop out the thick cream that is essential for whipping into a stable, fluffy filling. Ensure the cans are chilled in the refrigerator overnight for the best results.
Can I make this cake ahead of time for an event?
Yes, this Coconut Cream Dream Cake is an excellent make-ahead dessert! In fact, it often tastes even better the next day as the flavors have more time to meld and the coconut cream topping fully sets. You can bake the cake layers up to 2 days in advance, cool them completely, wrap them tightly in plastic wrap, and store them at room temperature or in the refrigerator. Prepare the filling and assemble the cake the day before your event, then refrigerate it overnight. This allows the cake to absorb some of the moisture from the filling, resulting in an incredibly tender and flavorful dessert.
My coconut cream filling isn’t whipping up properly. What went wrong?
There are a few common reasons why your coconut cream filling might not be whipping correctly. The most crucial factor is ensuring your full-fat coconut milk was thoroughly chilled overnight, allowing the thick cream to separate. If the cream isn’t firm enough, it won’t whip. Also, ensure your heavy cream is very cold. Overbeating can also cause the mixture to separate or become grainy, so stop once stiff peaks form. If your kitchen is very warm, try chilling your mixing bowl and whisk attachment for 15 minutes before you start whipping.
Can I make this cake gluten-free or vegan?
Making the cake gluten-free is fairly straightforward by substituting the all-purpose flour with a high-quality 1:1 gluten-free baking flour blend that contains xanthan gum. For a vegan version, you would need to make a few more substitutions: use a flax egg or commercial egg replacer for the eggs, a plant-based butter alternative, and ensure your buttermilk substitute is made with plant-based milk (e.g., almond milk with lemon juice). The coconut cream filling is naturally vegan, but you’d need to use a vegan heavy cream alternative if you’re combining it with heavy cream, or simply increase the amount of whipped coconut cream. Always check ingredient labels to ensure they are vegan-friendly.