Introduction
As autumn leaves begin to fall and a crisp chill fills the air, there’s one ingredient that truly embodies the spirit of the season: pumpkin! While canned pumpkin puree is readily available, nothing quite compares to the vibrant flavor, smooth texture, and sheer satisfaction of making your own. This easy homemade pumpkin puree recipe isn’t just about crafting an ingredient; it’s about elevating your fall baking and cooking to a whole new level, free from additives and bursting with authentic pumpkin goodness.
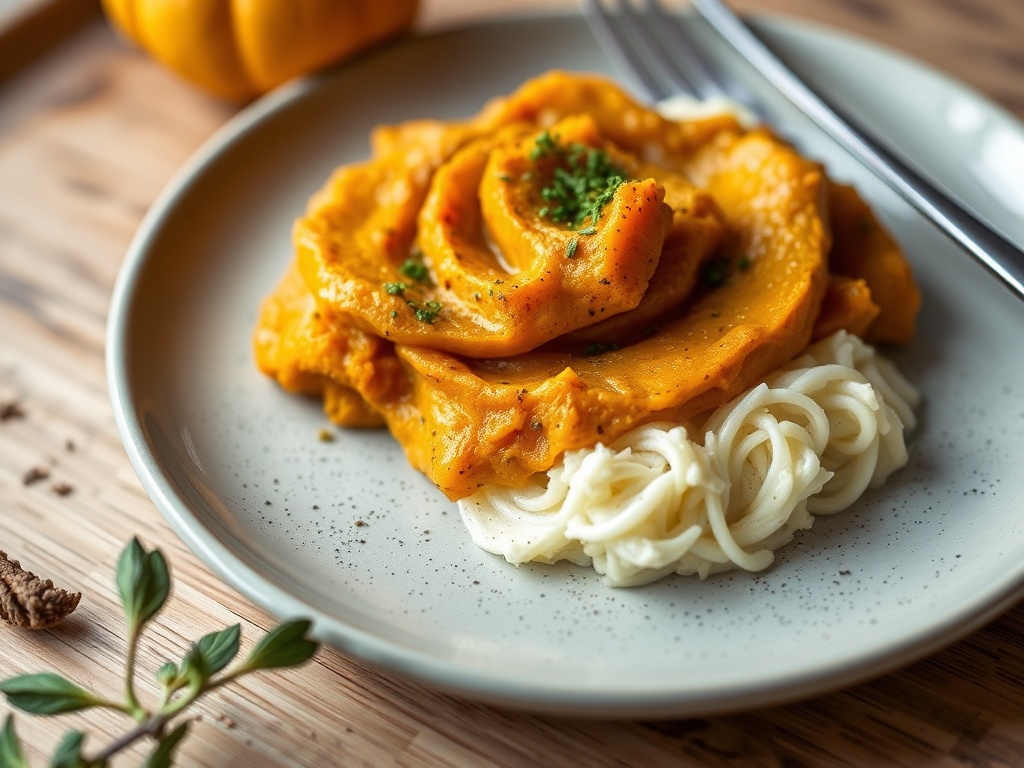
Imagine the rich aroma filling your kitchen as a fresh pumpkin roasts, transforming into a silky-smooth puree that’s perfect for everything from classic pumpkin pies to savory soups. Making your own pumpkin puree is surprisingly simple, incredibly rewarding, and offers unparalleled control over the quality and taste of your dishes. It’s a fundamental step that unlocks a world of delicious possibilities, ensuring your pumpkin-centric creations are as fresh and flavorful as possible.
Forget the watery, sometimes bland, taste of store-bought cans. Our method focuses on roasting a sweet “Sugar Pie” pumpkin, which caramelizes its natural sugars, yielding a deeply flavorful and naturally sweet puree that will make all your fall recipes shine. Whether you’re a seasoned baker or a curious beginner, this guide will walk you through every step, ensuring you achieve perfect, velvety pumpkin puree every time. Let’s get started!
Nutritional Information
Per serving (approximate values for 1/2 cup puree):
- Calories: 40
- Protein: 1g
- Carbohydrates: 10g
- Fat: 0g
- Fiber: 3g
- Sodium: 2mg
Ingredients
- 1 medium Sugar Pie Pumpkin (approx. 2-3 pounds)
- Water (optional, for steaming/boiling alternative)
Instructions
- Preheat Oven: Preheat your oven to 400°F (200°C). Line a baking sheet with parchment paper for easy cleanup, if desired.
- Prepare Pumpkin: Wash the exterior of the pumpkin thoroughly and pat it dry.
- Carefully Cut Pumpkin: Place the pumpkin on a sturdy cutting board. Using a large, sharp knife, carefully cut the pumpkin in half. It can be tough, so ensure the pumpkin is stable. A good technique is to start by piercing the skin, then gently rocking the knife back and forth while applying pressure.
- Scoop Out Seeds: Using a large spoon or an ice cream scoop, thoroughly scrape out all the seeds and stringy fibrous bits from both halves of the pumpkin. Don’t discard the seeds; you can clean and roast them later for a delicious snack!
- Roast Pumpkin (Recommended Method): Place the pumpkin halves cut-side down on the prepared baking sheet. Roasting caramelizes the sugars, enhancing the flavor.
- Bake Until Tender: Roast in the preheated oven for 45-60 minutes, or until the pumpkin flesh is very tender when pierced with a fork. The skin may appear slightly browned or shriveled.
- Cool Slightly: Once tender, carefully remove the baking sheet from the oven. Let the pumpkin halves cool on the baking sheet for at least 15-20 minutes, or until they are cool enough to handle.
- Scoop Out Flesh: Once cooled, use a spoon to scoop the soft, cooked pumpkin flesh away from the skin. Discard the skin. Ensure you only scoop the soft flesh and avoid any hard, uncooked bits near the skin.
- Puree Until Smooth: Transfer the cooked pumpkin flesh to a food processor or a high-speed blender. Process until completely smooth and creamy. If you don’t have a food processor or blender, you can use an immersion blender or a potato masher for a slightly chunkier puree.
- Optional Straining for Thicker Puree: If your puree seems too watery (this is less common with roasting but can happen), or if you desire an extra-thick puree for specific recipes like pumpkin pie, place a fine-mesh sieve over a large bowl and line it with cheesecloth. Pour the puree into the sieve and let it drain for 30-60 minutes, or even longer in the refrigerator, gently pressing occasionally to extract excess liquid.
- Cool Completely: Allow the pumpkin puree to cool completely to room temperature before storing.
- Store: Transfer the cooled puree to airtight containers or freezer-safe bags.
Cooking Tips and Variations
Choosing the Right Pumpkin: Always opt for “Sugar Pie” or “Pie Pumpkins” for the best results. These smaller pumpkins are specifically bred for cooking, offering sweeter, less fibrous flesh with lower water content compared to larger carving pumpkins. Avoid using carving pumpkins as they are watery and bland.
Safety First When Cutting: Cutting a pumpkin can be challenging. Use a sharp, sturdy knife and always place the pumpkin on a stable, flat surface. If you find it too difficult to cut raw, you can carefully pierce the pumpkin several times with a fork and microwave it for 3-5 minutes to slightly soften the skin before cutting.
Don’t Waste the Seeds: After scooping out the seeds, separate them from the stringy bits, rinse them clean, and pat them dry. Toss them with a little olive oil, salt, and your favorite spices (like paprika, garlic powder, or even cinnamon sugar) and roast them alongside the pumpkin or separately until golden brown and crunchy for a delicious snack.
Roasting for Superior Flavor: While steaming or boiling is faster, roasting is highly recommended. The dry heat of the oven caramelizes the pumpkin’s natural sugars, intensifying its flavor and creating a richer, deeper taste that canned puree simply cannot match. It also results in a naturally thicker puree.
Alternative Cooking Method (Steaming/Boiling): If you’re short on time, you can steam or boil the pumpkin. Cut the pumpkin into smaller 1-2 inch cubes after deseeding and peeling. Steam over boiling water or boil in lightly salted water until fork-tender. This method is faster but can yield a more watery puree that may require more draining.
Achieving the Perfect Texture: For the smoothest, most velvety puree, a food processor or high-speed blender is your best friend. Continue processing until absolutely no lumps remain. An immersion blender also works well. If you prefer a slightly rustic or chunkier texture, a sturdy potato masher will do the trick.
Thickening Watery Puree: If your puree (especially if steamed or boiled) seems too thin, you have a couple of options. You can place it in a saucepan over low heat and gently simmer, stirring frequently, to allow some of the excess moisture to evaporate. Alternatively, using a fine-mesh sieve lined with cheesecloth to drain the puree for 30 minutes to an hour will remove significant liquid, resulting in a much thicker consistency, ideal for pies.
Flavor Boost: A tiny pinch of salt (about 1/4 teaspoon per 2-3 cups of puree) added during the pureeing process can subtly enhance the pumpkin’s natural sweetness and overall flavor. This is optional but often recommended by chefs.
Batch Cooking for Convenience: When pumpkins are in season and often on sale, consider buying several and making a large batch of puree. This allows you to stock your freezer for year-round baking and cooking, ensuring you always have delicious, homemade pumpkin puree on hand.
No Added Spices: Remember, homemade pumpkin puree is plain. This is a huge advantage as it gives you complete control over the flavor profile of your final dish. You can add pumpkin pie spice for sweet treats or savory herbs and spices for soups and stews. Canned “pumpkin pie filling” is pre-spiced and should not be used interchangeably with plain pumpkin puree.
Alternative Cooking Methods (Instant Pot/Slow Cooker): For a hands-off approach, you can cook pumpkin in an Instant Pot or slow cooker. For an Instant Pot, place pumpkin halves (cut-side up) on a trivet with 1 cup of water, pressure cook on high for 10-15 minutes, then natural release. For a slow cooker, place halves cut-side down with a small amount of water (1/2 cup) and cook on high for 2-4 hours or low for 4-8 hours until tender.
Storage and Reheating
Refrigeration: Once your homemade pumpkin puree has cooled completely, transfer it to an airtight container. It will keep fresh in the refrigerator for 5-7 days. Always label your containers with the date for easy tracking.
Freezing for Long-Term Storage: Freezing is an excellent way to preserve homemade pumpkin puree for extended periods. It can last up to 6-12 months in the freezer without significant loss of quality.
- Portioning: For convenience, freeze the puree in usable portions. Ice cube trays are perfect for small amounts (great for smoothies or baby food). For larger portions, measure out 1-cup or 2-cup increments into freezer-safe bags or containers.
- Freezer Bags: If using freezer bags, fill them, press out as much air as possible, and flatten them before freezing. This saves space and allows for faster thawing.
- Labeling: Always label your frozen puree with the date it was made and the quantity (e.g., “Pumpkin Puree – 1 cup – 10/25/23”).
Thawing Frozen Puree:
- Refrigerator Thaw: The best and safest way to thaw frozen pumpkin puree is to transfer it from the freezer to the refrigerator and let it thaw slowly overnight.
- Cold Water Bath: For quicker thawing, place the sealed freezer bag of puree into a bowl of cold water, changing the water every 30 minutes until thawed.
- Microwave: You can also thaw frozen puree in the microwave using the defrost setting, stirring occasionally. Be careful not to cook it.
- Note on Consistency: After thawing, homemade pumpkin puree might appear slightly more watery than when it was fresh. This is normal. If using it for a recipe where thickness is crucial (like pie), you can gently simmer it in a saucepan over low heat to reduce some of the moisture, or drain it through a fine-mesh sieve lined with cheesecloth for 30-60 minutes.
Reheating: If you’re using the puree in a hot dish like soup or sauce, it will simply heat up as part of the cooking process. If you need to reheat it on its own, you can do so gently on the stovetop over low heat, stirring frequently, or in the microwave in short bursts until warmed through.
Frequently Asked Questions
What kind of pumpkin should I use for puree?
The best pumpkins for making puree are “Sugar Pie” or “Pie Pumpkins.” These are smaller, typically weighing 2-5 pounds, and have a sweeter, denser, and less stringy flesh than the larger carving pumpkins. Avoid using carving pumpkins as they are watery, bland, and not suitable for cooking.
Can I make pumpkin puree without a food processor or blender?
Yes, you can! While a food processor or high-speed blender will give you the smoothest, most consistent puree, you can achieve a decent puree with a sturdy potato masher. For a smoother result with a masher, you might need to press the mashed pumpkin through a fine-mesh sieve to remove any small lumps. The texture will be slightly coarser than a machine-processed puree, but still perfectly delicious for many recipes.
How much puree does one pumpkin yield?
A typical 2-3 pound Sugar Pie pumpkin will generally yield about 1.5 to 2 cups of finished pumpkin puree. The exact amount can vary slightly depending on the pumpkin’s specific size, water content, and how thoroughly you scrape out the flesh.
Why is my homemade pumpkin puree more watery than canned pumpkin?
Homemade pumpkin puree can sometimes be more watery than store-bought canned pumpkin because commercially produced purees often undergo a dehydration process to remove excess moisture. If your homemade puree is too watery, especially if you boiled or steamed the pumpkin, you can easily thicken it. Place the puree in a saucepan over low heat and simmer gently, stirring frequently, until some of the moisture evaporates. Alternatively, you can drain the puree through a fine-mesh sieve lined with cheesecloth for 30-60 minutes to allow excess liquid to drip away.
While canned pumpkin puree and homemade pumpkin puree are often used interchangeably in recipes, it’s important to note that canned pumpkin is typically much thicker and has a more consistent texture due to industrial processing. Homemade puree can vary more in consistency. If a recipe specifically calls for canned pumpkin and relies heavily on its thickness (like a very firm pumpkin pie), you might need to adjust your homemade puree’s consistency by draining it or reducing it on the stovetop. For most recipes, however, the difference is negligible, and the superior flavor of homemade shines through.