Instructions
- Prepare the Custard Base: In a medium saucepan, combine the heavy cream, whole milk, granulated sugar, and salt. If using a vanilla bean, add the scraped seeds and the pod to the mixture. Heat over medium heat, stirring occasionally, until the sugar dissolves and the mixture just begins to simmer around the edges. Do not let it boil vigorously. Remove from heat.
- Temper the Egg Yolks: In a separate medium bowl, whisk the egg yolks until they are light yellow and slightly thickened. Slowly, and in a steady stream, ladle about ½ cup of the hot cream mixture into the egg yolks, whisking constantly. This process, called tempering, prevents the eggs from scrambling.
- Combine and Thicken: Gradually pour the tempered egg yolk mixture back into the saucepan with the remaining hot cream, whisking continuously. Return the saucepan to low-medium heat. Cook, stirring constantly with a wooden spoon or spatula, until the mixture thickens enough to coat the back of the spoon (it should leave a clear path when you run your finger across it). This usually takes about 8-12 minutes. The temperature should reach between 170°F and 175°F (77°C-79°C). Do NOT let the custard boil, or the eggs will curdle.
- Strain and Chill: Immediately remove the saucepan from the heat. If using a vanilla bean pod, remove it now. Strain the custard through a fine-mesh sieve into a clean bowl. This step ensures a silky-smooth texture by catching any tiny bits of cooked egg. Stir in the vanilla extract at this stage if you are not using a vanilla bean.
- Chill Thoroughly: Place the bowl of custard over an ice bath (a larger bowl filled with ice and a little water) for about 10-15 minutes, stirring occasionally, to help it cool down quickly. Once cooled, cover the bowl with plastic wrap, pressing the wrap directly onto the surface of the custard to prevent a skin from forming. Refrigerate for at least 4 hours, or preferably overnight, until the base is completely chilled (ideally 40°F/4°C or colder). This chilling step is crucial for the best texture.
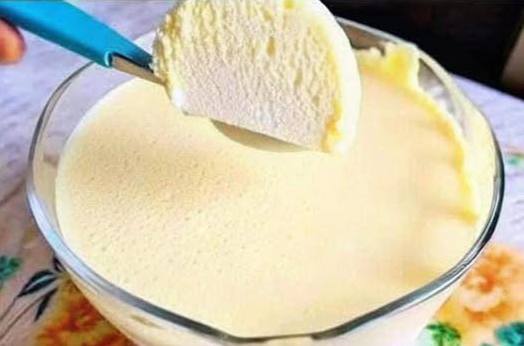
- Churn the Ice Cream: Once the base is thoroughly chilled, pour it into your ice cream maker’s frozen bowl. Churn according to the manufacturer’s instructions. This typically takes 20-30 minutes, depending on your machine. The ice cream will resemble soft-serve consistency when finished churning.
- Freeze for Firmness: Transfer the freshly churned ice cream to an airtight container. Press a piece of plastic wrap directly onto the surface of the ice cream to help prevent ice crystals and freezer burn. Cover the container and freeze for at least 2-4 hours, or until firm enough to scoop.
- Serve: Let the ice cream sit at room temperature for a few minutes before serving for easier scooping and optimal texture. Enjoy!
Cooking Tips and Variations
Achieving perfect homemade ice cream is a rewarding culinary endeavor, and a few key tips can elevate your results from good to exceptional. Firstly, the quality of your ingredients truly shines through in a simple recipe like vanilla ice cream. Always opt for high-quality heavy cream and whole milk; their fat content is essential for that rich, creamy texture. For vanilla, investing in a good-quality vanilla extract or, even better, a fresh vanilla bean, will make a remarkable difference. Vanilla beans offer a nuanced, floral aroma that extract, no matter how good, struggles to replicate. If using a bean, infuse it in the cream mixture from the start, then scrape the seeds and add them back in after heating. The pod can also be rinsed, dried, and stored in a jar of sugar to make vanilla sugar.
Temperature control is paramount when making the custard base. When tempering the egg yolks, pour the hot cream very slowly while whisking vigorously. This gradual introduction of heat prevents the yolks from scrambling. When cooking the custard, maintain a low to medium heat and stir constantly. The moment it coats the back of a spoon and you can draw a clear line with your finger, remove it from the heat immediately. Overcooking will result in a grainy texture. Straining the custard through a fine-mesh sieve after cooking is a non-negotiable step; it catches any tiny, cooked egg bits, ensuring a perfectly smooth base.
Thorough chilling of the custard base before churning is perhaps the most critical step for a smooth, creamy ice cream. A well-chilled base churns faster and forms smaller ice crystals, leading to a much smoother final product. Aim for at least 4 hours, but overnight chilling is ideal. Also, ensure your ice cream maker’s bowl is frozen solid according to the manufacturer’s instructions, typically 12-24 hours prior to use. A partially frozen bowl will result in a soupy, poorly churned ice cream.
For variations, the beauty of vanilla ice cream is its versatility. To make it a chocolate chip vanilla, fold in 1 cup of mini chocolate chips during the last few minutes of churning. For a berry swirl, gently fold in a swirl of homemade berry compote (made by simmering berries with a little sugar and lemon juice) after churning but before freezing. A hint of bourbon or rum (about 1-2 tablespoons) added to the chilled custard base can also enhance the flavor and create a slightly softer, less icy texture due to the alcohol’s lower freezing point. For a more intense vanilla flavor, consider adding a touch of vanilla bean paste along with or in place of extract. You can also experiment with different sweeteners; a portion of the granulated sugar can be replaced with brown sugar for a subtle caramel note, or maple syrup for a different depth of flavor, though this may slightly alter the final texture.
Storage and Reheating
Proper storage is key to preserving the delicious texture and flavor of your homemade vanilla ice cream. Once churned, transfer the ice cream to an airtight, freezer-safe container. The best containers are those designed specifically for ice cream, as they often have a narrower, taller shape that minimizes surface area exposed to air. Before sealing the container, press a piece of plastic wrap directly onto the surface of the ice cream. This creates a barrier that prevents air from reaching the ice cream, which is the primary cause of freezer burn and the formation of large, icy crystals. Freezer burn occurs when moisture evaporates from the surface, leading to a dry, crumbly texture and off-flavors.
Store the ice cream in the coldest part of your freezer, typically towards the back, and not in the door. The freezer door experiences more temperature fluctuations, which can degrade the ice cream’s quality over time. Homemade ice cream, without the stabilizers found in commercial varieties, is best enjoyed within 1-2 weeks for optimal freshness and texture. While it will remain safe to eat for longer, its quality will gradually diminish.
As for “reheating,” ice cream isn’t typically reheated, but rather softened for serving. Homemade ice cream, especially straight from a deep freeze, can be quite hard. To achieve the perfect scoopable consistency, simply remove the container from the freezer and let it sit at room temperature for 10-15 minutes before serving. For a quicker softening, you can place the container in the refrigerator for 20-30 minutes. Avoid microwaving, as this can melt the ice cream unevenly and compromise its texture, leading to a more icy, less creamy result once refrozen. If you have any leftover softened ice cream, it’s generally best to consume it rather than refreeze it, as refreezing can lead to larger ice crystals and a less desirable texture. However, if you must refreeze a small amount, ensure it’s done quickly in an airtight container.
Frequently Asked Questions
Why is my homemade ice cream icy instead of creamy?
Several factors can contribute to icy ice cream. The most common reasons are not chilling the custard base thoroughly enough before churning, insufficient fat content (ensure you’re using heavy cream and whole milk), or churning for too short a time. Rapid freezing and proper storage also play a role. Make sure your ice cream maker’s bowl is frozen solid, and store the ice cream in an airtight container with plastic wrap pressed directly onto the surface to minimize ice crystal formation.
Can I make this recipe without an ice cream maker?
While an ice cream maker yields the best results, you can make this without one. After chilling the custard base, pour it into a shallow, freezer-safe dish (like a metal baking pan). Freeze for 30-45 minutes until the edges start to freeze. Remove from the freezer and vigorously whisk or beat with an electric mixer to break up ice crystals. Repeat this process every 30-45 minutes for 3-4 hours, or until the ice cream is consistently frozen and creamy. This manual method requires more effort but can still produce delicious results.
How can I prevent my egg yolks from scrambling when making the custard?
The key to preventing scrambled egg yolks is tempering. This involves gradually raising the temperature of the yolks by slowly whisking a small amount of hot cream mixture into them before adding them back to the main pot. Pouring the hot liquid in a thin, steady stream while continuously whisking the yolks ensures they are gently heated without cooking into solid pieces. Also, make sure to keep the heat on low-medium when cooking the custard, never allowing it to boil.