Instructions
- Prepare the Chicken: Preheat your oven to 400°F (200°C). Line a large baking sheet with parchment paper or aluminum foil for easy cleanup. Pat the chicken drumsticks thoroughly dry with paper towels. This step is crucial for achieving crispy skin.
- Make the Honey Garlic Glaze: In a medium bowl, whisk together the honey, soy sauce, minced garlic, apple cider vinegar, sesame oil (if using), black pepper, and red pepper flakes (if using). Stir until all ingredients are well combined.
- Coat the Drumsticks: In a large bowl, drizzle the chicken drumsticks with olive oil and toss to coat evenly. Then, pour about half of the honey garlic glaze over the drumsticks. Toss again to ensure each drumstick is thoroughly coated. Reserve the remaining glaze for basting.
- Arrange on Baking Sheet: Arrange the coated drumsticks in a single layer on the prepared baking sheet, ensuring there’s a little space between each piece for even cooking and browning.
- Bake the Chicken: Bake for 25 minutes.
- Baste and Continue Baking: After 25 minutes, remove the baking sheet from the oven. Carefully brush the drumsticks with a generous amount of the reserved honey garlic glaze. Return to the oven and continue baking for another 15-20 minutes, or until the internal temperature of the thickest part of the chicken reaches 165°F (74°C) as measured with a meat thermometer, and the skin is beautifully golden brown and caramelized.
- Broil for Extra Crispiness (Optional): For extra crispy skin and a deeper caramelization, you can switch the oven to broil during the last 2-3 minutes of cooking. Watch carefully to prevent burning, as the glaze can caramelize quickly under the broiler.
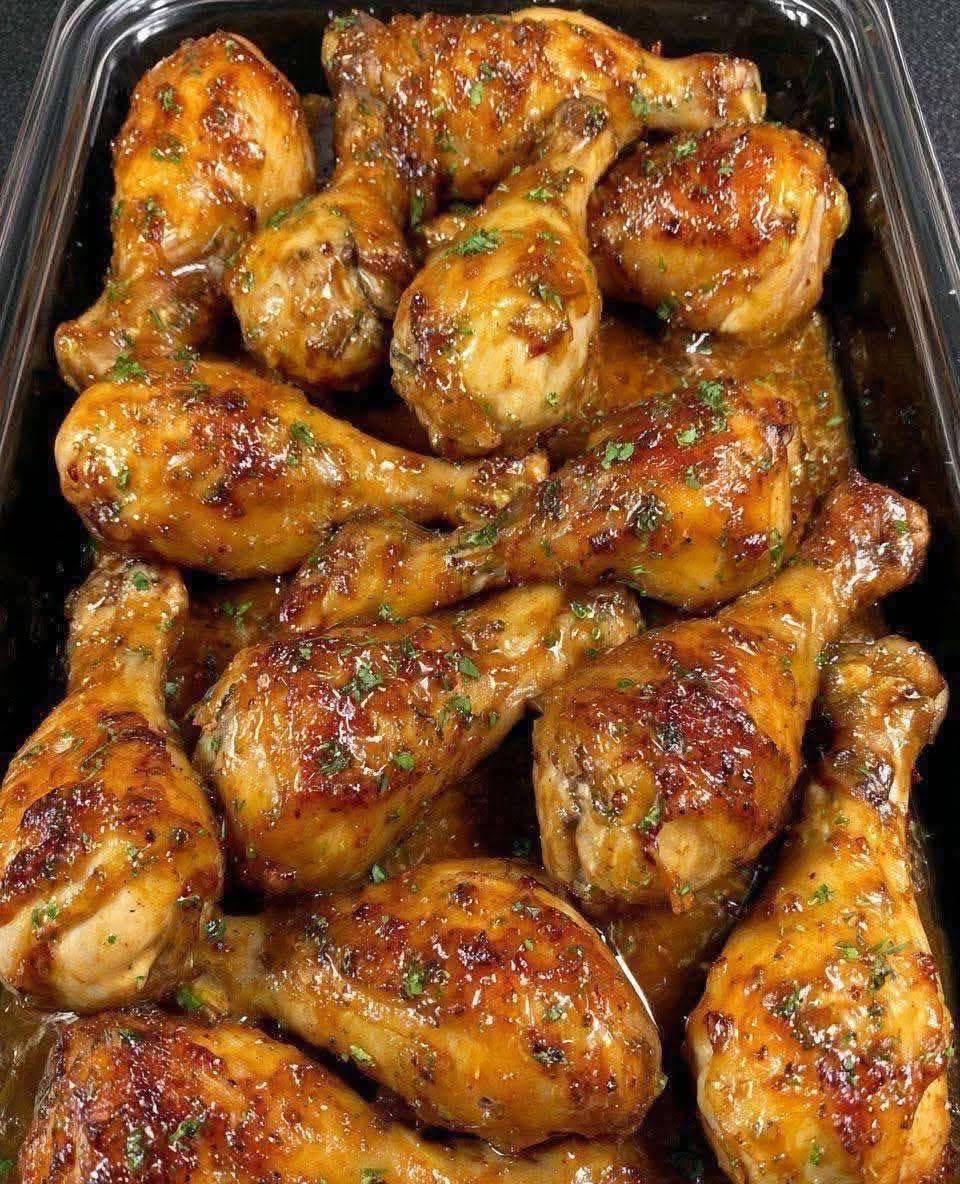
- Rest and Garnish: Once cooked, remove the drumsticks from the oven and let them rest on the baking sheet for 5 minutes before serving. This allows the juices to redistribute, keeping the chicken moist. Garnish with fresh chopped parsley before serving.
Cooking Tips and Variations
Achieving perfectly crispy, juicy, and flavorful honey garlic chicken drumsticks is easier than you think with a few simple tips and tricks. The key to that irresistible golden-brown skin and tender meat lies in proper preparation and thoughtful cooking. First and foremost, always pat your chicken drumsticks thoroughly dry with paper towels before seasoning and glazing. Excess moisture on the skin will steam rather than crisp, preventing that coveted crunch. A dry surface allows the skin to brown beautifully and absorb the flavors of the glaze more effectively. Don’t skip this crucial step!
When it comes to the glaze, don’t be afraid to experiment with the balance of sweet and savory. If you prefer a richer, more umami flavor, you can add a splash of Worcestershire sauce or a pinch of ginger to the honey garlic mixture. For those who enjoy a bit of heat, increasing the red pepper flakes or adding a dash of sriracha will give your drumsticks a delightful kick. Conversely, if you’re serving this to young children or those sensitive to spice, omit the red pepper flakes entirely.
To ensure even cooking and maximum caramelization, arrange the drumsticks in a single layer on your baking sheet, leaving a little space between each piece. Overcrowding the pan can lead to steaming, which hinders the browning process. If you’re cooking a large batch, it’s better to use two baking sheets or cook in batches. For an extra boost of flavor and tenderness, consider marinating the drumsticks in a portion of the honey garlic glaze for at least 30 minutes, or even overnight, before baking. This allows the flavors to deeply penetrate the meat.
Serving these drumsticks is a joy, as they pair wonderfully with a variety of side dishes. For a light and fresh accompaniment, consider a simple green salad with a vinaigrette dressing, or roasted asparagus. If you’re looking for something heartier, fluffy white rice or quinoa will soak up all the delicious extra glaze. Steamed broccoli or green beans tossed with a little garlic and butter also make excellent, nutritious choices. Don’t forget a sprinkle of sesame seeds over the top just before serving for an added touch of elegance and nutty flavor.
One popular variation is to add a tablespoon of cornstarch mixed with a tablespoon of water to the glaze mixture. This creates a slightly thicker glaze that clings to the chicken even more effectively, resulting in an incredibly luscious coating. If you’re short on time, you can even prepare the honey garlic glaze a day in advance and store it in the refrigerator, making dinner prep even quicker on the day of. For a different texture, instead of baking the entire time, you can pan-fry the drumsticks for 5-7 minutes per side to get a crispy skin, then transfer them to the oven to finish cooking with the glaze, basting as directed. This method can yield an even crispier exterior.
Another fantastic variation involves adding vegetables directly to the baking sheet during the last 20-25 minutes of cooking. Hearty vegetables like broccoli florets, chopped bell peppers, or even potato wedges can be tossed with a little olive oil, salt, and pepper, then added around the drumsticks. This turns it into a convenient one-pan meal, reducing cleanup and adding extra nutrition. Just ensure the vegetables are cut into similar-sized pieces for even cooking. The juices and glaze from the chicken will infuse the vegetables with incredible flavor.
For those who love a smoky flavor, a tiny dash of liquid smoke in the glaze can add an interesting depth. Alternatively, if you have an outdoor grill, these honey garlic drumsticks are phenomenal grilled. Grill over medium heat, basting frequently with the glaze, until cooked through and beautifully charred. Just be mindful of flare-ups due to the honey in the glaze. No matter how you prepare them, these drumsticks are sure to be a hit!
Storage and Reheating
Leftover Honey Garlic Chicken Drumsticks are a true treat, and storing them properly ensures they remain delicious for future meals. Once the drumsticks have cooled completely to room temperature, transfer them to an airtight container. It’s important not to put hot chicken directly into the refrigerator, as this can raise the internal temperature of your fridge and affect other foods. Store the container in the refrigerator for up to 3-4 days. For longer storage, you can freeze the cooked drumsticks. Place them in a freezer-safe bag or container, ensuring as much air as possible is removed to prevent freezer burn. They can be frozen for up to 2-3 months. When ready to eat, thaw frozen drumsticks overnight in the refrigerator before reheating.
Reheating these drumsticks is simple, and there are a few methods to ensure they retain their flavor and texture. The most recommended method for reheating is in the oven. Preheat your oven to 350°F (175°C). Place the drumsticks on a baking sheet, optionally adding a tablespoon of water or chicken broth to the bottom of the pan and covering loosely with foil to prevent them from drying out. Heat for 15-20 minutes, or until heated through. If you want to crisp up the skin again, remove the foil for the last 5 minutes of heating. This method helps maintain moisture and brings back some of that delicious caramelization.
For a quicker option, you can reheat individual drumsticks in the microwave. Place them on a microwave-safe plate, cover with a damp paper towel to help retain moisture, and heat on medium power for 1-2 minutes per drumstick, or until hot. Be aware that the skin might not be as crispy with this method, but the chicken will still be tender and flavorful. Another excellent reheating option, especially if you have an air fryer, is to heat them at 350°F (175°C) for 5-8 minutes, checking periodically. The air fryer does a fantastic job of crisping up the skin again, making them almost as good as fresh. No matter your reheating method, always ensure the chicken is heated to an internal temperature of 165°F (74°C) for food safety.
Frequently Asked Questions
What kind of drumsticks should I use?
You can use any standard chicken drumsticks for this recipe. Look for ones that are similar in size to ensure even cooking. Organic or free-range options can offer a slightly different flavor profile, but conventional drumsticks work perfectly well.
Can I substitute chicken thighs for drumsticks?
Absolutely! Chicken thighs are a great substitute. They are also dark meat and will stay juicy. Adjust the cooking time slightly; thighs might need a few extra minutes, so always check for an internal temperature of 165°F (74°C).
How can I make the sauce thicker?
If you prefer a thicker, more clinging sauce, you can add 1 teaspoon of cornstarch mixed with 1 tablespoon of cold water to the glaze mixture before cooking. Alternatively, after the chicken is cooked and removed from the pan, you can pour the pan drippings and any remaining glaze into a small saucepan and simmer over medium heat for 5-7 minutes, stirring occasionally, until it thickens to your desired consistency. You can also add a cornstarch slurry (1 tsp cornstarch dissolved in 1 tbsp cold water) to the simmering sauce to thicken it quickly.
Can I prepare this recipe ahead of time?
Yes, you can! You can prepare the honey garlic glaze up to 2-3 days in advance and store it in an airtight container in the refrigerator. You can also marinate the chicken drumsticks in the glaze for 30 minutes up to 12 hours before baking. This will infuse the chicken with even more flavor.