Introduction
There are some desserts that just whisper “Southern comfort” with every delicious bite, and the Kentucky Butter Cake is undeniably one of them. Imagine a cake so incredibly moist, so unbelievably tender, it practically melts in your mouth, leaving behind a rich, buttery sweetness that lingers beautifully. This isn’t just any butter cake; it’s a culinary hug, a timeless classic that has graced countless family tables and potlucks, always stealing the show with its golden hue and irresistible aroma. Its charm lies not just in its exquisite taste but also in its deceptively simple preparation, making it a beloved staple for bakers of all skill levels.
What sets the Kentucky Butter Cake apart, and truly elevates it to legendary status, is its signature warm butter glaze. This isn’t just a drizzle; it’s a generous bath of melted butter, sugar, and vanilla (or sometimes a hint of bourbon for that true Kentucky spirit!) poured over the cake while it’s still hot from the oven. The magic happens as this luscious glaze slowly seeps into every crevice, transforming the cake’s crumb into an incredibly moist, almost custardy texture. The result is a cake that is intensely buttery, wonderfully sweet, and boasts a delicate crust on top that gives way to an impossibly tender interior. It’s a dessert that perfectly embodies the hospitality and rich flavors of Southern baking.
This recipe for Kentucky Butter Cake is designed to bring that authentic, melt-in-your-mouth experience right into your kitchen. We’ll guide you through creating a cake that’s not only easy to make but also consistently delivers on its promise of rich flavor and unparalleled moisture. Whether you’re a seasoned baker looking for a reliable classic or a novice eager to impress, this recipe will quickly become a cherished favorite. Get ready to fill your home with the intoxicating scent of baking butter and vanilla, and prepare to indulge in a slice of pure Southern bliss that’s perfect for any occasion, from a casual afternoon coffee to a festive holiday gathering.
Nutritional Information
Per serving (approximate values):
- Calories: 450
- Protein: 5g
- Carbohydrates: 60g
- Fat: 22g
- Fiber: 1g
- Sodium: 300mg
Ingredients
For the Cake:
- 2 cups (4 sticks) unsalted butter, softened
- 3 cups granulated sugar
- 6 large eggs, at room temperature
- 1 teaspoon vanilla extract
- 3 cups all-purpose flour, sifted
- 1 teaspoon baking powder
- 1/2 teaspoon baking soda
- 1/2 teaspoon salt
- 1 cup buttermilk, at room temperature
For the Butter Glaze:
- 1/2 cup (1 stick) unsalted butter
- 1 cup granulated sugar
- 1/4 cup water (or milk, or even bourbon for an authentic kick)
- 1 teaspoon vanilla extract
For Garnish (Optional):
- Powdered sugar for dusting
Instructions
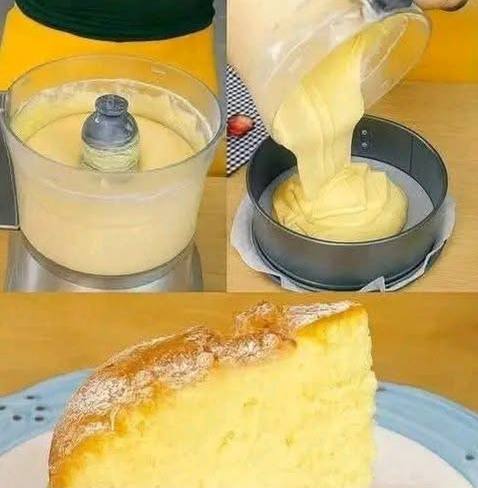
- Preheat your oven to 325°F (160°C). Grease and flour a 10-12 cup bundt pan or a 9×13 inch baking dish. Alternatively, you can line the bottom of a 9-inch springform pan with parchment paper and grease the sides, as seen in some baking preparations. Ensure the pan is thoroughly prepared to prevent sticking, which is crucial for a cake this moist and delicate.
- In a large mixing bowl, using an electric mixer (stand mixer with paddle attachment or a hand mixer), cream together the softened butter and granulated sugar until the mixture is light, fluffy, and pale in color. This process should take about 5-7 minutes. Scrape down the sides of the bowl occasionally to ensure everything is well combined. Achieving this light and airy consistency is key for a tender cake crumb.
- Add the eggs one at a time, beating well after each addition. Make sure each egg is fully incorporated before adding the next. This helps to emulsify the batter and prevent it from curdling. Once all eggs are added, beat in the vanilla extract until just combined. The mixture should still be smooth and creamy.
- In a separate medium bowl, whisk together the sifted all-purpose flour, baking powder, baking soda, and salt. Sifting the flour helps to aerate it and prevent lumps, contributing to a lighter cake texture.
- With the mixer on low speed, gradually add the dry ingredients to the wet ingredients, alternating with the buttermilk. Begin and end with the dry ingredients. For example, add about a third of the flour mixture, mix until just combined, then add half of the buttermilk, mix, then another third of the flour, the remaining buttermilk, and finally the last third of the flour. Be careful not to overmix; mix only until the ingredients are just incorporated and no streaks of flour remain. Overmixing can develop the gluten in the flour, leading to a tough cake.
- Pour the cake batter evenly into your prepared bundt pan or baking dish. Smooth the top with a spatula if necessary. Gently tap the pan on the counter a few times to release any large air bubbles.
- Bake for 50-70 minutes, or until a wooden skewer or toothpick inserted into the center of the cake comes out clean. Baking times can vary depending on your oven and the type of pan used. For a bundt pan, it might be closer to 60-70 minutes, while a 9×13 inch pan might be 50-60 minutes. The cake should be golden brown on top and spring back lightly when touched.
- While the cake is baking, prepare the butter glaze. In a small saucepan, melt the butter over medium heat. Add the granulated sugar and water (or milk/bourbon) to the melted butter. Bring the mixture to a gentle boil, stirring constantly until the sugar is completely dissolved. Remove from heat and stir in the vanilla extract. Keep the glaze warm; it’s essential to pour it over the cake while both are hot.
- As soon as the cake comes out of the oven, place it on a wire rack. While it’s still in the pan and piping hot, use the wooden skewer or toothpick to poke holes all over the top of the cake, going about halfway down. These holes will allow the warm glaze to penetrate deeply into the cake, ensuring maximum moisture and flavor.
- Slowly and evenly pour the warm butter glaze over the hot, poked cake, allowing it to soak into the holes. You might need to pour it in stages, letting each application absorb before pouring more. Ensure the glaze covers the entire surface of the cake.
- Let the cake cool in the pan on the wire rack for at least 30 minutes to 1 hour, or until it’s just warm but not hot. This cooling period is crucial for the cake to fully absorb the glaze and set properly. If you try to invert it too soon, it might stick or break.
- Once cooled slightly, carefully invert the cake onto a serving plate. If using a bundt pan, gently loosen the edges before inverting. If any glaze has pooled at the bottom of the pan, you can spoon it over the cake again.
- Allow the cake to cool completely before slicing and serving. For an extra touch, you can dust the cooled cake with powdered sugar just before serving.
Cooking Tips and Variations
To achieve the perfect Kentucky Butter Cake, always start with room temperature ingredients, especially butter, eggs, and buttermilk. This ensures that everything emulsifies smoothly, creating a uniform, lump-free batter that bakes evenly and results in a tender crumb. Cold ingredients can lead to a lumpy batter and a denser, less airy cake. When creaming butter and sugar, take your time; beating it until light and fluffy incorporates air, which is crucial for the cake’s rise and tender texture. Avoid the temptation to rush this step.
When adding dry and wet ingredients, always mix on low speed and stop as soon as the flour streaks disappear. Overmixing develops gluten, which can turn your wonderfully moist cake into a tough, rubbery one. A gentle hand is key here. For pan preparation, don’t skimp on greasing and flouring your bundt pan, or use a baking spray with flour. Bundt pans have intricate designs, and proper preparation is essential to prevent sticking and ensure your beautiful cake releases cleanly. If you’re using a springform pan, lining the bottom with parchment paper offers an extra layer of security.
The signature warm butter glaze is what makes this cake truly special. Pouring the warm glaze over the hot cake right out of the oven allows it to absorb deeply into the cake’s pores. Don’t be shy about poking plenty of holes; these are the channels that carry the luscious glaze throughout. If you’re feeling adventurous, elevate the glaze by substituting a part of the water with bourbon for an authentic Kentucky flavor. The alcohol will cook off, leaving behind a rich, warm note that complements the butter perfectly. For a citrusy twist, add a teaspoon of lemon or orange zest to the cake batter. You can also fold in chopped pecans or walnuts for added texture, especially delicious when paired with a bourbon glaze. Another delightful variation is to add a tablespoon of rum extract to the glaze for a Caribbean-inspired twist.
Storage and Reheating
Storing your Kentucky Butter Cake properly will ensure it remains wonderfully moist and flavorful for several days. Once the cake has cooled completely, wrap it tightly in plastic wrap or place it in an airtight container. Stored at room temperature, it will stay fresh for 3-4 days. The high butter and sugar content in both the cake and the glaze acts as a natural preservative, helping to maintain its moisture. If you live in a particularly warm or humid climate, or if you prefer to extend its shelf life, you can store it in the refrigerator for up to a week. However, bring it back to room temperature before serving for the best texture and flavor.
For longer storage, Kentucky Butter Cake freezes beautifully. Once completely cooled, wrap individual slices or the entire cake tightly in plastic wrap, then wrap again with aluminum foil. This double layer of protection prevents freezer burn. It can be frozen for up to 2-3 months. To thaw, simply transfer the cake (still wrapped) to the refrigerator overnight, or let it sit at room temperature for a few hours. Avoid thawing it in the microwave, as this can make the cake rubbery.
Reheating this cake is a fantastic way to recapture that “fresh from the oven” warmth, especially if you enjoy it with a scoop of ice cream. If reheating individual slices, you can warm them gently in the microwave for 15-30 seconds until just warm. Be careful not to overheat, as this can dry out the cake. Alternatively, you can place slices on a baking sheet and warm them in a preheated oven at 250°F (120°C) for about 5-10 minutes. This method helps to crisp up the exterior slightly while keeping the interior moist and tender. For a whole cake, you can warm it in the oven at the same temperature for 15-20 minutes. The warm cake with its rich, buttery aroma is an absolute delight, especially when served with a fresh cup of coffee or a dollop of whipped cream.
Frequently Asked Questions
What makes this cake “Kentucky” Butter Cake?
The “Kentucky” in Kentucky Butter Cake typically refers to the rich, buttery glaze that is poured over the cake while it’s still hot from the oven. This method allows the glaze to soak deep into the cake, creating an incredibly moist and dense texture that is characteristic of many Southern desserts. While some variations may include bourbon in the glaze, the core characteristic is the deep saturation of butter and sugar, a hallmark of Southern baking traditions, particularly from the Kentucky region.
Can I make this cake without a bundt pan?
Absolutely! While a bundt pan gives the cake its classic, decorative shape, you can easily bake this Kentucky Butter Cake in a 9×13 inch baking dish. The baking time might be slightly shorter, so start checking for doneness around 50-60 minutes. You can also use a 9-inch round springform pan. Just ensure your chosen pan is well-greased and floured (or lined with parchment paper) to prevent sticking, as this is a very moist cake.
My cake stuck to the bundt pan! What went wrong?
This is a common issue with bundt cakes, especially moist ones like the Kentucky Butter Cake. The most frequent culprits are inadequate pan preparation or not allowing the cake to cool sufficiently before inverting. Ensure you thoroughly grease and flour every crevice of the bundt pan, or use a high-quality baking spray with flour. Also, it’s crucial to let the cake cool in the pan for at least 30 minutes to 1 hour after pouring the glaze; this allows the cake to firm up slightly and the glaze to set, making it easier to release cleanly. If you try to invert it too hot, it’s more likely to break apart.
Can I add other flavors to the cake or glaze?
Yes, this recipe is quite versatile! For the cake batter, you can add citrus zest (lemon, orange) for a bright note, or a teaspoon of almond extract in addition to or instead of vanilla. For the glaze, a popular variation is to add 1-2 tablespoons of bourbon for an authentic Kentucky flavor. You can also experiment with other extracts like rum or maple. For texture, you could fold in chopped nuts (pecans or walnuts) into the batter, which pair wonderfully with the buttery flavor.