Introduction
Prepare to tantalize your taste buds with a dessert that perfectly balances bright, zesty tang with rich, creamy indulgence: the Lemon Cheesecake. This isn’t just any cheesecake; it’s a slice of sunshine, a delightful confection that brightens any occasion. Imagine a buttery, crumbly crust giving way to a velvety smooth, subtly tart lemon filling, all crowned with a vibrant lemon glaze and adorned with fresh berries and aromatic mint. It’s a dessert that speaks of celebration, warmth, and the simple joy of truly exceptional flavors.
Our recipe today delivers an irresistibly creamy, no-bake lemon cheesecake that’s as easy to make as it is stunning to behold. Forget the complexities of water baths and oven cracks; this recipe focuses on straightforward steps that yield spectacular results. We’ll guide you through creating a sturdy, flavorful base, whipping up a perfectly stable yet melt-in-your-mouth filling, and adding that extra layer of lemon luminosity with a beautiful glaze. The best part? The vibrant flavors and elegant presentation make it a showstopper, yet it requires minimal fuss, making it ideal for both seasoned bakers and dessert novices alike.
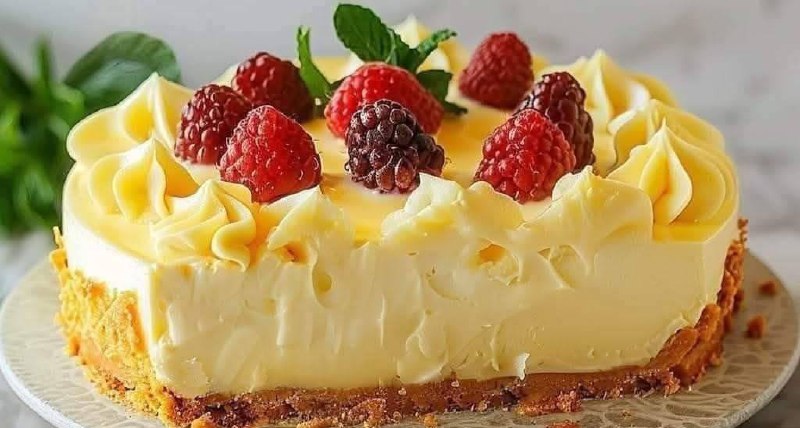
What truly sets this lemon cheesecake apart is its harmonious blend of textures and tastes. The satisfying crunch of the thick crumb crust provides a delightful contrast to the silky, pale yellow filling, which bursts with fresh lemon notes. A glossy, brighter yellow glaze adds another dimension of citrusy sweetness and a beautiful sheen, while the fresh raspberries, blackberries, and sprigs of mint elevate it from a simple dessert to a work of edible art. It’s a dessert that not only tastes incredible but also looks like it stepped right out of a gourmet patisserie, promising pure delight with every forkful.
Nutritional Information
Per serving (approximate values):
- Calories: 550
- Protein: 7g
- Carbohydrates: 60g
- Fat: 32g
- Fiber: 2g
- Sodium: 300mg
Ingredients
For the Crust:
- 2 cups (about 250g) graham cracker crumbs (or digestive biscuit crumbs)
- 1/2 cup (113g) unsalted butter, melted
- 1/4 cup (50g) granulated sugar
For the Cheesecake Filling:
- 24 oz (680g) full-fat cream cheese, softened at room temperature
- 1 1/4 cups (250g) granulated sugar
- 1/2 cup (120ml) fresh lemon juice (from 3-4 medium lemons)
- 2 tablespoons lemon zest (from 2-3 lemons)
- 1 teaspoon vanilla extract
- 1/4 teaspoon salt
- 1 1/2 cups (360ml) heavy cream (cold)
- 1 packet (0.25 oz or 7g) unflavored gelatin powder
- 1/4 cup (60ml) cold water
For the Lemon Glaze:
- 1/2 cup (120ml) fresh lemon juice
- 1/2 cup (100g) granulated sugar
- 2 tablespoons cornstarch
- 1/4 cup (60ml) cold water
- 1 tablespoon unsalted butter
- Pinch of yellow food coloring (optional, for vibrant color)
For the Piped Cream Decoration:
- 1 cup (240ml) heavy cream (cold)
- 2 tablespoons powdered sugar
- 1/2 teaspoon lemon extract or 1 teaspoon lemon zest (optional)
- Pinch of yellow food coloring (optional)
For Garnish:
- 1 cup fresh raspberries
- 1 cup fresh blackberries
- Fresh mint leaves
Instructions
- Prepare the Crust:
- Lightly grease a 9-inch springform pan.
- In a medium bowl, combine the graham cracker crumbs, melted butter, and 1/4 cup granulated sugar. Mix until the crumbs are evenly moistened and resemble wet sand.
- Press the crumb mixture firmly and evenly into the bottom of the prepared springform pan. Use the bottom of a glass or a flat measuring cup to compact it well.
- Place the crust in the refrigerator to chill for at least 30 minutes while you prepare the filling.
- Prepare the Gelatin:
- In a small bowl, sprinkle the unflavored gelatin powder over 1/4 cup of cold water. Let it sit for 5-10 minutes to “bloom” or soften. It will become thick and jelly-like.
- Once bloomed, heat the gelatin mixture gently. You can do this by placing the bowl over a pot of simmering water (double boiler method) or by microwaving it for 10-15 seconds until it’s completely dissolved and clear, with no granules remaining. Set aside to cool slightly, but ensure it doesn’t set.
- Make the Cheesecake Filling:
- In a large mixing bowl, using an electric mixer, beat the softened cream cheese on medium speed until smooth and creamy, about 2-3 minutes. Make sure there are no lumps.
- Gradually add the 1 1/4 cups granulated sugar to the cream cheese, beating until well combined and fluffy.
- Stir in the fresh lemon juice, lemon zest, vanilla extract, and salt until just combined. Do not overmix.
- In a separate, clean bowl, whip the 1 1/2 cups cold heavy cream until soft peaks form. Be careful not to over-whip it into butter.
- Slowly pour the slightly cooled, dissolved gelatin mixture into the cream cheese mixture while the mixer is running on low speed. Mix until just incorporated.
- Gently fold the whipped heavy cream into the cream cheese mixture using a spatula, until no streaks of cream remain. Be careful not to deflate the mixture.
- Assemble and Chill the Cheesecake:
- Pour the cheesecake filling evenly over the chilled crust in the springform pan.
- Smooth the top with a spatula.
- Cover the pan loosely with plastic wrap and refrigerate for at least 6-8 hours, or preferably overnight, to allow the cheesecake to set completely. This is crucial for a no-bake cheesecake.
- Prepare the Lemon Glaze:
- In a small saucepan, whisk together the 1/2 cup lemon juice, 1/2 cup granulated sugar, and cornstarch until smooth.
- In a separate small bowl, whisk the 1/4 cup cold water into the cornstarch mixture until fully dissolved.
- Place the saucepan over medium heat, stirring constantly, until the mixture thickens and comes to a boil. It should be thick enough to coat the back of a spoon.
- Remove from heat and stir in the tablespoon of unsalted butter until melted and fully incorporated, giving the glaze a glossy finish.
- If desired, stir in a tiny pinch of yellow food coloring for a more vibrant hue.
- Allow the glaze to cool completely to room temperature before pouring it over the cheesecake. It should still be pourable but not warm.
- Apply Glaze and Decorate:
- Once the cheesecake is fully set and the glaze is cool, carefully remove the cheesecake from the springform pan. You can run a thin knife around the edge before releasing the spring to ensure a clean release.
- Gently pour the cooled lemon glaze over the top of the cheesecake, spreading it evenly to the edges with an offset spatula.
- Return the cheesecake to the refrigerator for another 30-60 minutes to allow the glaze to set slightly.
- While the glaze is setting, prepare the piped cream decoration: In a cold bowl, whip 1 cup cold heavy cream with 2 tablespoons powdered sugar and optional lemon extract/zest or food coloring until firm peaks form.
- Transfer the whipped cream to a piping bag fitted with a star tip.
- Pipe decorative rosettes or swirls around the edge of the cheesecake.
- Artfully arrange the fresh raspberries, blackberries, and fresh mint leaves on top of the cheesecake, within the piped cream border.
- Serve:
- For clean slices, dip a sharp knife in hot water and wipe it clean between each cut.
- Serve immediately and enjoy your homemade masterpiece!
Cooking Tips and Variations
Achieving the perfect no-bake lemon cheesecake is all about precision and patience. For the crust, ensure your graham cracker crumbs are finely ground and mixed thoroughly with the melted butter and sugar. Pressing it firmly into the pan is key to a stable base; a flat-bottomed glass or measuring cup works wonders for this. A brief chill of the crust before adding the filling prevents a soggy bottom and helps it hold its shape.
When it comes to the filling, room temperature cream cheese is non-negotiable for a silky, lump-free texture. Beat it well until smooth before adding other ingredients. While incorporating the lemon juice and zest, avoid overmixing, as this can incorporate too much air, leading to a less dense filling. The gelatin is your secret weapon for stability in a no-bake cheesecake. Make sure it’s fully dissolved and slightly cooled before adding it to the cream cheese mixture; if it’s too hot, it can curdle the cream cheese, and if it’s too cold, it will set too quickly and create lumps. Gently folding in the whipped cream at the end ensures a light and airy yet stable consistency. And remember, chilling time is paramount! A minimum of 6-8 hours, or ideally overnight, allows the cheesecake to set firmly, making for clean slices and a truly satisfying texture.
For the lemon glaze, cooling it to room temperature before pouring is essential. Pouring hot glaze onto a cold cheesecake can cause the filling to soften or even melt. If you prefer a thicker, more intensely flavored topping, you can opt for a homemade lemon curd instead of a glaze. Simply prepare your favorite lemon curd recipe and allow it to cool before spreading it over the set cheesecake. For a vibrant visual, a tiny drop of yellow food coloring in both the glaze and the piped cream can enhance the lemon aesthetic without altering the flavor.
Variations:
- Lime or Orange Cheesecake: Swap out the lemon juice and zest for fresh lime or orange juice and zest for a different citrus twist. The vibrant green of lime or the sunny orange would be equally stunning.
- Different Crusts: Experiment with other cookie crumbs like shortbread, vanilla wafers, or even gingersnaps for a spiced version. You can also add a pinch of cinnamon or nutmeg to the graham cracker crust for extra warmth.
- Fruit Swirl: Before chilling, swirl a spoonful of raspberry or blueberry puree into the cheesecake filling for a marbled effect and an extra layer of fruitiness.
- Chocolate Drizzle: For chocolate lovers, a delicate drizzle of melted white or dark chocolate over the top before adding berries can add an elegant touch and a complementary flavor.
- Coconut Boost: Add shredded coconut to the crust or a hint of coconut extract to the filling for a tropical twist.
Presentation Tips:
- Clean Slices: Always use a sharp knife dipped in hot water and wiped clean between each slice. This prevents the cheesecake from sticking and ensures beautifully neat portions.
- Artful Garnish: Arrange your berries and mint leaves thoughtfully. Consider creating a pattern or a cluster in the center for a professional look.
- Edible Flowers: For an extra touch of elegance, add a few edible flowers like pansies or violas alongside the berries and mint.
Storage and Reheating
Storing your lemon cheesecake properly is key to maintaining its freshness, flavor, and texture. Due to the dairy components, this cheesecake must always be kept refrigerated.
To store, cover the cheesecake loosely with plastic wrap or aluminum foil, or place it in an airtight container. This prevents it from absorbing odors from other foods in the refrigerator and keeps the surface from drying out. Stored this way, the lemon cheesecake will remain fresh and delicious for up to 3-4 days in the refrigerator.
For longer storage, lemon cheesecake freezes beautifully. To freeze, place the entire cheesecake (without the fresh berry and mint garnish) on a baking sheet and freeze for 1-2 hours until firm. Then, wrap it tightly in several layers of plastic wrap, followed by a layer of aluminum foil. You can also freeze individual slices, wrapped in the same manner. Frozen cheesecake can be stored for up to 1-2 months. When you’re ready to enjoy it, transfer the frozen cheesecake or individual slices to the refrigerator and let them thaw overnight. Add fresh garnishes just before serving. Do not attempt to reheat this no-bake cheesecake, as the delicate texture and fresh ingredients are not meant for heat. It is best enjoyed chilled.
Frequently Asked Questions
Can I make this cheesecake ahead of time?
Absolutely! This no-bake lemon cheesecake is an excellent make-ahead dessert. In fact, making it a day in advance is highly recommended as it allows ample time for the cheesecake to set properly, resulting in the best texture and flavor. Prepare the cheesecake up to the point of adding the glaze and garnish, then keep it covered in the refrigerator. Add the glaze, piped cream, and fresh fruit just a few hours before serving for optimal freshness and appearance.
Why is my cheesecake filling not setting?
There are a few common reasons why a no-bake cheesecake might not set. The most frequent culprit is insufficient chilling time; it truly needs a minimum of 6-8 hours, but overnight is ideal. Another reason could be issues with the gelatin: ensure it was properly bloomed (softened in cold water) and then fully dissolved without being overheated. If the gelatin wasn’t fully dissolved, it won’t be able to do its job. Also, make sure you’re using full-fat cream cheese, as reduced-fat versions may not set as firmly. Lastly, if you overmixed the heavy cream, it might have separated, affecting the overall stability.
Can I use bottled lemon juice instead of fresh?
While fresh lemon juice is always recommended for the best, brightest flavor in a lemon cheesecake, you can use good quality bottled lemon juice in a pinch. However, be aware that bottled juice often lacks the vibrant acidity and nuanced flavor of fresh lemons and may contain preservatives that can slightly alter the taste. If using bottled, you might need to adjust the amount slightly to achieve your desired tanginess. For the zest, however, fresh lemons are essential as the oils in the zest carry a significant portion of the lemon’s aroma and flavor.
How do I prevent the crust from becoming soggy?
To prevent a soggy crust, ensure you press the crumb mixture very firmly into the bottom of the springform pan. A well-compacted crust is less likely to absorb moisture from the filling. Chilling the crust for at least 30 minutes before adding the filling also helps it firm up and create a barrier. If you’re particularly concerned, you can brush a very thin layer of melted white chocolate over the chilled crust before adding the filling; once set, this creates an impenetrable barrier against moisture.