Instructions
- In a large mixing bowl, combine the warm water and granulated sugar. Stir gently until the sugar dissolves.
- Sprinkle the yeast over the sugar water. If using active dry yeast, let it sit for 5-10 minutes until foamy, indicating it’s active. If using instant yeast, you can proceed immediately.
- Add the olive oil and salt to the yeast mixture and stir to combine.
- Gradually add 3 cups of the all-purpose flour, one cup at a time, mixing with a wooden spoon or a dough hook on a stand mixer until a shaggy dough forms.
- If mixing by hand, turn the dough out onto a lightly floured surface. Knead for 8-10 minutes, adding small amounts of the remaining 1/2 cup of flour as needed, until the dough is smooth, elastic, and no longer sticky. It should spring back when lightly poked. If using a stand mixer, knead with the dough hook on medium-low speed for 6-8 minutes.
- Lightly grease a clean large bowl with olive oil. Place the dough in the bowl, turning it once to coat all sides with oil.
- Cover the bowl tightly with plastic wrap or a clean kitchen towel.
- Let the dough rise in a warm, draft-free place for 1 to 1.5 hours, or until it has doubled in size. The rising time can vary depending on the temperature of your kitchen.
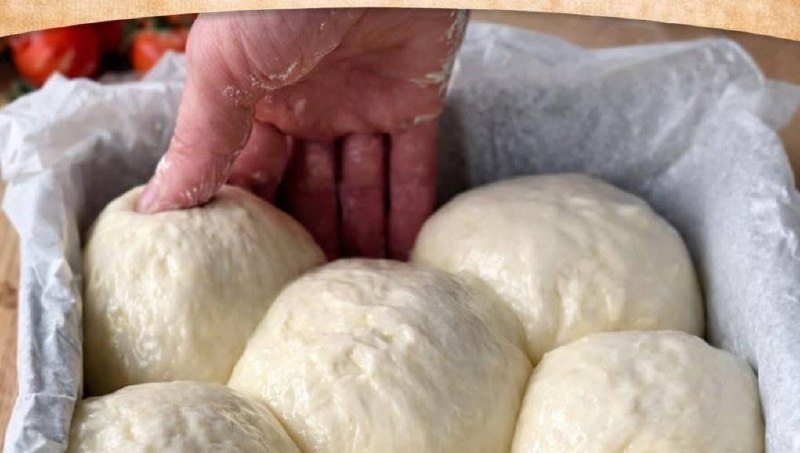
- Once risen, gently punch down the dough to release the air.
- The Magic Crazy Dough is now ready to be used for your desired recipe. Divide, shape, and bake according to the specific instructions for pizza, rolls, calzones, or any other creation.
Cooking Tips and Variations
Achieving the perfect Magic Crazy Dough starts with the right temperature for your water. If the water is too hot, it will kill the yeast, and your dough won’t rise. If it’s too cold, the yeast won’t activate properly, leading to a sluggish rise. Aim for a temperature between 105-115°F (40-46°C), which feels comfortably warm to the touch, like a baby’s bathwater. A kitchen thermometer is your best friend here for consistent results. When kneading, resist the urge to add too much flour. A slightly sticky dough is often a sign of good hydration, which leads to a tender crumb. Only add just enough flour to prevent it from sticking to your hands or the counter. Over-flouring can result in a dry, dense product. The kneading process is crucial for developing gluten, which gives the dough its structure and elasticity. Knead until the dough is smooth and springs back when gently poked, indicating proper gluten development.
The rising environment also plays a significant role. A warm, draft-free spot is ideal. Some excellent places include a slightly warmed oven (turned off, with the light on), near a sunny window, or on top of a warm appliance. If your kitchen is particularly cool, you can place the covered bowl in a larger bowl of warm water (be careful not to get water into the dough). Don’t rush the rising process; a slow, steady rise often yields a more flavorful dough. For troubleshooting, if your dough isn’t rising after 30-45 minutes, your yeast might be old or the water temperature was off. You might need to start over with fresh yeast. If the dough is too sticky, gradually add a tablespoon of flour at a time during kneading. If it’s too stiff, a little more warm water can be kneaded in very slowly.
Now for the fun part: variations! This dough is incredibly forgiving and easily customizable. For a savory twist, knead in 1-2 tablespoons of dried herbs like oregano, basil, or rosemary with the flour. You could also incorporate 1/4 cup of grated Parmesan cheese or nutritional yeast for a cheesy flavor. For a richer dough, substitute 1/4 cup of melted unsalted butter for the olive oil. If you’re planning sweet treats, you can increase the sugar by another tablespoon or two, and add a teaspoon of vanilla extract or a pinch of cinnamon when mixing the wet ingredients. For whole wheat variations, you can substitute up to half of the all-purpose flour with whole wheat flour, but you might need a tiny bit more water as whole wheat flour absorbs more liquid. Remember that whole wheat dough tends to be denser and may require a slightly longer rise time.
Another fantastic tip is to experiment with different flours. While all-purpose flour is excellent for its versatility, bread flour, with its higher protein content, will give you a chewier texture, perfect for artisan breads or pizza crusts. Cake flour, on the other hand, would yield a much softer, more delicate dough, suitable for extremely tender rolls, though it might be less ideal for structural items like pizza. You can also play with the fat content; using butter instead of olive oil often results in a richer, more tender crumb, especially good for sweet applications or dinner rolls. Don’t be afraid to add other flavorings directly into the dough itself. Garlic powder, onion powder, or even a pinch of red pepper flakes can elevate savory dishes, while orange zest or cardamom can transform sweet recipes. The beauty of Magic Crazy Dough is truly in its blank canvas potential, allowing you to infuse it with flavors that perfectly complement your final dish.
When it comes to shaping, ensure your work surface is lightly floured, but again, don’t overdo it. Too much flour on the counter can dry out the dough as you work with it. If you’re making rolls, try to keep them uniform in size so they bake evenly. For pizza, stretching by hand often results in a better texture than using a rolling pin, as it preserves more of the air bubbles in the dough. Always preheat your oven thoroughly before baking. A hot oven helps the dough rise quickly (oven spring) and develop a good crust. For a golden-brown finish on rolls or bread, an egg wash (one egg beaten with a tablespoon of water) brushed on before baking works wonders. For a softer crust, brush with melted butter immediately after baking. The possibilities are truly endless once you understand the basic principles of working with this incredible dough.
Storage and Reheating
Magic Crazy Dough is wonderfully versatile, even when it comes to storage. If you’re not planning to use all the dough immediately after its first rise, you have a few excellent options. For short-term storage (up to 2-3 days), place the punched-down dough in an airtight container or a large zip-top bag, lightly greased, and refrigerate it. The cold temperature will significantly slow down the yeast activity. When you’re ready to use it, remove the dough from the refrigerator and let it come to room temperature for about 30-60 minutes before shaping, or until it’s pliable and has slightly relaxed. It may need a second, slightly longer rise after shaping, as the cold slows down yeast activity.
For longer storage, Magic Crazy Dough freezes beautifully. After the first rise and punching down, divide the dough into portions that you plan to use (e.g., enough for one pizza, or a batch of rolls). Lightly grease each portion, wrap it tightly in plastic wrap, and then place it in a freezer-safe bag or container. It can be stored in the freezer for up to 2-3 months. To thaw, transfer the frozen dough to the refrigerator the night before you plan to use it. In the morning, or several hours before use, remove it from the fridge and let it come to room temperature on the counter for 1-2 hours until it’s soft and pliable. Then, shape and proceed with your recipe as usual, allowing for a full second rise.
When it comes to reheating items made with Magic Crazy Dough, the method depends on what you’ve created. For bread rolls or small loaves, a quick refresh in a preheated oven (around 300-350°F / 150-175°C) for 5-10 minutes, or until warmed through, often works best. You can lightly mist them with water before reheating for a softer interior. Pizza slices can be reheated in a hot oven or toaster oven at 375-400°F (190-200°C) for 5-8 minutes until the crust is crisp and the cheese is melted. Avoid microwaving most baked goods from this dough, as it tends to make them soft and chewy rather than crisp or fluffy. Calzones or savory pastries can also be reheated in a moderate oven until warm throughout. Always ensure baked goods are completely cooled before storing to prevent condensation buildup, which can lead to sogginess.
Frequently Asked Questions
What if my dough doesn’t rise?
If your Magic Crazy Dough isn’t rising, the most common culprits are inactive yeast or incorrect water temperature. First, ensure your yeast isn’t expired. If it’s active dry yeast, proof it by mixing it with the warm water and sugar; it should get foamy within 5-10 minutes. If it doesn’t foam, your yeast is likely dead, and you’ll need new yeast. Second, check your water temperature. Water that’s too hot (above 120°F / 49°C) will kill the yeast, while water that’s too cold (below 100°F / 38°C) won’t activate it properly. Aim for 105-115°F (40-46°C). Also, ensure your rising environment is warm and draft-free.
Can I make this dough without a stand mixer?
Absolutely! This Magic Crazy Dough recipe can be easily made by hand. After mixing the initial ingredients and forming a shaggy dough, turn it out onto a lightly floured surface. Knead the dough by hand for 8-10 minutes. Use the heel of your hand to push the dough away from you, then fold it back over, turn it a quarter turn, and repeat. Continue until the dough is smooth, elastic, and springs back when poked. It’s a great arm workout and a very satisfying process!
How can I tell if I’ve kneaded the dough enough?
Properly kneaded dough should be smooth, elastic, and not overly sticky. A good test is the “windowpane test.” Pinch off a small piece of dough (about the size of a golf ball) and gently stretch it between your fingers. If you can stretch it thin enough to see light through it without it tearing, it’s been kneaded sufficiently. If it tears easily, continue kneading for a few more minutes and test again. This indicates that the gluten has developed adequately, which is crucial for a good rise and texture.
What’s the best way to divide the dough for different recipes?
To ensure consistent results, especially for things like dinner rolls, it’s helpful to weigh your dough. After the first rise and punching it down, place the dough on a lightly floured surface. Use a kitchen scale to divide it into equal portions based on your recipe’s needs. For example, if making 12 dinner rolls, divide the total dough weight by 12. If you don’t have a scale, you can eyeball it, but try to be as consistent as possible in size and shape for even baking.