Introduction
Imagine this: a golden-brown exterior, gently crisp to the touch, giving way to an interior so impossibly tender, so unbelievably flaky, it practically dissolves on your tongue. That, my friends, is the promise of a truly perfect biscuit, and it’s precisely what you’re about to achieve with this “Melt In Your Mouth Buttermilk Biscuits” recipe. Forget everything you thought you knew about tough, dry, or crumbly biscuits. We’re on a mission to deliver pure, unadulterated biscuit bliss – an experience so comforting and satisfying, it feels like a warm hug from the inside out.
For many, the biscuit remains an elusive culinary dream, a baked good that often falls short of its fluffy potential. But fear not, because this recipe is your foolproof guide to conquering biscuit anxiety and unlocking a world of tender, buttery perfection. What makes these particular biscuits so special, you ask? It’s the magical synergy of carefully chosen ingredients and precise techniques, all designed to maximize flakiness and tenderness. At the heart of it all lies the humble yet mighty buttermilk, which, when combined with generous amounts of cold butter, transforms simple flour into a symphony of delicate layers. Get ready to embark on a journey that will forever change your perception of what a homemade biscuit can be.
We’ll delve into the secrets behind that signature “melt-in-your-mouth” quality, exploring the science of why cold butter creates steam pockets and how buttermilk works its tenderizing magic. You’ll learn the importance of a light hand and the art of folding dough, not kneading it, to prevent toughness. This isn’t just another recipe; it’s an education in biscuit mastery, designed to empower you with the knowledge and confidence to bake biscuits that will earn rave reviews every single time. So, tie on your apron, gather your ingredients, and prepare to be amazed. Your journey to biscuit perfection starts now!
Nutritional Information
Per serving (approximate values, for 1 of 12 biscuits):
- Calories: 250 kcal
- Protein: 5g
- Carbohydrates: 28g
- Fat: 14g
- Fiber: 1g
- Sodium: 350mg
Ingredients
- 2 cups (240g) all-purpose flour (preferably unbleached, or pastry flour)
- 1 tablespoon baking powder
- 1/2 teaspoon baking soda
- 1 teaspoon fine sea salt
- 1 tablespoon granulated sugar (optional, for a hint of sweetness and browning)
- 8 tablespoons (113g) unsalted butter, very cold and cut into 1/2-inch cubes or grated
- 1 cup (240ml) cold full-fat buttermilk, plus more for brushing (if not using egg wash)
- 1-2 tablespoons melted unsalted butter, for brushing after baking (optional)
Instructions
- Preparation: Preheat your oven to 425°F (220°C). Line a baking sheet with parchment paper or a silicone baking mat.
- Combine Dry Ingredients: In a large mixing bowl, whisk together the flour, baking powder, baking soda, salt, and granulated sugar (if using). Ensure there are no lumps and everything is evenly distributed.
- Incorporate Cold Butter: Add the very cold, cubed or grated butter to the dry ingredients. Using a pastry blender, your fingertips, or a food processor (pulse just a few times), cut the butter into the flour mixture until it resembles coarse crumbs with some pea-sized pieces of butter remaining. The key is to work quickly to keep the butter as cold as possible.
- Add Buttermilk: Make a well in the center of the flour mixture. Pour in the cold buttermilk. With a wooden spoon or spatula, gently stir the mixture just until it comes together into a shaggy, moist dough. Be careful not to overmix; a few dry spots are okay. The dough should be sticky but not wet.
- Gentle Kneading/Folding: Lightly flour a clean work surface. Turn the dough out onto the floured surface. Gently pat the dough into a rough rectangle, about 3/4 to 1 inch thick. Fold the dough in half, then gently pat it down again. Repeat this folding and patting process 3-4 more times. This lamination technique helps create those desirable flaky layers without overworking the gluten. Avoid traditional kneading, which develops gluten and can lead to tough biscuits.
- Cut Biscuits: Pat the dough to a thickness of about 3/4 to 1 inch. Using a 2 to 2.5-inch round biscuit cutter (or a sharp knife for square biscuits), press straight down firmly without twisting. Twisting seals the edges and prevents a good rise. Re-flour the cutter as needed. Gather the scraps, gently press them together (do not knead), and cut out any remaining biscuits.
- Arrange & Bake: Place the cut biscuits onto the prepared baking sheet. For taller, softer-sided biscuits, arrange them so they are just touching. For crispier, browner edges, space them about 1 inch apart. If desired, brush the tops with a little extra buttermilk for a golden finish.
- Bake: Bake for 12-18 minutes, or until the tops are golden brown and the biscuits have risen significantly. The exact baking time will depend on your oven and the size of your biscuits.
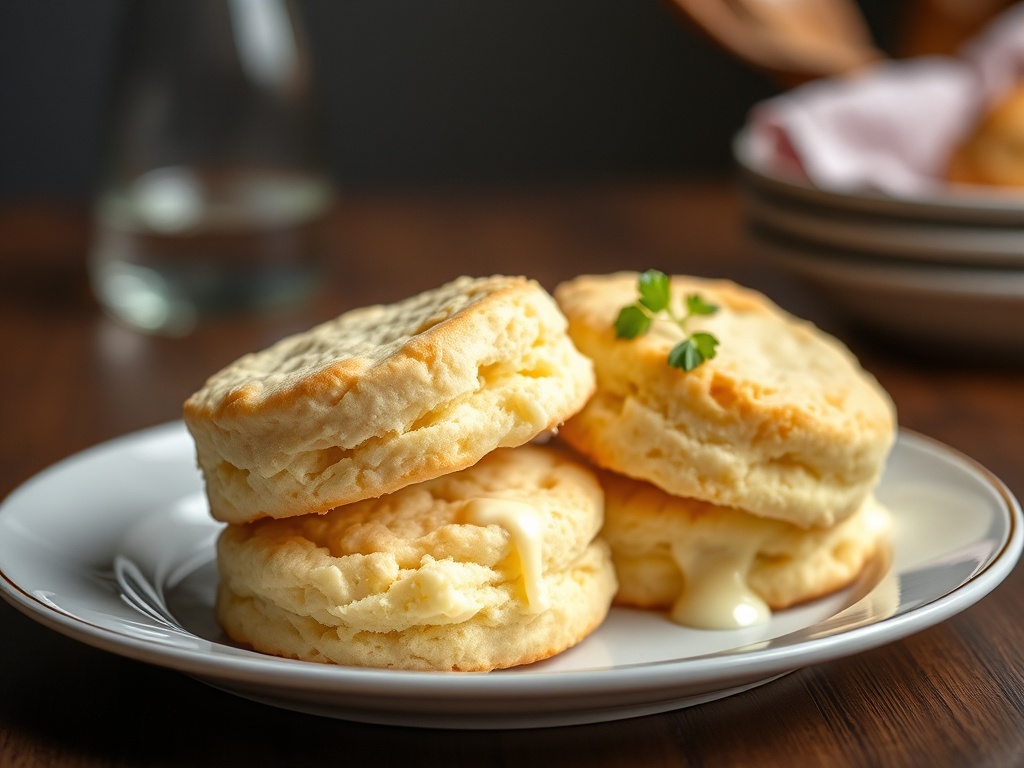
- Cooling & Finishing: Transfer the biscuits to a wire rack to cool slightly. For an extra touch of richness and softness, immediately brush the tops with melted butter. Serve warm.
Cooking Tips and Variations
To truly achieve “Melt In Your Mouth Buttermilk Biscuits,” adhering to a few key principles is paramount. First and foremost, cold is key! This mantra applies to both your butter and your buttermilk. When tiny pieces of cold butter hit the hot oven, they create steam pockets that push apart the layers of dough, resulting in that incredible flakiness. If your butter is warm, it simply melts into the flour, leading to a more cake-like texture. For best results, consider grating frozen butter or chilling your mixing bowl and even your flour for 15-30 minutes if your kitchen is particularly warm. A food processor can be a great tool for quickly incorporating butter, just remember to pulse it in short bursts to avoid overworking.
Another crucial tip is to not overmix the dough. The less you handle the dough, the less gluten develops, which translates directly to a more tender biscuit. Overworking the dough creates long, elastic gluten strands that result in a tough, chewy texture. Your dough should look shaggy and a bit sticky, not smooth and uniform. When cutting the biscuits, always use a sharp biscuit cutter and press straight down. Twisting the cutter seals the edges, preventing the biscuit from rising to its full potential. Re-flour your cutter between cuts to ensure clean edges.
For the best rise and crumb, consider using a low-protein flour like pastry flour, or an all-purpose flour that is on the lower end of the protein spectrum (around 10-11%). This further minimizes gluten development. And remember, measure your flour correctly by spooning it into your measuring cup and leveling it off, rather than scooping directly from the bag, which can compact it and lead to too much flour.
When it comes to variations, the possibilities are endless! For a delightful sweet treat, try adding 1/4 cup of granulated sugar to the dry ingredients along with a teaspoon of cinnamon and a handful of dried cranberries or chopped apricots. For savory biscuits, cheddar cheese and chives are a classic combination; simply fold in 1/2 cup shredded sharp cheddar and 2 tablespoons snipped fresh chives with the buttermilk. Other savory additions could include garlic powder, rosemary, or even crispy bacon bits. Don’t forget compound butters! Honey butter, garlic-herb butter, or cinnamon sugar butter can elevate your biscuits to new heights. Finally, a light brush of melted butter immediately after baking adds shine, flavor, and softness to the crust. Practice makes perfect, so don’t be discouraged if your first batch isn’t exactly what you envisioned; every batch is a delicious learning experience!
Storage and Reheating
These “Melt In Your Mouth Buttermilk Biscuits” are undoubtedly best enjoyed fresh from the oven, when their flakiness and tenderness are at their peak. However, if you find yourself with leftovers, proper storage and reheating can still yield a delicious experience.
To store baked biscuits, allow them to cool completely on a wire rack. Once cooled, place them in an airtight container or a resealable plastic bag. They will keep at room temperature for 1-2 days. For longer storage, you can refrigerate them for up to 4-5 days, though they may lose some of their initial tenderness and become a bit drier.
For reheating, the oven is your best friend. Preheat your oven to 300-325°F (150-160°C). Place the biscuits directly on a baking sheet and heat for about 5-10 minutes, or until warmed through. This low, slow reheat helps to restore some of their soft interior and lightly crisp the exterior without drying them out. If you’re in a hurry, you can use a toaster oven or even microwave them for 15-30 seconds, but be aware that microwaved biscuits can sometimes become a bit chewy. A quick brush with melted butter before reheating can also help to revive their moisture and flavor.
You can also freeze baked biscuits for up to 2-3 months. Wrap individual cooled biscuits tightly in plastic wrap, then place them in a freezer-safe bag or container. To reheat from frozen, simply place them on a baking sheet in a preheated 300-325°F (150-160°C) oven for 15-20 minutes, or until warmed through and lightly re-crisped.
If you want to get a head start, you can prepare the biscuit dough ahead of time and freeze the unbaked cut biscuits. Place the cut biscuits on a parchment-lined baking sheet and freeze until solid (about 1-2 hours). Once frozen, transfer them to a freezer-safe bag. They can be baked directly from frozen; simply add a few extra minutes to the baking time (around 18-25 minutes total) and keep an eye on them until golden brown.
Frequently Asked Questions
Why are my biscuits tough?
Tough biscuits are almost always a result of overworking the dough. When you knead or mix biscuit dough too much, you develop the gluten in the flour, which creates a chewy, bread-like texture rather than a tender, flaky one. The goal with biscuits is minimal handling; mix just until the ingredients are combined and the dough is shaggy, then fold it gently a few times instead of kneading. Also, using a high-protein flour can contribute to toughness, so opt for all-purpose or pastry flour.
My biscuits didn’t rise, what went wrong?
Several factors can contribute to biscuits not rising properly. Firstly, ensure your leavening agents (baking powder and baking soda) are fresh and not expired. Buttermilk’s acidity activates baking soda, so using old or low-fat buttermilk might also reduce its effectiveness. Another common issue is warm butter; if the butter melts into the flour before baking, it won’t create the steam pockets needed for rise. Lastly, twisting the biscuit cutter seals the edges of the dough, preventing it from expanding upwards, so always press straight down and lift.
Can I make these biscuits without buttermilk?
While true buttermilk provides the best flavor and tenderizing qualities, you can create a substitute in a pinch. For every 1 cup of buttermilk needed, combine 1 cup of regular milk (whole or 2%) with 1 tablespoon of white vinegar or lemon juice. Let it sit for 5-10 minutes until it slightly curdles. This acidified milk will react with the baking soda and provide some of the tang, but the unique thickness and flavor of real buttermilk are hard to fully replicate.
Why is cold butter so important for flaky biscuits?
Cold butter is crucial because of the way it interacts with heat. When cold butter is incorporated into the flour in small pieces, it remains solid until it hits the hot oven. As the butter melts, the water content in the butter turns into steam. This steam gets trapped between the layers of dough, forcing them apart and creating those beautiful, airy, flaky pockets. If the butter is warm or fully melted before baking, it gets absorbed by the flour, leading to a denser, more cake-like crumb instead of a flaky one.