Introduction
Close your eyes for a moment and imagine the vibrant burst of a perfectly ripe orange, its zesty aroma mingling with the sweet, creamy embrace of vanilla. Now, picture that sensation transformed into a decadent, cloud-like cake. That, my friends, is the Orange Dreamsicle Cake – a dessert that doesn’t just tantalize your taste buds but transports you straight back to carefree summer days, the joyful jingle of the ice cream truck, and the sticky-sweet delight of a classic Dreamsicle. This isn’t just any cake; it’s a slice of pure, unadulterated nostalgia, reimagined for the sophisticated palate yet retaining all the whimsical charm of its frozen inspiration. Prepare to fall in love with a cake that’s bright, creamy, and utterly irresistible.
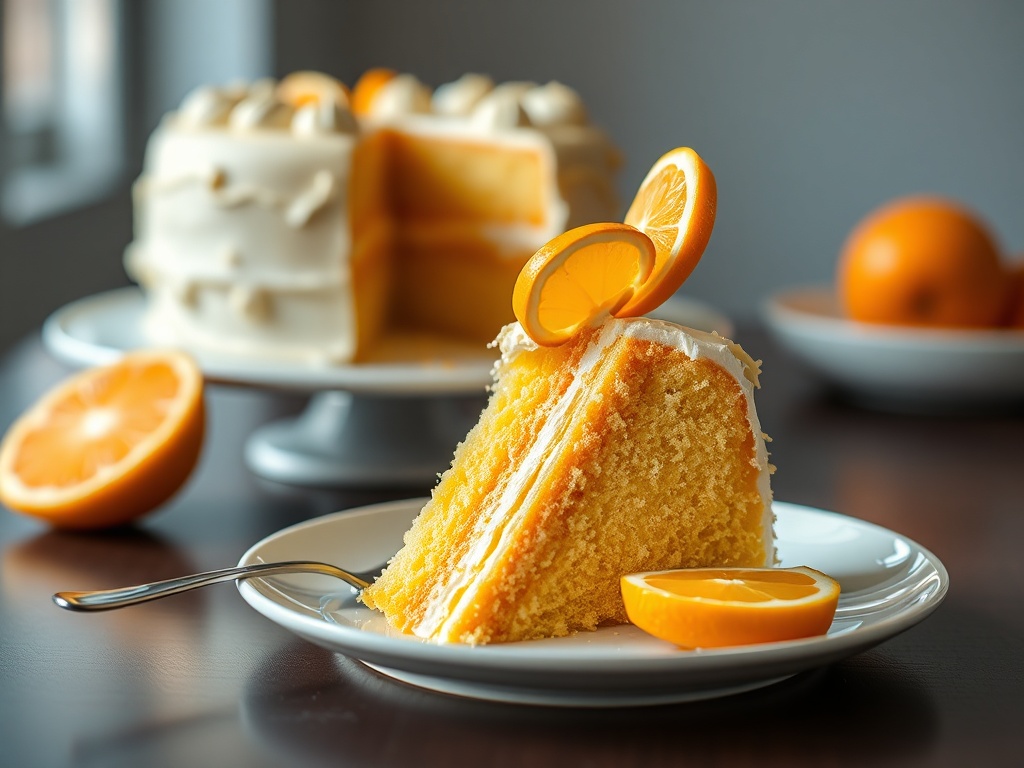
The magic of a Dreamsicle lies in its deceptively simple yet perfectly balanced flavor profile: the tangy brightness of orange sherbet playing harmoniously with the smooth, comforting sweetness of vanilla ice cream. Our Orange Dreamsicle Cake captures this iconic duo in every single bite. We’re talking about a moist, tender orange cake infused with fresh zest and juice, generously layered and frosted with a velvety cream cheese dreamsicle frosting that sings with vanilla and a subtle kiss of orange. It’s a symphony of textures and tastes that’s both refreshing and deeply satisfying, making it an instant crowd-pleaser for any occasion, from casual backyard barbecues to elegant birthday celebrations.
What makes this particular recipe stand out? Beyond its undeniable deliciousness, it’s remarkably approachable for home bakers of all skill levels. We’ve meticulously crafted the steps to ensure a flawless result every time, from achieving a perfectly domed cake to whipping up a frosting that’s smooth as silk. The visual appeal is just as captivating as the taste, with its sunny orange hues and elegant presentation. Whether you’re aiming to impress guests, celebrate a special moment, or simply treat yourself to a little slice of culinary happiness, this Orange Dreamsicle Cake promises to deliver joy, elicit compliments, and become a cherished addition to your recipe repertoire. Get ready to bake, share, and savor the sweet taste of dreams.
Nutritional Information
Per serving (approximate values):
- Calories: 450 kcal
- Protein: 5g
- Carbohydrates: 60g
- Fat: 22g
- Fiber: 1g
- Sodium: 300mg
Ingredients
For the Orange Dreamsicle Cake:
- 2 ½ cups all-purpose flour
- 2 teaspoons baking powder
- ½ teaspoon baking soda
- ½ teaspoon salt
- 1 ½ cups granulated sugar
- ½ cup (1 stick) unsalted butter, softened
- 3 large eggs, at room temperature
- 1 cup buttermilk, at room temperature
- ¼ cup fresh orange juice, pulp-free
- 2 tablespoons orange zest (from about 2 large oranges)
- 2 teaspoons vanilla extract
- ½ cup vegetable oil (or other neutral oil)
For the Dreamsicle Cream Cheese Frosting:
- 16 ounces (2 blocks) full-fat cream cheese, softened
- 1 cup (2 sticks) unsalted butter, softened
- 6-7 cups powdered sugar, sifted
- 2 teaspoons vanilla extract
- 1 tablespoon fresh orange juice
- 1 teaspoon orange zest
- ¼ teaspoon orange extract (optional, for stronger orange flavor)
- 2-3 drops orange food coloring (optional)
For Optional Garnish:
- Orange slices or segments
- White chocolate shavings
- Fresh mint leaves
- Orange or white sprinkles
Instructions
1. Prepare the Orange Dreamsicle Cake:
- Preheat your oven to 350°F (175°C). Grease and flour two 8-inch round cake pans or line with parchment paper circles.
- In a medium bowl, whisk together the all-purpose flour, baking powder, baking soda, and salt. Set aside.
- In a large mixing bowl, using an electric mixer, cream together the softened unsalted butter and granulated sugar until light and fluffy, about 3-4 minutes.
- Add the eggs one at a time, beating well after each addition until fully incorporated. Scrape down the sides of the bowl as needed.
- Stir in the vanilla extract, orange zest, and vegetable oil. Mix until just combined.
- In a separate small bowl, combine the buttermilk and fresh orange juice.
- Gradually add the dry ingredients to the wet ingredients in three additions, alternating with the buttermilk and orange juice mixture, beginning and ending with the dry ingredients. Mix on low speed until just combined after each addition. Be careful not to overmix the batter; overmixing can lead to a tough cake.
- Divide the batter evenly between the two prepared cake pans.
- Bake for 28-32 minutes, or until a wooden skewer or toothpick inserted into the center of the cakes comes out clean.
- Allow the cakes to cool in their pans on a wire rack for 10-15 minutes before inverting them onto the wire rack to cool completely. Ensure cakes are entirely cool before frosting.
2. Prepare the Dreamsicle Cream Cheese Frosting:
- In a large mixing bowl, using an electric mixer, beat the softened cream cheese and softened unsalted butter together on medium speed until smooth and creamy, about 2-3 minutes.
- Gradually add the sifted powdered sugar, one cup at a time, beating on low speed until combined, then increasing to medium-high speed until light and fluffy. Scrape down the sides of the bowl frequently.
- Stir in the vanilla extract, fresh orange juice, orange zest, and optional orange extract. Beat until well combined.
- If desired, add 2-3 drops of orange food coloring and mix until the desired dreamsicle orange hue is achieved.
- Taste the frosting and adjust sweetness or tanginess as needed by adding more powdered sugar or a tiny squeeze of orange juice.
3. Assemble the Orange Dreamsicle Cake:
- Once the cake layers are completely cool, use a serrated knife to level the tops of the cakes if necessary, creating flat surfaces for stacking.
- Place one cake layer on your serving plate or cake stand. Spread about 1 to 1 ½ cups of frosting evenly over the top of the first layer.
- Carefully place the second cake layer on top.
- Spread the remaining frosting over the top and sides of the cake, using an offset spatula or bench scraper to create a smooth finish. You can make decorative swirls or keep it perfectly smooth.
- Garnish the cake with fresh orange slices, white chocolate shavings, fresh mint leaves, or sprinkles, if desired.
- Refrigerate the cake for at least 30 minutes before serving to allow the frosting to set.
Cooking Tips and Variations
Baking Tips for a Perfect Cake:
- Room Temperature Ingredients are Key: Ensure your butter, cream cheese, and eggs are at room temperature. This allows them to emulsify properly, creating a smooth batter and creamy frosting, preventing lumps, and ensuring a tender cake texture.
- Measure Flour Accurately: For best results, spoon flour into your measuring cup and level it off with a straight edge rather than scooping directly from the bag, which can compact the flour and lead to a dry cake.
- Don’t Overmix: Mix the cake batter until just combined. Overmixing develops gluten, which can result in a tough, dense cake.
- Proper Pan Preparation: Always grease and flour your cake pans thoroughly, or use parchment paper circles on the bottom, to prevent sticking and ensure easy release.
- Test for Doneness: The toothpick test is reliable. Insert a wooden skewer or toothpick into the center of the cake; if it comes out clean or with a few moist crumbs, the cake is done.
- Cool Completely: Frosting a warm cake is a recipe for disaster. Ensure the cake layers are entirely cool before applying frosting to prevent it from melting and sliding off.
Frosting Tips for a Smooth Finish:
- Sift Powdered Sugar: Sifting powdered sugar is crucial for a lump-free, silky-smooth frosting. Don’t skip this step!
- Adjust Consistency: If your frosting is too thick, add a tiny splash of milk or cream (about a teaspoon at a time) until it reaches your desired consistency. If it’s too thin, add more sifted powdered sugar.
- Achieve a Smooth Finish: Use an offset spatula or a bench scraper. After applying the frosting, hold the scraper perpendicular to the cake and rotate the cake on a turntable (if you have one) to smooth the sides. Heat your spatula under hot water, dry it, and then use it to gently smooth the top and sides for an extra polished look.
Flavor Enhancements & Variations:
- Orange Extract vs. Juice: Fresh orange juice and zest provide a bright, natural orange flavor. For an intensified, more sherbet-like orange punch in the frosting, add a small amount of orange extract (start with ¼ teaspoon and add more to taste).
- Adding Orange Curd: For an extra layer of tangy-sweetness, spread a thin layer of homemade or store-bought orange curd between the cake layers before adding the frosting. This adds a delightful textural and flavor contrast.
- Dreamsicle Glaze: For a lighter dessert or if you prefer less frosting, you can make a simple dreamsicle glaze by whisking powdered sugar with orange juice, orange zest, and a touch of vanilla. Pour it over a cooled cake.
- Cupcakes or Sheet Cake: This recipe can easily be adapted! For cupcakes, line a muffin tin with paper liners and fill ¾ full; bake for 18-22 minutes. For a 9×13-inch sheet cake, bake for 30-35 minutes. Adjust baking times accordingly.
- Dreamsicle Swirl Cake: For a stunning visual effect, divide a portion of your cake batter (about 1 cup) and mix it with a few drops of orange food coloring to create a vibrant orange color. Swirl this colored batter into the plain batter in the cake pans using a knife or skewer before baking.
- Gluten-Free Option: Substitute the all-purpose flour with a 1:1 gluten-free baking flour blend that contains xanthan gum.
- Dairy-Free Option: Use dairy-free butter sticks, dairy-free cream cheese, and dairy-free buttermilk (made by adding 1 tablespoon of lemon juice or apple cider vinegar to 1 cup of dairy-free milk and letting it sit for 5-10 minutes).
Storage and Reheating
Serving Suggestions:
- Classic Elegance: Garnish simply with thin orange slices or elegant white chocolate curls for a sophisticated presentation.
- Festive Fun: A sprinkle of colorful orange or white sprinkles can add a playful touch, especially for birthdays or children’s parties.
- Dessert Pairing: Serve a slice alongside a small scoop of premium vanilla bean ice cream or a scoop of orange sherbet to lean into the full dreamsicle experience.
- Freshness Boost: A few fresh mint leaves can add a pop of color and a refreshing aroma.
Best Practices for Storage:
- Refrigeration is Key: Due to the cream cheese in the frosting, this Orange Dreamsicle Cake must be stored in the refrigerator. Place it in an airtight cake carrier or cover it loosely with plastic wrap to prevent it from drying out or absorbing refrigerator odors.
- Shelf Life: Stored properly in the refrigerator, the cake will stay fresh for 3-5 days.
- Bringing to Room Temperature: For the best flavor and texture, remove the cake from the refrigerator and let it sit at room temperature for 30-60 minutes before serving. This allows the frosting and cake to soften slightly, enhancing their deliciousness.
- Freezing Instructions (Unfrosted Layers): You can bake the cake layers ahead of time and freeze them. Once completely cooled, wrap each unfrosted cake layer tightly in plastic wrap, then an additional layer of aluminum foil. Freeze for up to 2-3 months. Thaw frozen layers in the refrigerator overnight before unwrapping and frosting.
- Freezing Frosted Cake: While technically possible, freezing a fully frosted cake with cream cheese frosting can sometimes alter the frosting’s texture upon thawing, making it slightly grainy. If you must freeze the frosted cake, ensure it’s well-wrapped in plastic wrap and then foil, and thaw slowly in the refrigerator.
Frequently Asked Questions
Can I use bottled orange juice instead of fresh?
While fresh orange juice and zest offer the most vibrant and authentic flavor, you can use good quality bottled orange juice if fresh isn’t available. However, make sure it’s 100% orange juice with no added sugar or pulp. You will still need fresh zest for the best aroma and flavor in both the cake and frosting.
My cream cheese frosting is too runny. What can I do?
If your cream cheese frosting is too runny, it’s usually due to warm ingredients or not enough powdered sugar. First, try chilling the frosting in the refrigerator for 20-30 minutes. The cold will help solidify the butter and cream cheese. If it’s still too thin, gradually beat in more sifted powdered sugar, one tablespoon at a time, until the desired consistency is reached. Ensure your butter and cream cheese were properly softened, not melted, before starting.
How far in advance can I make this cake?
You can bake the cake layers up to 2 days in advance, cool them completely, wrap them tightly in plastic wrap, and store them at room temperature (or refrigerate if your kitchen is very warm). The frosting can be made 1-2 days in advance and stored in an airtight container in the refrigerator. Before using, let the frosting come to room temperature and re-whip it briefly until smooth. Assemble and frost the cake no more than 24 hours before serving for optimal freshness and texture.
Why did my cake sink in the middle?
Several factors can cause a cake to sink. Common culprits include opening the oven door too early during baking (which causes a sudden temperature drop), overmixing the batter (developing too much gluten), using old or expired leavening agents (baking powder/soda), or baking at too low a temperature for too long. Ensure your oven temperature is accurate (an oven thermometer can help), and resist the urge to peek before the recommended baking time.