Introduction
Prepare yourself for a culinary adventure that will redefine your perception of homemade barbecue: Oven-Baked BBQ Ribs. This isn’t just a recipe; it’s a promise of pure, unadulterated pleasure, delivering ribs so incredibly tender they literally fall off the bone with the slightest nudge. Forget the smoker, the grill, and the endless fuss – our oven-baked method ensures consistently succulent, juicy pork ribs, slathered in a rich, glossy, and perfectly caramelized BBQ sauce, all from the comfort of your kitchen. The allure of perfectly cooked ribs, with their smoky-sweet aroma filling your home, is simply irresistible, and with this recipe, that dream becomes a delicious reality.
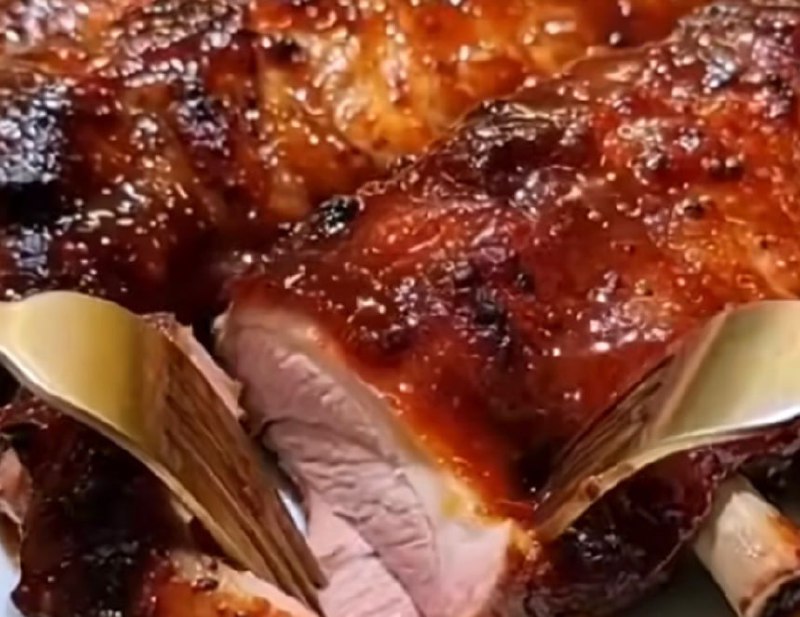
What makes this particular recipe stand out is its masterful blend of simplicity and spectacular results. We’re harnessing the gentle, consistent heat of your oven to slowly break down the tough connective tissues in the ribs, transforming them into melt-in-your-mouth perfection. This low-and-slow approach is the secret weapon for achieving that coveted “fall-off-the-bone” texture, ensuring every bite is as tender as the last. And let’s not forget the star of the show – that thick, dark, and sticky BBQ glaze that coats each rib, offering a delightful balance of sweet, tangy, and savory notes that will have everyone reaching for seconds.
Imagine the satisfaction of serving up a platter of restaurant-quality ribs, glistening under the light, with guests exclaiming over their incredible tenderness and flavor. This recipe empowers you to achieve just that, effortlessly. Whether you’re a seasoned pitmaster or a novice in the kitchen, our detailed steps will guide you to barbecue nirvana, proving that you don’t need fancy equipment to create truly unforgettable, finger-licking good BBQ ribs right at home. Get ready to impress, delight, and savor every single succulent bite of these truly exceptional oven-baked BBQ ribs.
Nutritional Information
Per serving (approximate values, based on 1/3 rack of St. Louis style ribs with moderate BBQ sauce):
- Calories: 720 kcal
- Protein: 45g
- Carbohydrates: 35g
- Fat: 42g
- Fiber: 1g
- Sodium: 980mg
Ingredients
- 2 racks St. Louis style pork ribs (about 2.5-3 pounds each)
- 2 tablespoons yellow mustard (for binder)
- 1/2 cup brown sugar, packed
- 2 tablespoons smoked paprika
- 1 tablespoon garlic powder
- 1 tablespoon onion powder
- 1 tablespoon kosher salt
- 1 teaspoon black pepper
- 1/2 teaspoon cayenne pepper (optional, for a kick)
- 1/2 teaspoon ground cumin
- 2 cups your favorite BBQ sauce (a thicker, sweeter sauce works best)
- 1/4 cup apple cider vinegar (for spritzing, optional)
- 1/4 cup water or apple juice (for spritzing, optional)
Instructions
- Prepare the Ribs: Remove the ribs from their packaging and pat them thoroughly dry with paper towels. This is a crucial step for a good crust. On the boney side of each rack, locate the thin, silvery membrane (silver skin). Starting from one end, use a butter knife or the handle of a spoon to gently lift a corner of the membrane. Once you have a good grip, use a paper towel to firmly pull the membrane off the entire rack. This prevents the ribs from being tough and allows the rub to penetrate deeper. Trim any excess fatty bits from the top side of the ribs.
- Apply the Binder: Lightly spread about 1 tablespoon of yellow mustard evenly over both sides of each rack of ribs. The mustard acts as a binder for the dry rub, helping it adhere to the meat, but won’t impart a strong mustard flavor after cooking.
- Mix the Dry Rub: In a small bowl, combine the brown sugar, smoked paprika, garlic powder, onion powder, kosher salt, black pepper, cayenne pepper (if using), and ground cumin. Mix well until all ingredients are thoroughly combined.
- Season the Ribs: Generously sprinkle the dry rub over all surfaces of both rib racks. Gently pat the rub into the meat to ensure it adheres well. Don’t be shy; a good amount of rub is key to flavor. For best results, cover the seasoned ribs tightly with plastic wrap and refrigerate for at least 2 hours, or preferably overnight, to allow the flavors to meld. If short on time, you can proceed directly to cooking, but the marination step significantly enhances the flavor.
- Preheat the Oven: Preheat your oven to a low temperature of 275°F (135°C). Low and slow is the mantra for fall-off-the-bone tenderness.
- Prepare for Baking: Tear off two large sheets of heavy-duty aluminum foil for each rack of ribs (so four sheets total). Stack two sheets of foil on top of each other for added strength. Place one seasoned rack of ribs, meat-side up, onto the center of the stacked foil. Repeat with the second rack.
- Wrap the Ribs: Tightly wrap the ribs in the foil, creating a sealed packet. Ensure there are no gaps for steam to escape. This wrapping technique essentially steams the ribs, keeping them incredibly moist and tender during the long cooking process.
- Bake Low and Slow: Place the foil-wrapped ribs directly onto a baking sheet (to catch any potential drips) and transfer to the preheated oven. Bake for approximately 3 to 3.5 hours. The exact time may vary slightly depending on the thickness of your ribs. The goal is for them to be very tender, but not completely falling apart inside the foil yet.
- Check for Tenderness: After 3 hours, carefully remove the ribs from the oven. Open one foil packet (be careful of the hot steam) and gently try to bend a rib. If it feels very flexible and the meat starts to pull away from the bone easily, they are ready for the next step. If not, re-wrap and return to the oven for another 30-60 minutes.
- Apply BBQ Sauce: Carefully unwrap the ribs from the foil and discard any accumulated liquid. Place the ribs, meat-side up, directly onto the baking sheet (you may want to line it with fresh foil or parchment paper for easier cleanup). Generously brush a thick layer of your favorite BBQ sauce over the top and sides of the ribs.
- Return to Oven for Glazing: Increase the oven temperature to 375°F (190°C). Return the sauced ribs to the oven and bake for another 20-30 minutes, or until the BBQ sauce is caramelized, sticky, and slightly bubbly. You can baste them once or twice more with additional sauce during this phase for an even thicker glaze.
- Optional Broil for Extra Char: For an extra charred and sticky finish, you can carefully transfer the ribs to a broiler-safe pan (or keep them on the existing baking sheet if it’s broiler-safe) and broil for 2-5 minutes. Watch them very closely, as barbecue sauce can burn quickly under the broiler. This step gives them that beautiful, slightly crisp, restaurant-style char.
- Rest the Ribs: Once the ribs are beautifully glazed and caramelized, remove them from the oven. Tent them loosely with foil and let them rest for 10-15 minutes before slicing. This resting period allows the juices to redistribute, resulting in even more tender and flavorful ribs.
- Slice and Serve: Slice the ribs between the bones and serve immediately. Prepare for happy faces and sticky fingers!
Cooking Tips and Variations
For truly fall-off-the-bone ribs, the “low and slow” cooking method is non-negotiable. Resist the urge to crank up the heat, as this will dry out the meat. The 275°F (135°C) temperature for 3-3.5 hours is ideal for breaking down the tough collagen without sacrificing moisture. Ensure your ribs are tightly wrapped in heavy-duty foil during the initial baking phase; this creates a steamy environment that tenderizes the meat from within. If you only have regular foil, use two layers per rack. When removing the membrane, a dry paper towel provides excellent grip. If it’s still slippery, try using a corner of a kitchen towel. For an extra layer of flavor and moisture during the long bake, you can spritz the ribs with a mixture of equal parts apple cider vinegar and water/apple juice every hour or so, just before re-sealing the foil. This adds a subtle tang and keeps the surface moist. Don’t apply the BBQ sauce too early; the high sugar content can cause it to burn before the ribs are fully tender. Wait until the last 20-30 minutes of cooking at a higher temperature. For a smoky flavor without a smoker, try adding a few drops of liquid smoke to your dry rub or BBQ sauce, or use smoked paprika for a milder effect. Experiment with different dry rubs: for a spicier kick, add more cayenne or chili powder. For a sweeter profile, increase the brown sugar. You can also customize your BBQ sauce by stirring in a tablespoon of Worcestershire sauce, a dash of hot sauce, or a spoonful of molasses for added depth. If you prefer a less sweet rib, opt for a vinegar-based BBQ sauce. For make-ahead convenience, cook the ribs through the foil-wrapped stage, let them cool completely, then refrigerate. When ready to serve, unwrap, sauce, and finish baking at 375°F (190°C) until heated through and glazed.
Storage and Reheating
To store leftover oven-baked BBQ ribs, allow them to cool completely to room temperature within two hours of cooking. Once cooled, place the ribs in an airtight container or wrap them tightly in aluminum foil. They can be stored in the refrigerator for 3-4 days. For longer storage, ribs can be frozen for up to 2-3 months. To freeze, wrap individual portions or whole racks tightly in plastic wrap, then an additional layer of aluminum foil, and place them in a freezer-safe bag or container. Label with the date.
When reheating, it’s best to do so gently to maintain their tenderness and moisture. For refrigerated ribs, preheat your oven to 250-275°F (120-135°C). Place the ribs on a baking sheet, add a tablespoon or two of water or apple juice to the bottom of the pan, and cover tightly with foil. Heat for 20-30 minutes, or until heated through. You can also microwave individual portions, but this may result in a slightly tougher texture. If reheating from frozen, thaw the ribs overnight in the refrigerator first, then follow the oven reheating instructions. Avoid reheating at high temperatures, as this can dry out the meat and make it tough. If desired, you can brush on a fresh layer of BBQ sauce during the last few minutes of reheating for a refreshed glaze.
Frequently Asked Questions
Why do my ribs come out tough instead of fall-off-the-bone?
The most common reason for tough ribs is not cooking them long enough at a low temperature. Tenderness comes from slowly breaking down the connective tissues in the meat. If your ribs are tough, they likely needed more time in the oven. Ensure you’re cooking them tightly wrapped in foil at 275°F (135°C) for at least 3-3.5 hours, or until they are very flexible when bent.
Is it really necessary to remove the membrane from the back of the ribs?
Yes, absolutely! Removing the membrane (silver skin) is a critical step for achieving truly fall-off-the-bone ribs. This membrane doesn’t break down during cooking and will result in a chewy, tough texture on the underside of your ribs. It also prevents your dry rub and flavors from fully penetrating the meat. It’s a small effort for a significant improvement in texture.
Can I use baby back ribs instead of St. Louis style?
Yes, you can definitely use baby back ribs for this recipe. Baby back ribs are typically smaller and leaner than St. Louis style, so they may require a slightly shorter cooking time. Start checking for tenderness around 2.5 hours when wrapped in foil, and adjust as needed. The glazing process will remain the same.
My BBQ sauce is burning in the oven. What am I doing wrong?
BBQ sauce contains a lot of sugar, which can burn easily at high temperatures or if applied too early in the cooking process. Make sure you only apply the BBQ sauce during the final 20-30 minutes of baking, after the ribs are already tender. If you want a deeper caramelization, you can finish them under the broiler, but watch them very carefully, as they can go from perfectly glazed to burnt in a matter of seconds.