Introduction
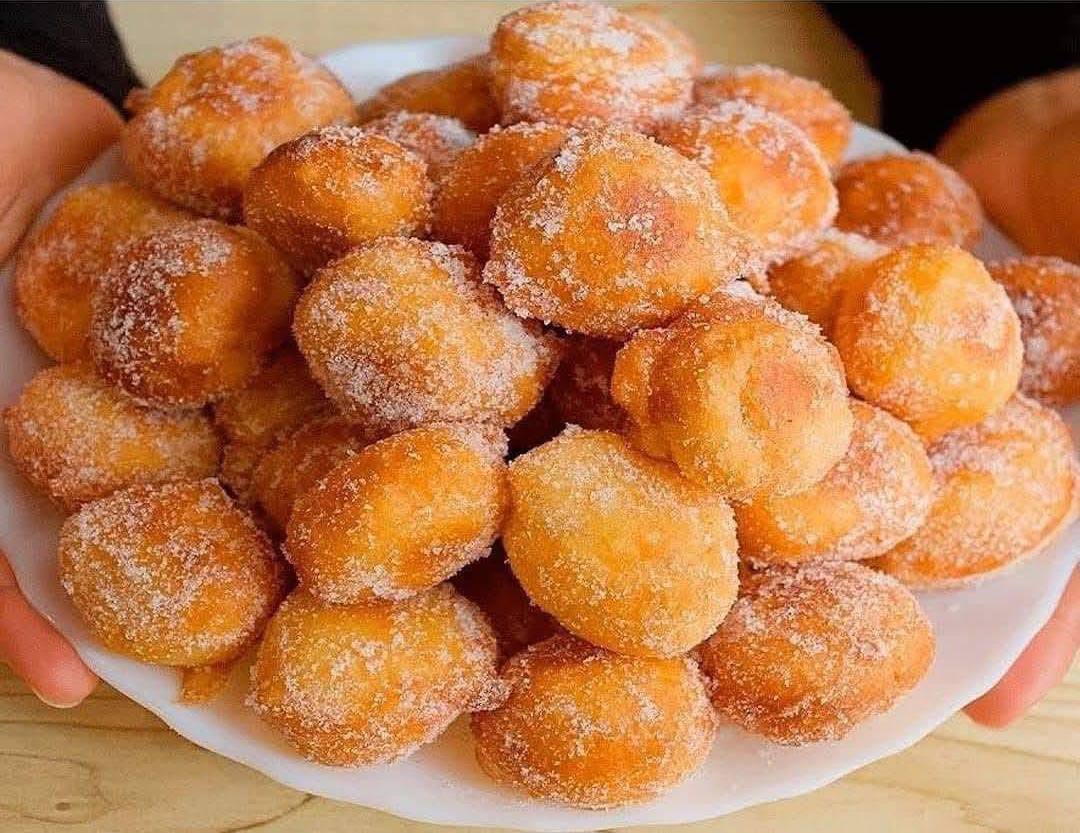
There’s something undeniably magical about a warm, fluffy doughnut, fresh from the fryer and coated in a sweet, glistening sugar crust. Now, imagine that same irresistible delight, but in a perfectly bite-sized package! Our “Perfectly Mini Doughnuts” recipe brings all the joy of homemade doughnuts right into your kitchen, transforming simple ingredients into an extraordinary treat. These golden-brown morsels are a testament to the simple pleasure of fried dough, offering a sweet escape with every pop-in-your-mouth bite. They’re not just a dessert; they’re an experience – a little moment of indulgence that feels both nostalgic and utterly delicious.
What makes mini doughnuts so special? For starters, their size is a game-changer. They’re ideal for sharing at parties, perfect for a quick snack without the guilt of a full-sized doughnut, and fantastic for little hands. No need for plates or forks; just grab and enjoy! Their diminutive stature also means they cook up incredibly quickly, making them a much more approachable baking project than their larger counterparts. You get that same satisfying crunch on the outside and a tender, airy interior, all while enjoying the convenience of a smaller, more manageable treat. This recipe is designed to be straightforward and achievable, ensuring that even novice bakers can whip up a batch of these sugar-coated beauties.
Get ready to fill your home with the intoxicating aroma of freshly fried dough and warm sugar. This guide will walk you through every step, from mixing the simple batter to achieving that perfect golden hue and irresistible sugar coating. We’ll cover all the essential tips and tricks to ensure your mini doughnuts are not just good, but truly perfect – light, airy, and bursting with sweet flavor. So, gather your ingredients, clear your counter, and prepare to embark on a delightful culinary adventure that promises to deliver a batch of the most charming and delicious mini doughnuts you’ve ever tasted. Your taste buds, and your guests, will thank you!
Nutritional Information
Per serving (approximate values, based on 1 mini doughnut):
- Calories: 85
- Protein: 1g
- Carbohydrates: 10g
- Fat: 5g
- Fiber: 0g
- Sodium: 50mg
Ingredients
- 2 cups (240g) all-purpose flour
- 1/2 cup (100g) granulated sugar, plus 1 cup (200g) for coating
- 2 teaspoons baking powder
- 1/2 teaspoon baking soda
- 1/2 teaspoon salt
- 1 cup (240ml) buttermilk (or 1 cup milk mixed with 1 tablespoon lemon juice or white vinegar, let sit for 5 minutes)
- 1 large egg
- 2 tablespoons (28g) unsalted butter, melted and cooled
- 1 teaspoon vanilla extract
- 4-6 cups vegetable oil, canola oil, or peanut oil, for frying
Instructions
- In a large bowl, whisk together the 2 cups all-purpose flour, 1/2 cup granulated sugar, 2 teaspoons baking powder, 1/2 teaspoon baking soda, and 1/2 teaspoon salt until well combined and no lumps remain. This ensures an even distribution of leavening agents and seasoning.
- In a separate medium bowl, whisk together the 1 cup buttermilk, 1 large egg, 2 tablespoons melted and cooled unsalted butter, and 1 teaspoon vanilla extract until smooth. Make sure the butter is cooled to prevent scrambling the egg.
- Pour the wet ingredients into the dry ingredients. Using a rubber spatula or wooden spoon, gently mix until just combined. Be careful not to overmix the dough; a few lumps are perfectly fine. Overmixing can lead to tough doughnuts. The dough will be thick and sticky.
- Cover the bowl with plastic wrap and let the dough rest at room temperature for 10-15 minutes. This resting period allows the flour to fully hydrate and the gluten to relax, resulting in a more tender and pliable dough.
- While the dough rests, prepare your frying station. Pour 4-6 cups of frying oil into a large, heavy-bottomed pot or Dutch oven, ensuring the oil is at least 3 inches deep. Attach a deep-fry thermometer to the side of the pot. Heat the oil over medium heat until it reaches 350°F (175°C). It is crucial to maintain this temperature for perfectly cooked doughnuts.
- While the oil heats, prepare your sugar coating station. Pour the remaining 1 cup of granulated sugar into a shallow dish or bowl. Place a wire rack over a baking sheet or paper towels near your frying station to drain excess oil from the cooked doughnuts.
- Once the oil reaches 350°F (175°C), it’s time to form and fry the doughnuts. You have a few options for shaping:
- Scooping: Use two spoons or a small cookie scoop (about 1-inch diameter) to drop small portions of dough into the hot oil. This method results in charmingly irregular, rustic “doughnut hole” shapes.
- Piping: Transfer the dough to a piping bag fitted with a large round tip (or simply snip off the corner of a sturdy Ziploc bag). Squeeze out small dollops of dough directly into the hot oil, using a pair of kitchen shears or a knife to snip off the dough.
Work in small batches, frying 4-6 doughnuts at a time, depending on the size of your pot. Do not overcrowd the pot, as this will lower the oil temperature and lead to greasy doughnuts.
- Fry the mini doughnuts for 2-3 minutes per side, or until they are a beautiful golden brown color and cooked through. Use a slotted spoon or spider to gently flip them halfway through the frying process. The internal temperature of a cooked doughnut should be around 200-210°F (93-99°C).
- Carefully remove the fried doughnuts from the oil with the slotted spoon or spider, allowing any excess oil to drip back into the pot. Immediately transfer them to the prepared wire rack to drain for about 30 seconds to 1 minute.
- While the doughnuts are still warm (this is key for the sugar to adhere properly), transfer them in small batches to the shallow dish of granulated sugar. Toss gently to coat them completely and evenly.
- Transfer the sugar-coated mini doughnuts to a clean serving platter. Repeat the frying and coating process with the remaining dough, ensuring the oil temperature is maintained at 350°F (175°C) between batches. Adjust heat as needed.
- Serve your Perfectly Mini Doughnuts immediately and enjoy their warm, fluffy, and sweet deliciousness!
Cooking Tips and Variations
Achieving perfectly mini doughnuts relies on a few key techniques. First and foremost, oil temperature is paramount. Invest in a reliable deep-fry thermometer; maintaining a steady 350°F (175°C) prevents your doughnuts from becoming either greasy (if the oil is too cool) or burnt on the outside and raw on the inside (if the oil is too hot). If the oil temperature drops too low, simply pause frying for a moment to allow it to reheat before adding more dough. Another critical tip is to avoid overmixing your dough. A slightly lumpy batter is desirable, as overworking the gluten will result in tough, chewy doughnuts rather than light and airy ones. When forming your doughnuts, handle the dough as little as possible. For the best sugar adhesion, make sure to coat the doughnuts while they are still warm from the fryer. The residual heat creates a slightly sticky surface that helps the sugar cling perfectly.
For those looking to experiment, these mini doughnuts are incredibly versatile. You can easily add flavor to the dough itself. Try incorporating 1/2 teaspoon of ground cinnamon or nutmeg into the dry ingredients for a spiced doughnut. A pinch of cardamom can also add a unique aromatic note. For a citrusy twist, add 1-2 teaspoons of lemon or orange zest to the wet ingredients – the zest brightens the flavor beautifully. The sugar coating also offers a canvas for creativity. Instead of plain granulated sugar, make a cinnamon sugar coating by mixing 1 cup of granulated sugar with 1 tablespoon of ground cinnamon. For a different texture and look, you can toss the warm doughnuts in powdered sugar (confectioners’ sugar) instead. For a more decadent treat, consider making a simple glaze. Whisk together 1 cup powdered sugar, 2 tablespoons milk, and 1/2 teaspoon vanilla extract until smooth, then dip the cooled doughnuts into the glaze.
Beyond flavor additions, you can also experiment with serving suggestions. These mini doughnuts are fantastic on their own, but they also pair wonderfully with dipping sauces. A rich chocolate ganache, a silky caramel sauce, or even a fruit compote can elevate them to an even more impressive dessert. For a festive touch, you could drizzle them with melted chocolate and sprinkle with colorful sprinkles. They also make an excellent addition to a brunch spread or a dessert bar. Remember to fry in small batches to maintain oil temperature and ensure each mini doughnut cooks evenly and beautifully. Don’t be afraid to experiment and find your favorite combination!
Storage and Reheating
Mini doughnuts are undoubtedly best enjoyed fresh, warm, and straight from the fryer, as this is when their texture is at its peak – crispy on the outside and fluffy on the inside. However, if you happen to have any leftovers (a rare occurrence with these delightful treats!), they can be stored to enjoy later.
To store leftover mini doughnuts, allow them to cool completely to room temperature. Once cooled, place them in an airtight container. If you have coated them in granulated sugar, it’s best to store them in a single layer or with parchment paper between layers to prevent the sugar from clumping or melting. Store the container at room temperature for up to 1-2 days. Beyond that, the texture tends to degrade significantly, becoming tougher and drier. Avoid refrigerating doughnuts, as the cold air can dry them out and make them stale more quickly.
For reheating, the best method to revive their texture is a quick warm-up. You can reheat them in an oven or toaster oven at 300°F (150°C) for about 5-7 minutes, or until they are warmed through and slightly crisp again. Be careful not to overheat them, as this can make them tough. Alternatively, you can pop them in a microwave for 10-15 seconds; however, this method often results in a softer, chewier texture rather than the desired crispiness. If your doughnuts were coated in granulated sugar, reheating might cause some of the sugar to melt and become sticky. If you anticipate having leftovers, you might consider coating only the doughnuts you plan to eat immediately and storing the plain ones, then tossing them in fresh sugar after reheating.
Frequently Asked Questions
What kind of oil is best for frying mini doughnuts?
For frying mini doughnuts, it’s best to use a neutral-flavored oil with a high smoke point. Vegetable oil, canola oil, and peanut oil are all excellent choices. These oils won’t impart any unwanted flavors to your doughnuts and can withstand the high temperatures required for deep frying without breaking down or smoking excessively. Avoid olive oil or butter for deep frying.
Can I make these mini doughnuts without a deep-fry thermometer?
While a deep-fry thermometer is highly recommended for best results, it is possible to fry mini doughnuts without one, though it requires more careful attention. To test if your oil is hot enough, you can drop a tiny pinch of dough into the oil. If it immediately sizzles and bubbles vigorously, the oil is likely ready. If it sinks and barely bubbles, the oil is too cool. If it browns too quickly and aggressively, the oil is too hot. Adjust your heat accordingly, and remember that consistent temperature is key to avoiding greasy or burnt doughnuts.
My doughnuts are coming out greasy. What went wrong?
Greasy doughnuts are almost always a sign that your frying oil was not hot enough. When the oil temperature is too low, the dough absorbs more oil instead of cooking quickly and forming a crisp exterior. Ensure your oil is consistently maintained at 350°F (175°C) using a thermometer. Also, avoid overcrowding the pot, as this can cause the oil temperature to drop significantly. Frying in small batches helps maintain the optimal temperature.
Can I prepare the dough ahead of time?
This particular recipe uses baking powder and baking soda as leavening agents, which are fast-acting. While you can let the dough rest for up to 30 minutes at room temperature, it’s generally best to fry these mini doughnuts relatively soon after mixing the dough to get the best rise and texture. The leavening agents start reacting as soon as they come into contact with the wet ingredients. If you want to prepare ahead, you could measure out your dry ingredients and wet ingredients separately, and then combine them just before you are ready to fry.