Introduction
There are few things as comforting and inviting as the aroma of freshly baked bread wafting through your home. It’s a scent that promises warmth, sustenance, and a touch of homemade magic. Imagine that same comforting aroma, but with a twist: bread so soft, so fluffy, and so utterly shareable that everyone at the table can easily pull off their own perfect, golden-brown piece. Welcome to the wonderful world of Pull-Apart Bread Rolls – a dish that’s as delightful to make as it is to eat, transforming simple ingredients into a communal centerpiece.
These aren’t just any dinner rolls; their unique presentation encourages interaction and makes them an instant hit at any gathering. Whether you’re serving them alongside a hearty stew, as a sophisticated side for a holiday meal, or simply as a comforting snack, Pull-Apart Bread Rolls are designed for sharing. Each roll bakes up perfectly tender on all sides, with just enough of a golden crust to provide a satisfying counterpoint to the pillowy interior. They’re surprisingly simple to master, even for novice bakers, making them a fantastic entry point into the rewarding art of bread making.
What truly sets these rolls apart is their irresistible texture and the charming way they come together. The dough, enriched with milk and a touch of butter, bakes into individual spheres that are just barely connected, allowing for effortless “pulling apart” without any tearing or crumbling. This recipe will guide you through creating soft, airy rolls with a beautiful golden finish, proving that homemade bread doesn’t have to be intimidating. Get ready to impress your friends and family with this easy-to-make, utterly delicious, and endlessly versatile bread creation.
Nutritional Information
Per serving (approximate values, based on 12 rolls):
- Calories: 220
- Protein: 7g
- Carbohydrates: 35g
- Fat: 6g
- Fiber: 2g
- Sodium: 280mg
Ingredients
- 1 cup (240ml) warm milk (105-115°F / 40-46°C)
- 2 ¼ teaspoons (1 standard packet) active dry yeast
- 2 tablespoons granulated sugar, plus a pinch for yeast activation
- 1 large egg, at room temperature
- ¼ cup (55g) unsalted butter, melted and cooled slightly, plus 1 tablespoon for brushing
- 1 teaspoon salt
- 3 ½ cups (420g) all-purpose flour, plus more for dusting
- Cooking spray or additional butter for greasing the pan
Instructions
- Activate the Yeast: In a large mixing bowl (or the bowl of a stand mixer), combine the warm milk, 2 tablespoons of sugar, and the active dry yeast. Stir gently and let it sit for 5-10 minutes, until the mixture becomes foamy. This indicates the yeast is active.
- Prepare the Dough: To the yeast mixture, add the egg, ¼ cup melted butter, and salt. Whisk everything together until well combined. Gradually add the flour, about 1 cup at a time, mixing with a wooden spoon or the dough hook attachment of your stand mixer until a shaggy dough forms.
- Knead the Dough: Turn the dough out onto a lightly floured surface (or continue in the stand mixer). Knead for 8-10 minutes by hand, or 6-8 minutes with a stand mixer on medium-low speed. The dough should become smooth, elastic, and slightly tacky but not sticky. If kneading by hand, resist the urge to add too much flour; a slightly tacky dough is key to soft rolls.
- First Rise (Bulk Fermentation): Lightly grease a clean large bowl with cooking spray or oil. Place the dough in the bowl, turning it once to coat. Cover the bowl tightly with plastic wrap or a clean kitchen towel. Let the dough rise in a warm, draft-free place for 1 to 1.5 hours, or until it has doubled in size.
- Shape the Rolls: Gently punch down the risen dough to release the air. Turn the dough out onto a lightly floured surface. Divide the dough into 18-20 equal pieces (about 1.5-2 ounces each). Roll each piece into a smooth, round ball.
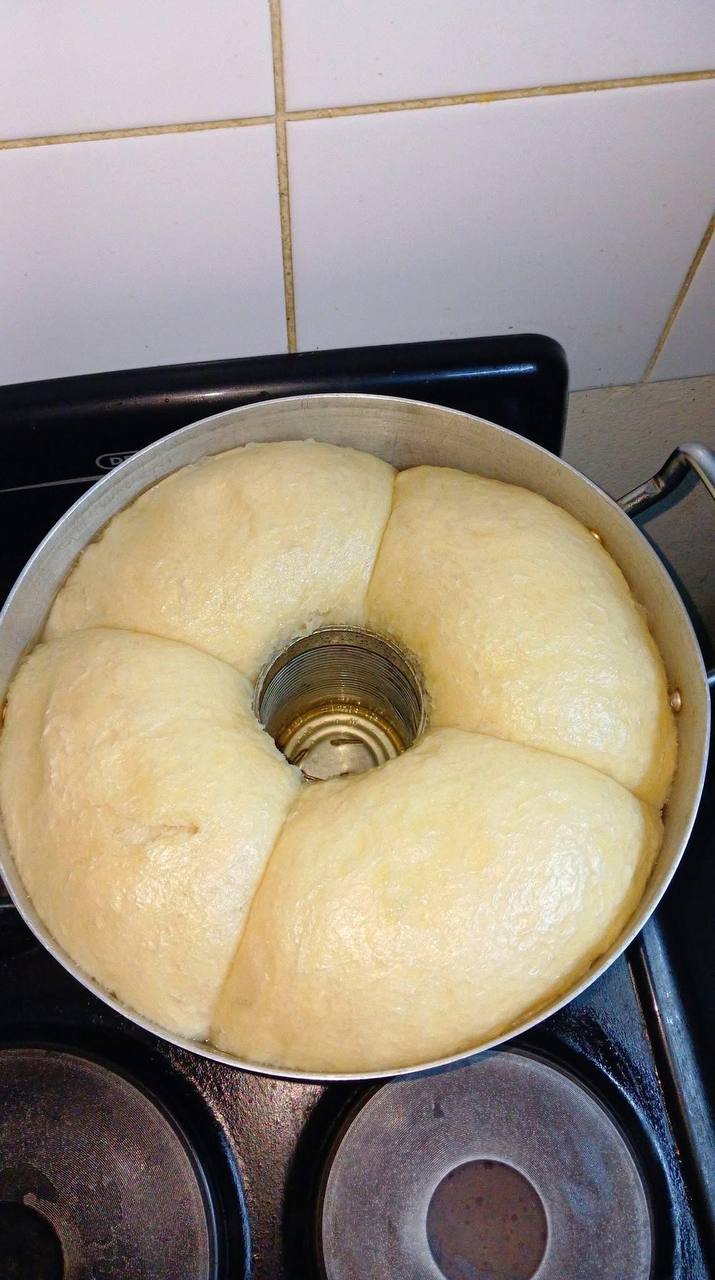
- Arrange in the Pan: Grease a 9-inch round cake pan or a similarly sized oven-safe pot (like a Dutch oven) with cooking spray or butter. If desired, place a small, heat-safe can (like an empty, cleaned tomato paste can) in the center of the pan to create a central void, or simply arrange the rolls in a circular pattern. Arrange the dough balls snugly in the prepared pan, leaving a small space between them as they will expand significantly.
- Second Rise (Proofing): Cover the pan loosely with plastic wrap or a clean kitchen towel. Let the rolls rise in a warm, draft-free place for another 45-60 minutes, or until they have nearly doubled in size and are visibly puffy and touching each other. This is the stage beautifully captured in the provided image.
- Preheat Oven & Bake: While the rolls are completing their second rise, preheat your oven to 375°F (190°C). Once risen, remove the cover from the pan. Bake for 20-25 minutes, or until the rolls are golden brown on top and cooked through. If the tops are browning too quickly, you can loosely tent the pan with aluminum foil for the last 5-10 minutes of baking.
- Brush with Butter: Once the rolls are out of the oven, immediately brush the tops with the remaining 1 tablespoon of melted butter. This adds flavor, shine, and helps keep the crust soft.
- Cool and Serve: Let the rolls cool in the pan for 5-10 minutes before carefully transferring them to a wire rack to cool slightly further. Serve warm and enjoy pulling them apart!
Cooking Tips and Variations
Dough Consistency is Key: The ideal dough for these rolls should be soft and slightly tacky, but not sticky. Resist the urge to add too much flour during kneading, as this can result in dry, dense rolls. A little stickiness is fine; a well-kneaded dough will become more manageable. If using a stand mixer, the dough should clear the sides of the bowl but still cling to the bottom slightly.
Proofing Environment: A warm, draft-free environment is crucial for successful rising. If your kitchen is cool, you can create a warm spot by heating your oven to its lowest setting for a few minutes, then turning it off and placing the covered dough inside (make sure the oven is not hot enough to cook the dough). Alternatively, placing the bowl near a sunny window or on top of a warm appliance can help.
Achieving a Golden Crust: The egg and sugar in the dough contribute to a beautiful golden-brown crust. Brushing with melted butter immediately after baking further enhances the color and adds a lovely sheen and rich flavor. If you notice your rolls browning too quickly, a loose tent of aluminum foil can prevent over-browning.
The Perfect Pan Choice: While a standard 9-inch round cake pan works well, using a pan with a central void (like a Bundt pan or a standard round pan with a heat-safe can in the middle) is what gives these rolls their classic pull-apart shape. The void ensures that the inner rolls get just as much heat and browning as the outer ones, resulting in uniformly cooked and perfectly pull-apartable rolls.
Savory Variations: For a savory twist, knead in 1-2 teaspoons of garlic powder, 1 tablespoon of dried Italian herbs, or ½ cup of shredded Parmesan cheese into the dough during the last few minutes of kneading. You can also brush the baked rolls with garlic butter instead of plain butter.
Sweet Variations: To make sweet pull-apart rolls, increase the sugar to ¼ cup. After rolling the dough into balls, you can roll them in a mixture of cinnamon sugar before arranging them in the pan. A light drizzle of cream cheese glaze (powdered sugar, milk, and a touch of cream cheese) after baking would be a delightful addition.
Don’t Overbake: Overbaking can lead to dry rolls. Keep an eye on them towards the end of the baking time. They should be golden brown and sound hollow when tapped on the bottom. An internal temperature of 200-205°F (93-96°C) indicates they are done.
Cooling is Important: While it’s tempting to dive right in, allowing the rolls to cool slightly on a wire rack prevents the bottoms from becoming soggy due to trapped steam. This also allows the internal structure of the bread to set properly.
Storage and Reheating
Storage: Pull-Apart Bread Rolls are best enjoyed the day they are baked, when they are at their softest and freshest. However, leftovers can be stored at room temperature in an airtight container or a resealable plastic bag for 2-3 days. For longer storage, you can freeze the baked and cooled rolls. Wrap them tightly in plastic wrap, then place them in a freezer-safe bag or container for up to 2-3 months.
Reheating:
- From Room Temperature: To reheat, wrap the rolls loosely in aluminum foil and bake in a preheated oven at 300°F (150°C) for 10-15 minutes, or until warmed through. Alternatively, microwave individual rolls for 15-30 seconds until soft.
- From Frozen: For frozen rolls, you can reheat them directly from the freezer. Wrap them tightly in aluminum foil and bake in a preheated oven at 325°F (160°C) for 20-30 minutes, or until thoroughly heated and soft.
Frequently Asked Questions
Why did my dough not rise?
The most common reasons for dough not rising are inactive yeast or an improper proofing environment. Ensure your yeast is fresh and the warm milk is between 105-115°F (40-46°C) – too cold and it won’t activate, too hot and it will kill the yeast. Also, make sure your dough is rising in a warm, draft-free spot.
Can I make these rolls ahead of time?
Yes, you can! After the first rise, punch down the dough, shape the rolls, and arrange them in the pan. Cover the pan tightly with plastic wrap and refrigerate overnight (up to 12-18 hours). The next day, remove the pan from the refrigerator and let it sit at room temperature for 1-2 hours, or until the rolls have risen and are puffy, before baking as directed.
What kind of flour is best for these rolls?
All-purpose flour works perfectly for these pull-apart rolls, yielding a soft and tender crumb. You can also use bread flour for a slightly chewier texture, though it might absorb a bit more liquid, so adjust accordingly.
My rolls are tough, what went wrong?
Tough rolls are usually a sign of too much flour or over-kneading. Over-kneading can develop too much gluten, leading to a dense and chewy texture. Ensure your dough remains slightly tacky after kneading and avoid adding excessive flour during the process.