Introduction
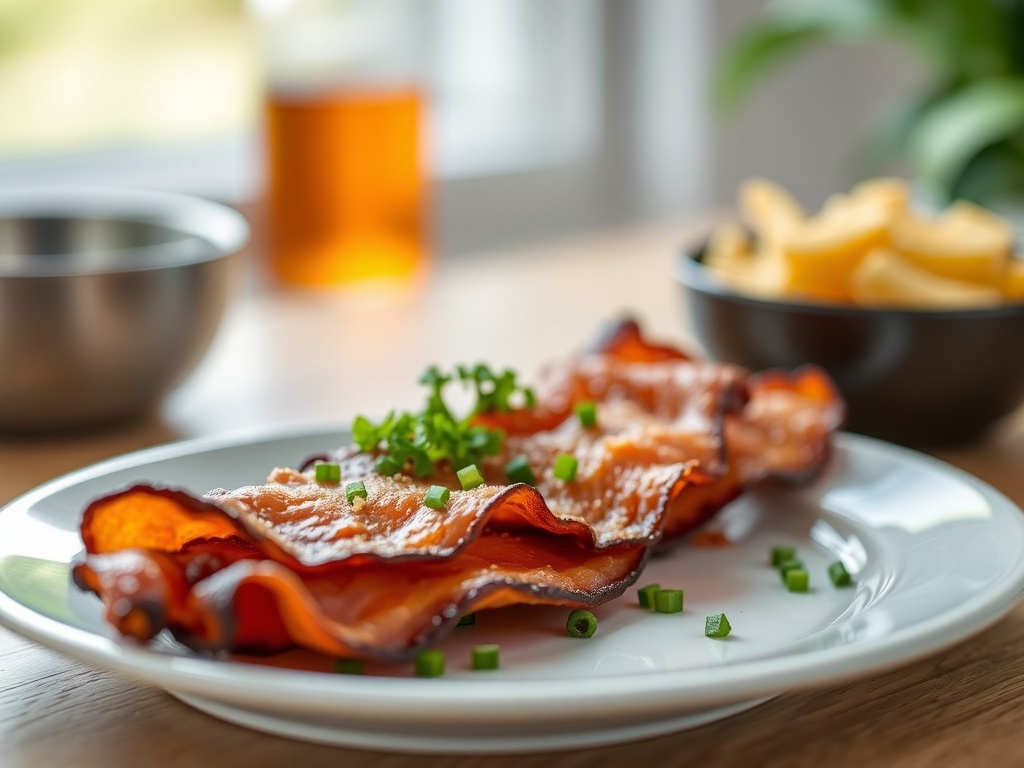
Ah, bacon. Just the word conjures images of sizzling strips, tantalizing aromas, and that irresistible crunch. It’s more than just a breakfast staple; it’s a culinary phenomenon, a universal love language spoken on plates around the world. From complementing a stack of fluffy pancakes to elevating a simple sandwich, bacon brings a salty, smoky, and utterly satisfying punch to countless dishes. Its crispy texture and rich, savory flavor have cemented its status as a beloved food, capable of transforming an ordinary meal into an extraordinary experience. There’s a reason why bacon memes dominate the internet and why entire festivals are dedicated to its glory – it’s simply that good.
Yet, for all its widespread adoration, truly perfect bacon can be surprisingly elusive. How many times have you eagerly pulled bacon from the pan, only to be met with disappointment? Chewy, flabby strips that lack that satisfying snap, unevenly cooked pieces with burnt edges and raw centers, or a greasy mess that leaves you feeling more unsatisfied than satiated. The quest for consistently crispy, perfectly rendered bacon can feel like a culinary holy grail, often resulting in frustration rather than the desired golden-brown perfection. Many home cooks resign themselves to “good enough” bacon, never quite achieving that restaurant-quality, shatteringly crisp texture they dream of.
But what if I told you the secret to restaurant-quality, shatteringly crisp bacon was hiding in your pantry all along? Prepare to say goodbye to soggy, sad bacon forever. In this article, we’re going to unveil a game-changing technique, a simple yet profoundly effective “secret ingredient” that will revolutionize your bacon-making process. This method doesn’t require fancy equipment or complex steps; it leverages basic kitchen science to deliver consistently crispy, evenly cooked bacon every single time. Get ready to elevate your breakfast, brunch, and every bacon-infused dish to a whole new level of deliciousness.
Nutritional Information
Per serving (approximate values for 3 slices of regular bacon):
- Calories: 160 kcal
- Protein: 12g
- Carbohydrates: 0g
- Fat: 13g
- Fiber: 0g
- Sodium: 450mg
Ingredients
- 1 pound thick-cut or regular sliced bacon
- 1/2 cup cold water (the secret ingredient!)
Instructions
- Prepare Your Pan: Lay the bacon slices in a single layer in a large, cold skillet. A heavy-bottomed pan, especially a cast iron skillet, is ideal for even heat distribution. Do not overlap the bacon; if necessary, cook in batches.
- Add the Secret Ingredient: Pour the 1/2 cup of cold water into the pan, ensuring it covers the bottom of the pan and just comes up around the bacon slices. The water should not fully submerge the bacon, but rather create a shallow bath.
- Initial Cooking – The Steaming Phase: Place the skillet over medium-high heat. The water will begin to simmer and then boil. Allow the bacon to cook in the boiling water. During this phase, the water gently renders the fat from the bacon, preventing it from burning while allowing it to slowly release its moisture. Continue cooking until most of the water has evaporated, which typically takes about 8-12 minutes depending on your heat and the pan size. You’ll notice the bacon starting to look opaque and the fat becoming more translucent.
- Rendering & Crisping Phase: Once the water has almost completely evaporated, reduce the heat to medium. The bacon will now begin to fry in its own rendered fat. Continue cooking, turning the bacon frequently with tongs, to ensure even browning and crisping. This stage requires a watchful eye.
- Achieve Desired Crispness: Cook for another 5-10 minutes, or until the bacon reaches your desired level of crispness and is beautifully golden brown. The bubbling will subside as the bacon crisps. Be patient during this stage; rushing it can lead to burnt or unevenly cooked bacon.
- Drain and Rest: Once perfectly crispy, carefully remove the bacon from the pan using tongs. Transfer the bacon to a plate lined with several layers of paper towels, or onto a wire rack set over a baking sheet, to drain off any excess fat. Resting for a minute or two will allow the bacon to become even crisper as it cools.
- Save the Fat (Optional): Carefully pour the rendered bacon fat into a heat-proof container (like a glass jar) through a fine-mesh sieve to remove any burnt bits. Let it cool completely before covering and storing in the refrigerator for future use.
Cooking Tips and Variations
Achieving consistently perfect bacon is a craft, and these tips will help you master it:
- The Power of the Cold Pan Start: This is non-negotiable. Starting bacon in a cold pan allows the fat to render slowly and evenly as the pan gradually heats up. This slow rendering process is crucial for achieving that consistent crispness, preventing the fat from seizing up and resulting in chewy strips.
- The Magic of Water: The “secret ingredient” – water – works by creating a steamy environment that gently coaxes the fat out of the bacon before it has a chance to burn. This initial steaming phase helps to slowly melt the fat and cook the bacon through without shocking it with high heat. Once the water evaporates, the bacon then crisps up beautifully in its own rendered fat, which is now at an ideal temperature for browning. This process optimizes the Maillard reaction, giving you deep flavor and perfect browning without burning.
- Pan Choice Matters: A heavy-bottomed pan, especially cast iron, is your best friend for bacon. Its superior heat retention and even heat distribution prevent hot spots that can lead to unevenly cooked or burnt bacon. While non-stick pans can work, cast iron truly delivers the best results.
- Don’t Overcrowd the Pan: Give your bacon room to breathe! Overcrowding lowers the pan’s temperature and causes the bacon to steam rather than fry, resulting in flabby, sad bacon. Cook in batches if necessary, ensuring each slice has direct contact with the pan.
- Mind the Temperature: Patience is key. While you start on medium-high to evaporate the water, reducing to medium heat for the crisping stage is crucial. Too high, and the bacon will burn before it crisps; too low, and it will become greasy and chewy. A moderate, consistent temperature is your goal.
- Thick-Cut vs. Regular: Thick-cut bacon will take longer to cook and render, but often yields a more satisfying chew alongside its crispness. Adjust cooking times accordingly, allowing more time for the water to evaporate and for the fat to render.
- Optional Flavor Boosts: For an extra layer of flavor, consider a light sprinkle of freshly cracked black pepper during the crisping phase. If you enjoy a touch of sweetness, a very light dusting of brown sugar can be added after the water evaporates, but watch it carefully as sugar can burn quickly.
- Don’t Discard the Fat (Unless You Must!): Rendered bacon fat is liquid gold in the kitchen. Strain it and store it in a sealed container in the fridge. Use it for frying eggs, sautéing vegetables, making cornbread, or even adding a smoky depth to gravies and dressings.
- Cooling Rack for Maximum Crispness: While paper towels are great for initial draining, transferring your bacon to a wire rack set over a baking sheet allows air to circulate around all sides, preventing the bottom from getting soggy and ensuring maximum crispness as it cools.
Storage and Reheating
Once you’ve mastered making perfectly crispy bacon, you might want to store some for later or reheat leftovers. Here’s how:
- Storage: Allow cooked bacon to cool completely. Store it in an airtight container or a resealable bag in the refrigerator for up to 4-5 days. For longer storage, you can freeze cooked bacon for up to 1 month. Lay individual slices on a baking sheet to freeze solid, then transfer to a freezer-safe bag.
- Reheating (for best crispness):
- Oven Method: Preheat your oven to 350°F (175°C). Spread the bacon in a single layer on a baking sheet. Reheat for 5-10 minutes, or until it’s warmed through and re-crisped to your liking. This is the best method for retaining crispness.
- Skillet Method: Place bacon in a cold skillet over medium-low heat. Reheat gently, turning occasionally, until crispy again. Be careful not to burn it.
- Microwave Method (Least Recommended): While possible for speed, reheating bacon in the microwave often results in a chewier texture and can make it rubbery. If you must, place slices on a paper towel-lined plate and microwave in 10-15 second intervals until warm.
Frequently Asked Questions
Why does starting bacon in a cold pan make a difference?
Starting bacon in a cold pan is crucial because it allows the fat to render slowly and evenly as the pan heats up. If you put bacon into a hot pan, the muscle fibers seize up and the fat renders too quickly, leading to uneven cooking, burning, and a chewy, rather than crispy, texture. The gradual temperature increase ensures the fat melts out gently, resulting in consistently crisp bacon.
Can I use this method for thin-cut bacon?
Yes, this method works wonderfully for thin-cut bacon as well! The only adjustment you’ll need to make is to slightly reduce the cooking times, especially during the crisping phase, as thin bacon will cook faster. Keep a closer eye on it to prevent burning once the water has evaporated.
What if all the water evaporates too quickly?
If the water evaporates too quickly, it usually means your heat is too high during the initial steaming phase. Reduce the heat slightly to medium or medium-low to allow the water to simmer and evaporate more gradually. The goal is a gentle simmer, not a vigorous boil, to ensure the fat renders slowly before the crisping begins.
Is it really necessary to save the bacon fat?
While not strictly “necessary,” saving bacon fat is highly recommended for its culinary value! It’s a fantastic, flavorful cooking oil that can add incredible depth to many dishes. It can be used to fry eggs, sauté vegetables, make gravies, or even grease baking pans. It’s an excellent way to reduce waste and enhance the flavor of your cooking.