Introduction
Get ready to meet the pound cake that will redefine your dessert expectations – the “Slap Ya Mama” Pound Cake! This isn’t just any old cake; it’s a culinary experience so profoundly delicious, so perfectly moist, and so utterly comforting, it’s rumored to make you want to slap your mama (lovingly, of course!) for not making it sooner. Imagine a cake with a golden, slightly crisp crust, a dense yet tender crumb that practically melts in your mouth, and a sweet, vanilla-infused flavor that speaks of timeless Southern charm and homemade goodness. This is the kind of dessert that brings families together, sparks joy with every bite, and becomes an instant classic in your recipe repertoire.
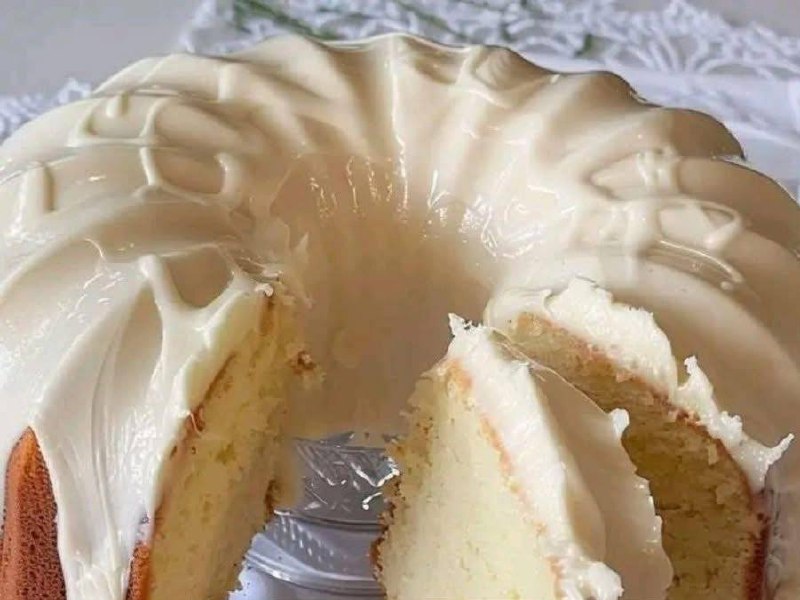
What gives this “Slap Ya Mama” Pound Cake its legendary status? It’s a symphony of simple, high-quality ingredients transformed through classic baking techniques into something truly extraordinary. We’re talking about a pound cake that boasts an unparalleled richness, an incredibly buttery flavor, and a moistness that lingers long after the last crumb is gone. Topped with a luscious, opaque glaze that cascades down its fluted sides, this cake is as beautiful to behold as it is delightful to devour. It’s the ultimate comfort food, a dessert that evokes memories of grandma’s kitchen and promises pure, unadulterated pleasure.
Prepare to embark on a baking journey that will culminate in pound cake perfection. We’ll guide you through every step, from selecting the right ingredients to mastering the art of the perfect glaze, ensuring your “Slap Ya Mama” Pound Cake comes out flawlessly every time. Whether you’re a seasoned baker or a kitchen novice, this recipe is designed to help you achieve a dessert that’s not just good, but truly memorable. So, tie on your apron, gather your ingredients, and get ready to create a cake that will have everyone begging for the recipe – and maybe even giving their mama a playful pat!
Nutritional Information
Per serving (approximate values):
- Calories: 450-550
- Protein: 5-7g
- Carbohydrates: 60-75g
- Fat: 20-30g
- Fiber: 1-2g
- Sodium: 250-350mg
Ingredients
For the Pound Cake:
- 1 cup (2 sticks) unsalted butter, softened to room temperature
- 3 cups granulated sugar
- 6 large eggs, room temperature
- 3 cups all-purpose flour, sifted
- 1 teaspoon baking powder
- 1/2 teaspoon salt
- 1 cup whole milk or buttermilk, room temperature
- 2 teaspoons pure vanilla extract
- 1/2 teaspoon almond extract (optional, but highly recommended)
- Non-stick baking spray with flour, or butter and flour for greasing the pan
For the Glaze:
- 2 cups powdered sugar, sifted
- 1/4 cup whole milk or heavy cream
- 1 teaspoon pure vanilla extract
- 1 tablespoon unsalted butter, melted (optional, for extra richness and shine)
Instructions
- Prepare Your Bundt Pan: Preheat your oven to 325°F (160°C). Generously grease a 10-12 cup Bundt pan with non-stick baking spray containing flour, ensuring every crevice is coated. Alternatively, use softened butter to coat the pan thoroughly, then dust with flour, tapping out any excess. This step is crucial for easy cake release.
- Cream Butter and Sugar: In a large mixing bowl, using an electric mixer (stand mixer with paddle attachment or handheld), cream together the softened butter and granulated sugar on medium-high speed until light, fluffy, and pale, about 5-7 minutes. This incorporates air, which is essential for the pound cake’s texture.
- Add Eggs Gradually: Add the eggs one at a time, beating well after each addition. Scrape down the sides of the bowl as needed to ensure everything is fully incorporated. The mixture may look slightly curdled at this stage, which is normal.
- Combine Dry Ingredients: In a separate medium bowl, whisk together the sifted all-purpose flour, baking powder, and salt. Sifting the flour helps prevent lumps and aerates it.
- Alternate Dry and Wet Ingredients: With the mixer on low speed, gradually add the dry ingredients to the wet ingredients, alternating with the room temperature milk (or buttermilk). Begin and end with the dry ingredients. For example, add about one-third of the flour mixture, mix until just combined, then add half of the milk, mix, then another third of the flour, the remaining milk, and finally the last third of the flour. Do not overmix; mix only until just combined.
- Add Extracts: Stir in the vanilla extract and almond extract (if using) until evenly distributed.
- Fill the Pan: Pour the prepared batter evenly into the greased and floured Bundt pan. Gently tap the pan on the counter a few times to release any large air bubbles and level the batter.
- Bake the Cake: Bake for 60-80 minutes, or until a wooden skewer or toothpick inserted into the center of the cake comes out clean. Baking times can vary depending on your oven. The cake should be golden brown and spring back when lightly touched.
- Cool in Pan: Once baked, remove the Bundt pan from the oven and let the cake cool in the pan on a wire rack for 15-20 minutes. This allows the cake to firm up slightly before inversion.
- Invert and Cool Completely: After the initial cooling period, carefully invert the Bundt pan onto a wire rack to release the cake. Allow the cake to cool completely, ideally for at least 1-2 hours, before applying the glaze. Glazing a warm cake will cause the glaze to melt and run off.
- Prepare the Glaze: While the cake cools, prepare the glaze. In a medium bowl, whisk together the sifted powdered sugar, milk (or heavy cream), vanilla extract, and melted butter (if using) until smooth and lump-free. The consistency should be pourable but thick enough to cling to the cake. If too thick, add a tiny bit more milk; if too thin, add a bit more powdered sugar.
- Glaze the Cake: Once the cake is completely cool, place the wire rack with the cake over a baking sheet (to catch drips). Slowly pour the glaze over the top of the cake, allowing it to drip down the sides. You can use a spoon to guide the glaze if desired.
- Set and Serve: Let the glaze set for about 15-30 minutes before slicing and serving.
Cooking Tips and Variations
Room Temperature Ingredients are Non-Negotiable: This is perhaps the most critical tip for any pound cake. Softened butter creams beautifully with sugar, incorporating air for a light texture. Room temperature eggs emulsify better with the butter mixture, preventing a curdled batter. Cold ingredients will result in a dense, heavy cake. Plan ahead and take your butter, eggs, and milk out of the fridge at least an hour or two before you start baking.
Don’t Overmix the Batter: Once you add the flour, mix only until just combined. Overmixing develops the gluten in the flour, leading to a tough and dry cake. A few small lumps are better than an overmixed, tough cake.
Proper Pan Preparation: Greasing and flouring your Bundt pan meticulously is key to a clean release. Use a baking spray with flour for ease, or butter and then flour, ensuring every nook and cranny is covered. A sticky cake is a sad cake!
Knowing When It’s Done: A wooden skewer or toothpick inserted into the thickest part of the cake should come out clean. The cake should also be golden brown and spring back lightly when gently pressed. If it’s browning too quickly, you can loosely tent it with foil during the last 15-20 minutes of baking.
Cooling Patience is a Virtue: Allow the cake to cool in the pan for the recommended 15-20 minutes before inverting. This allows the structure to set. Then, cool completely on a wire rack before glazing. A warm cake will absorb or melt the glaze, rather than allowing it to set beautifully on top.
Glaze Consistency is Key: Adjust the glaze by adding more powdered sugar if it’s too thin, or a tiny bit more milk if it’s too thick. You want it to be pourable but still opaque and able to cling to the cake.
Variations:
- Citrus Zest: Add 1-2 tablespoons of lemon, orange, or lime zest to the batter with the wet ingredients for a bright, refreshing flavor. A little zest in the glaze can also be delightful.
- Nutty Crunch: Fold in 1 cup of chopped pecans or walnuts into the batter for added texture and flavor.
- Coconut Lover’s Dream: Substitute buttermilk for whole milk, add 1 teaspoon of coconut extract, and fold in 1 cup of shredded sweetened coconut to the batter.
- Chocolate Marble: Reserve 1 cup of batter, melt 2 ounces of unsweetened chocolate and stir it into the reserved batter. Swirl the chocolate batter into the vanilla batter in the Bundt pan using a knife.
- Boozy Glaze: Replace some of the milk in the glaze with a tablespoon or two of bourbon, rum, or Grand Marnier for an adult twist.
Storage and Reheating
Storing Your “Slap Ya Mama” Pound Cake: This pound cake stores beautifully, often tasting even better the next day as the flavors meld. Once completely cooled and glazed, store the cake at room temperature, loosely covered with plastic wrap or in an airtight cake dome, for up to 3-4 days. If your kitchen is particularly warm or humid, or if the glaze contains fresh dairy like cream cheese, it’s best to store it in the refrigerator. If refrigerated, allow it to come to room temperature for about 30 minutes before serving for the best texture and flavor.
Freezing Instructions: Pound cake freezes exceptionally well, making it perfect for preparing ahead or saving for later.
- For Unglazed Cake: Once the cake is completely cooled, wrap it tightly in several layers of plastic wrap, then an additional layer of aluminum foil. This prevents freezer burn.
- For Glazed Cake: If the cake is already glazed, freeze it uncovered on a baking sheet until the glaze is solid (about 1-2 hours). Then, wrap it tightly in plastic wrap and foil.
- Storage Time: Frozen pound cake can be stored for up to 3-4 months.
- Thawing: To thaw, unwrap the cake (if glazed) or leave it wrapped (if unglazed) and let it sit at room temperature for several hours or overnight until fully defrosted. If unglazed, you can then prepare and apply the fresh glaze.
Reheating (Optional): While pound cake is traditionally served at room temperature, a very slight warming can enhance its comforting qualities, especially if unglazed. You can warm individual slices in the microwave for 10-15 seconds, or in a preheated oven at 250°F (120°C) for 5-10 minutes until just warm to the touch. Be careful not to overheat, as this can dry out the cake.
Frequently Asked Questions
What does “Slap Ya Mama” mean in a recipe title?
The phrase “Slap Ya Mama” (often associated with Southern cooking) is a playful and hyperbolic expression used to describe food that is so incredibly delicious and satisfying that it elicits an extreme, almost involuntary, reaction of delight. It implies that the dish is so good, you might just want to playfully “slap your mama” for not having introduced you to it sooner, or for not making it more often! It’s a testament to the recipe’s irresistible quality and memorable flavor.
Can I make this pound cake without a Bundt pan?
Yes, you can! While a Bundt pan gives the cake its classic, decorative shape, you can bake this pound cake in other pans. A 10-inch tube pan (angel food cake pan with a removable bottom) works well, or you can use two 9×5-inch loaf pans. Adjust baking time accordingly; loaf pans will likely bake for 50-60 minutes, while a tube pan might be similar to a Bundt pan. Always rely on the toothpick test for doneness.
Why did my pound cake stick to the pan?
There are several common reasons for a cake sticking. The most frequent issue is insufficient greasing and flouring of the pan. Ensure you thoroughly coat every crevice with baking spray containing flour, or butter and then flour. Another reason could be not allowing the cake to cool in the pan for long enough (15-20 minutes) before inverting, or alternatively, letting it cool too long in the pan, causing it to “sweat” and stick. Make sure to invert it while still slightly warm, but not hot.
My glaze is too thin/thick. How can I fix it?
Adjusting glaze consistency is simple. If your glaze is too thin and runny, gradually whisk in more sifted powdered sugar, a tablespoon at a time, until you reach your desired thickness. If the glaze is too thick and won’t pour easily, add a very small amount (half a teaspoon at a time) of milk or cream, whisking until it thins out to a pourable consistency. Always add small amounts and mix well before adding more to avoid over-correcting.