Introduction
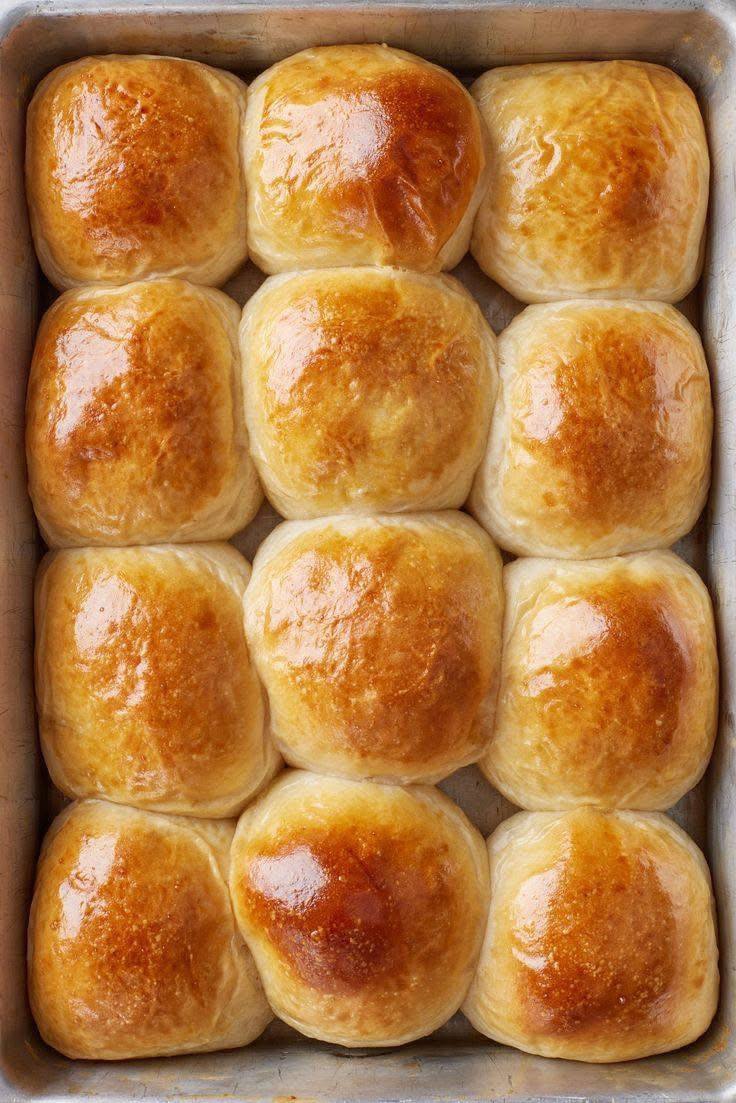
Imagine this: a basket overflowing with golden-brown, impossibly soft rolls, still warm from the oven, their aroma filling your kitchen with an irresistible invitation. This isn’t just a dream; it’s the reality you can create with these incredible soft dinner rolls. Forget dry, crumbly store-bought versions – these homemade beauties are a revelation, transforming any meal into a special occasion. Their delicate, pillowy texture and subtly sweet, buttery flavor make them the ultimate comfort food, perfect for soaking up gravy, accompanying a hearty soup, or simply enjoyed on their own with a smear of butter.
What makes these dinner rolls truly stand out is their signature softness, a quality achieved through a careful balance of ingredients and a little bit of baking magic. Each bite melts in your mouth, leaving you craving another. They boast a beautiful, golden crust that gives way to an airy, tender interior, making them utterly addictive. Whether you’re a seasoned baker or just starting your culinary journey, this recipe is designed to be achievable, delicious, and guaranteed to impress. Get ready to elevate your dinner table and delight your family and friends with the best soft dinner rolls they’ve ever tasted.
Beyond their incredible taste and texture, these rolls are remarkably versatile. They’re not just for holiday feasts; they’re perfect for weeknight dinners, potlucks, or even as a base for mini sliders. The joy of pulling apart a warm roll, watching the steam escape, and savoring that first soft bite is an experience everyone deserves to have. So, let’s dive into the world of homemade bread and discover the simple secrets to baking these extraordinary soft dinner rolls that will undoubtedly become a staple in your recipe collection.
Nutritional Information
Per serving (approximate values):
- Calories: 220
- Protein: 6g
- Carbohydrates: 35g
- Fat: 6g
- Fiber: 1g
- Sodium: 280mg
Ingredients
- 1 cup (240ml) whole milk, warmed to 105-115°F (40-46°C)
- 2¼ teaspoons (1 packet or 7g) active dry yeast
- ¼ cup (50g) granulated sugar, plus a pinch for yeast
- 1 large egg, at room temperature
- ¼ cup (56g) unsalted butter, melted and slightly cooled, plus 2 tablespoons for brushing
- 1 teaspoon salt
- 3¼ to 3½ cups (390-420g) all-purpose flour, plus more for dusting
Instructions
- In a large bowl or the bowl of a stand mixer, combine the warm milk, a pinch of granulated sugar, and the active dry yeast. Stir gently and let sit for 5-10 minutes, or until the mixture is foamy. This indicates the yeast is active and ready to work its magic.
- Once the yeast is foamy, add the remaining ¼ cup of granulated sugar, the room temperature egg, ¼ cup of melted butter, and the salt to the bowl. Whisk everything together until well combined.
- Gradually add the all-purpose flour, starting with 3¼ cups, to the wet ingredients. If using a stand mixer, attach the dough hook. Mix on low speed until a shaggy dough forms.
- Increase the mixer speed to medium-low and knead for 7-10 minutes, or until the dough is smooth, elastic, and pulls away from the sides of the bowl. If the dough is too sticky, add the remaining ¼ cup of flour, one tablespoon at a time, until the desired consistency is reached. The dough should be soft but not overly sticky. If kneading by hand, turn the dough out onto a lightly floured surface and knead for 10-15 minutes until smooth and elastic.
- Lightly grease a clean large bowl with a little oil or cooking spray. Transfer the kneaded dough to the greased bowl, turning it once to coat all sides. Cover the bowl tightly with plastic wrap or a clean kitchen towel.
- Place the bowl in a warm, draft-free place for the first rise (bulk fermentation) for 1 to 1.5 hours, or until the dough has doubled in size. This could be a slightly warm oven (turned off!), near a sunny window, or just a warm spot in your kitchen.
- Once the dough has doubled, gently punch it down to release the air. Turn the dough out onto a lightly floured surface.
- Divide the dough into 12 equal pieces. For best results and uniform rolls, you can weigh each piece to be approximately 65-70 grams.
- Shape each piece of dough into a smooth, round ball. To do this, pull the edges of the dough underneath itself, pinching to seal at the bottom, then roll it gently between your palm and the counter to create a taut, smooth surface.
- Lightly grease a 9×13 inch baking pan. Arrange the shaped rolls in the prepared pan, leaving a little space between each roll (they will expand).
- Cover the baking pan loosely with plastic wrap or a clean kitchen towel and let the rolls rise for a second time (proofing) in a warm, draft-free place for 30-45 minutes, or until they have nearly doubled in size and look puffy.
- Preheat your oven to 375°F (190°C) about 15 minutes before the second rise is complete.
- Bake the rolls for 15-20 minutes, or until they are golden brown on top and cooked through. If the tops are browning too quickly, you can loosely tent the pan with aluminum foil.
- While the rolls are baking, melt the remaining 2 tablespoons of unsalted butter.
- As soon as the rolls come out of the oven, brush the tops generously with the melted butter. This adds shine, flavor, and helps keep the crust soft.
- Let the rolls cool in the pan for a few minutes before serving warm.
Cooking Tips and Variations
Achieving truly soft dinner rolls requires attention to a few key details. Firstly, the temperature of your milk is crucial for activating the yeast; too hot and it will kill it, too cold and it won’t activate properly. Aim for lukewarm, like a baby’s bathwater. A common pitfall is adding too much flour during kneading. Resist the urge to add excessive flour; a slightly sticky dough is often a sign of a well-hydrated dough, which contributes to softness. The dough should be soft and pliable, not stiff. Kneading adequately is also vital; it develops the gluten, creating the elasticity and structure needed for those airy pockets. You’ll know it’s properly kneaded when it passes the “windowpane test” – you can stretch a small piece of dough thin enough to see light through it without it tearing.
Patience during the rising process is another non-negotiable. Don’t rush the first or second rise. A warm, draft-free environment is ideal for optimal proofing. If your kitchen is cool, you can place the covered bowl in a turned-off oven with the light on, or in a microwave with a cup of hot water. Overbaking is the enemy of soft rolls; keep an eye on them and remove them from the oven as soon as they are golden brown. Brushing with melted butter immediately after baking is not just for shine; it also adds a layer of richness and helps soften the crust.
For variations, try adding fresh or dried herbs like rosemary, thyme, or garlic powder to the dough for a savory twist. A sprinkle of grated Parmesan cheese can also be added. For a sweeter roll, increase the sugar slightly or add a tablespoon of honey. You can also make these into pull-apart garlic knots by rolling the dough into ropes, tying them into knots, and brushing with garlic butter before or after baking. For a slightly healthier option, substitute up to half of the all-purpose flour with whole wheat pastry flour, though this will result in a slightly denser roll. Experiment with different spices like a touch of nutmeg or cinnamon for a unique flavor profile.
Storage and Reheating
These soft dinner rolls are best enjoyed fresh, warm from the oven. However, if you have any leftovers (a rare occurrence!), proper storage will help maintain their wonderful texture. Once completely cooled, store the rolls in an airtight container or a resealable plastic bag at room temperature for up to 2-3 days. Avoid refrigerating them, as this can actually dry them out and make them stale faster.
For longer storage, these rolls freeze beautifully. Once completely cool, place them in a freezer-safe bag or container, removing as much air as possible. They can be frozen for up to 2-3 months. When you’re ready to enjoy them, simply thaw them at room temperature for a few hours.
To reheat, for room temperature or thawed rolls, you have a few options. The best method for restoring their freshly baked softness is to warm them in a preheated oven. Place the rolls on a baking sheet and heat at 300°F (150°C) for 5-10 minutes, or until warmed through. Alternatively, you can wrap individual rolls in a damp paper towel and microwave them for 15-30 seconds, or until warm and soft. Be careful not to overheat in the microwave, as this can make them tough. Brushing with a little extra melted butter after reheating can also refresh their flavor and texture.
Frequently Asked Questions
What makes these dinner rolls so soft?
The softness of these rolls comes from a combination of factors: the use of milk and butter for richness and tenderness, a good amount of sugar to help activate the yeast and keep them moist, and proper kneading to develop gluten without overworking it. Crucially, allowing for two full rises (proofings) creates an airy structure, and avoiding overbaking ensures they don’t dry out. Brushing with melted butter right after baking also contributes to a soft crust.
Can I make the dough ahead of time?
Yes, you can! After the first rise, you can punch down the dough, shape the rolls, and then place them in the prepared baking pan. Cover the pan tightly with plastic wrap and refrigerate overnight (up to 18 hours). The next day, take the rolls out of the refrigerator and let them come to room temperature and complete their second rise (this might take 1-2 hours) before baking as directed. Alternatively, you can refrigerate the dough after the first rise in a well-oiled bowl, then shape and proof the next day.
My rolls didn’t rise. What went wrong?
The most common reasons for rolls not rising are inactive yeast or incorrect liquid temperature. Ensure your yeast is fresh and active by performing the “foaming” test with warm milk and a pinch of sugar. If it doesn’t foam, your yeast might be dead. Also, make sure your milk is warm (105-115°F or 40-46°C); milk that’s too hot will kill the yeast, and milk that’s too cold won’t activate it. A cold kitchen environment can also hinder rising, so find a warm, draft-free spot for proofing.
Can I use bread flour instead of all-purpose flour?
While bread flour has a higher protein content and will produce a chewier, more structured roll, you can use it. However, for the signature “softness” of these dinner rolls, all-purpose flour is generally preferred. If you do use bread flour, you might need a tiny bit more liquid to achieve the same dough consistency, as it absorbs more water. The rolls will still be delicious but will have a slightly different texture.