Instructions
- Prepare the Ribs: Carefully remove the thin membrane from the back of each rack of ribs. To do this, slide a small knife under the membrane at one end of the rack. Grip the membrane with a paper towel and pull firmly to remove it. This step is crucial for tender ribs. If you have difficulty, ask your butcher to do it for you.
- Season the Ribs: Pat the ribs dry with paper towels. Rub both sides of the ribs with olive oil, then generously season with salt and freshly ground black pepper.
- Preheat Oven & Prepare Baking Sheet: Preheat your oven to 300°F (150°C). Line a large baking sheet with aluminum foil for easier cleanup. Place a wire rack on top of the foil-lined baking sheet.
- Bake the Ribs (First Stage): Place the seasoned ribs on the wire rack. Cover the baking sheet tightly with another layer of aluminum foil, creating a sealed packet. This steams the ribs, making them incredibly tender.
- Slow Cook the Ribs: Bake for 2.5 to 3 hours, or until the ribs are very tender and the meat has pulled back from the bone slightly. You should be able to easily pierce the meat with a fork.
- Make the Honey Garlic Sauce: While the ribs are baking, prepare the sauce. In a medium saucepan, combine the honey, soy sauce, apple cider vinegar, ketchup, brown sugar, Worcestershire sauce, sriracha (if using), minced garlic, and grated ginger (if using).
- Simmer the Sauce: Bring the sauce mixture to a gentle simmer over medium heat, stirring occasionally. Reduce the heat to low and let it simmer for 5-7 minutes, allowing the flavors to meld.
- Thicken the Sauce: In a small bowl, whisk together the cornstarch and cold water to create a slurry. Pour the slurry into the simmering sauce, whisking constantly. Continue to simmer and whisk for another 1-2 minutes, until the sauce has thickened to a consistency that coats the back of a spoon. Remove from heat and set aside.
- Finish Baking the Ribs & Glaze: Once the ribs are tender, carefully remove them from the oven. Increase the oven temperature to 375°F (190°C).
- Apply First Glaze: Discard the top layer of aluminum foil. Generously brush the ribs with about half of the prepared honey garlic sauce.
- Bake for Glazing: Return the ribs to the oven, uncovered. Bake for 15 minutes.
- Apply Second Glaze: Remove the ribs from the oven again. Brush with most of the remaining honey garlic sauce, reserving a small amount for serving if desired.
- Final Bake for Caramelization: Return to the oven and bake for another 10-15 minutes, or until the glaze is beautifully caramelized, sticky, and slightly bubbly. Keep a close eye on them to prevent burning.
- Rest and Serve: Once done, remove the ribs from the oven. Let them rest on the cutting board for 5-10 minutes before cutting into individual portions. This allows the juices to redistribute, ensuring maximum tenderness.
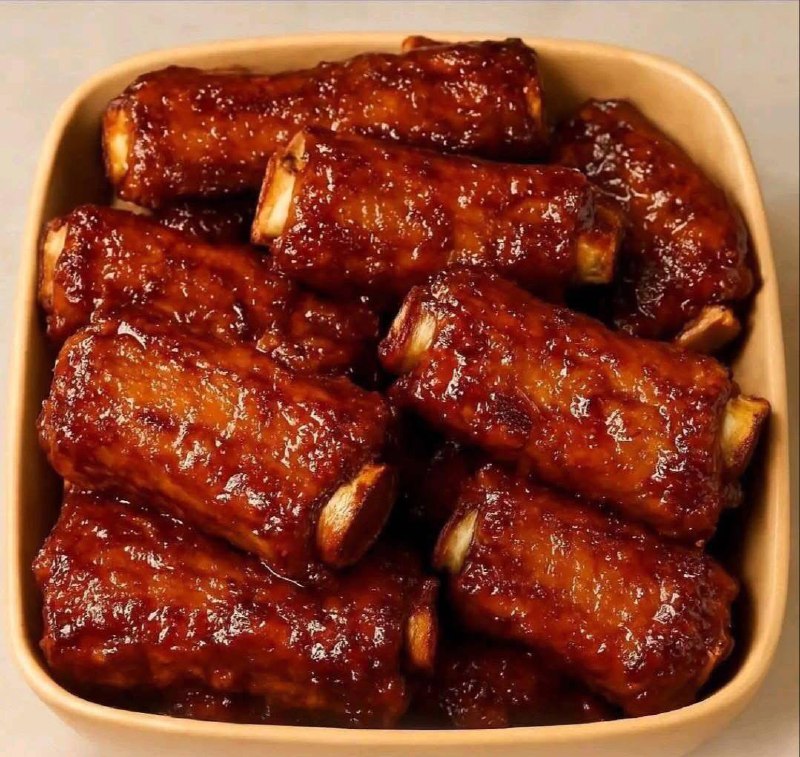
- Garnish and Enjoy: Transfer the sticky honey garlic ribs to a serving platter. Drizzle with any remaining sauce, sprinkle generously with sesame seeds and sliced green onions. Serve immediately and prepare for rave reviews!
Cooking Tips and Variations
Removing the Membrane: Don’t skip this step! The membrane on the back of the ribs can become tough and chewy when cooked. Removing it ensures melt-in-your-mouth tender ribs. If you struggle to grip it, a paper towel can provide extra traction.
Low and Slow is Key: The initial long, slow bake at a lower temperature is what breaks down the tough connective tissues in the ribs, resulting in that desirable fork-tender texture. Don’t rush this stage!
Achieving Maximum Stickiness: The final higher-temperature bake after glazing is essential for caramelizing the sugars in the sauce, giving you that beautiful, glossy, and sticky exterior. Watch them closely during this phase to avoid burning.
Spice it Up: For those who love a bit more heat, feel free to increase the amount of sriracha or add a pinch of red pepper flakes to the sauce.
Smoky Flavor: If you enjoy a smoky undertone, add 1/2 teaspoon of liquid smoke to the sauce mixture. Alternatively, finish the ribs on a grill after the initial bake for a delicious char and smoky flavor.
Marinating for Extra Flavor: For an even deeper flavor, you can marinate the ribs in a portion of the raw honey garlic sauce (before thickening) for at least 4 hours or overnight in the refrigerator. Just be sure to discard any marinade that came into contact with raw meat and use fresh sauce for glazing.
Slow Cooker Variation: For ultimate convenience and tenderness, you can cook the ribs in a slow cooker. After seasoning, cut the ribs into 2-3 bone portions. Place them in the slow cooker with half of the honey garlic sauce (before thickening). Cook on low for 6-8 hours or on high for 3-4 hours, until very tender. Once cooked, transfer the ribs to a foil-lined baking sheet, brush with the remaining thickened sauce, and broil for 5-10 minutes until caramelized and sticky, watching carefully.
Instant Pot Ribs: Cut the ribs into 2-3 bone portions. Place them on a trivet with 1 cup of water or broth. Cook on high pressure for 25-30 minutes, then allow for a natural pressure release for 10 minutes before quick releasing. Transfer to a baking sheet and proceed with glazing and broiling as above.
Glaze Consistency: If your sauce isn’t thickening enough, you can add another small cornstarch slurry (1 teaspoon cornstarch mixed with 1 tablespoon cold water) and simmer for another minute. If it’s too thick, thin it with a little water or chicken broth.
Serving Suggestions: These sticky honey garlic ribs pair wonderfully with classic BBQ sides like coleslaw, corn on the cob, mashed potatoes, or a simple green salad. A side of steamed rice can also help soak up all that delicious extra sauce.
Storage and Reheating
Storage: Leftover Sticky Honey Garlic Ribs can be stored in an airtight container in the refrigerator for up to 3-4 days. Ensure the ribs have cooled completely before refrigerating to prevent condensation.
Freezing: For longer storage, you can freeze cooked ribs. Wrap individual portions tightly in plastic wrap, then place them in a freezer-safe bag or container. They can be stored in the freezer for up to 2-3 months. Thaw overnight in the refrigerator before reheating.
Reheating in the Oven: This is the best method for retaining moisture and stickiness. Preheat your oven to 300°F (150°C). Place the ribs in a single layer on a foil-lined baking sheet. Cover loosely with aluminum foil to prevent drying out. Bake for 15-25 minutes, or until heated through. If you want to refresh the glaze, you can brush them with a little extra sauce (if you have some reserved or quickly make a small batch) during the last 5 minutes of reheating, then increase the temperature to 375°F (190°C) for a few minutes to re-caramelize.
Reheating in the Microwave: While convenient, the microwave can sometimes make ribs a bit dry. Place individual portions on a microwave-safe plate, cover loosely with a damp paper towel, and heat on medium power in 1-2 minute intervals until warmed through. This method won’t re-crisp the glaze.
Reheating on the Grill: If you have a grill, this is a great way to reheat and add a smoky char. Preheat your grill to medium-low heat. Place the ribs directly on the grates and grill for 5-10 minutes, flipping occasionally, until heated through and slightly charred. Be careful not to burn the glaze.
Frequently Asked Questions
What kind of ribs are best for this recipe?
Baby back ribs are highly recommended for this recipe as they are leaner, cook faster, and are very tender. Spare ribs also work wonderfully; they are meatier and have more fat, which can result in even juicier ribs, but they will require a longer cooking time (add about 30-60 minutes to the initial bake).
Can I make the sauce ahead of time?
Absolutely! The honey garlic sauce can be made up to 3 days in advance and stored in an airtight container in the refrigerator. This can save you some time on the day you plan to cook the ribs. Just gently reheat the sauce to make it brushable before glazing the ribs.
My ribs aren’t falling off the bone, what went wrong?
If your ribs aren’t as tender as you’d like, it usually means they haven’t cooked long enough at the low temperature. Tenderness comes from patience. Ensure your oven temperature is accurate and give them more time, covered, until they reach that desired fork-tender stage. Temperature fluctuations or not covering them tightly enough can also impact the cooking process.
How do I prevent the glaze from burning?
The key to a beautiful, caramelized glaze without burning is to keep a close eye on the ribs during the final baking stages. The sugars in the honey and brown sugar can burn quickly at higher temperatures. If you notice the glaze browning too fast, you can lower the oven temperature slightly or loosely tent the ribs with foil. Don’t walk away from the oven during those last 10-15 minutes of glazing.