Instructions
- Prepare the Cornmeal Mush: In a heavy-bottomed saucepan, bring 3 cups of the water or milk to a boil over medium-high heat. If using salt or sugar, stir it into the liquid now until dissolved.
- Whisk in Cornmeal: In a separate bowl, whisk the remaining 1 cup of cold water or milk with the 1 cup of cornmeal until a smooth slurry is formed. This prevents lumps.
- Combine and Cook: Once the liquid in the saucepan is boiling, slowly pour the cornmeal slurry into the boiling liquid while continuously whisking. Reduce the heat to low.
- Simmer and Thicken: Continue to stir frequently to prevent sticking and scorching. The mush will begin to thicken considerably. Cook for 15-20 minutes, or until the cornmeal is tender and the mush is very thick, resembling polenta or grits. It should pull away from the sides of the pan. If it becomes too thick to stir, add a splash more hot water or milk.
- Cool and Set: Lightly grease a loaf pan (8×4 or 9×5 inches) or a shallow baking dish with butter or oil. Pour the hot cornmeal mush into the prepared pan, spreading it evenly with a spatula. Smooth the top.
- Refrigerate: Cover the pan with plastic wrap, pressing it directly onto the surface of the mush to prevent a skin from forming. Refrigerate for at least 4 hours, or preferably overnight, until the mush is completely firm and chilled. This step is crucial for it to hold its shape when fried.
- Slice the Mush: Once thoroughly chilled and firm, invert the pan onto a cutting board. The cornmeal mush should slide out easily. Slice the block of mush into 1/2-inch to 3/4-inch thick slices. You can cut them into squares, rectangles, or triangles.
- Preheat Skillet: Heat 1-2 tablespoons of butter, lard, or cooking oil in a large skillet (cast iron works wonderfully) over medium-high heat until shimmering. You want enough fat to coat the bottom of the pan generously.
- Fry the Slices: Carefully place the cornmeal slices into the hot skillet, ensuring not to overcrowd the pan. Cook in batches if necessary.
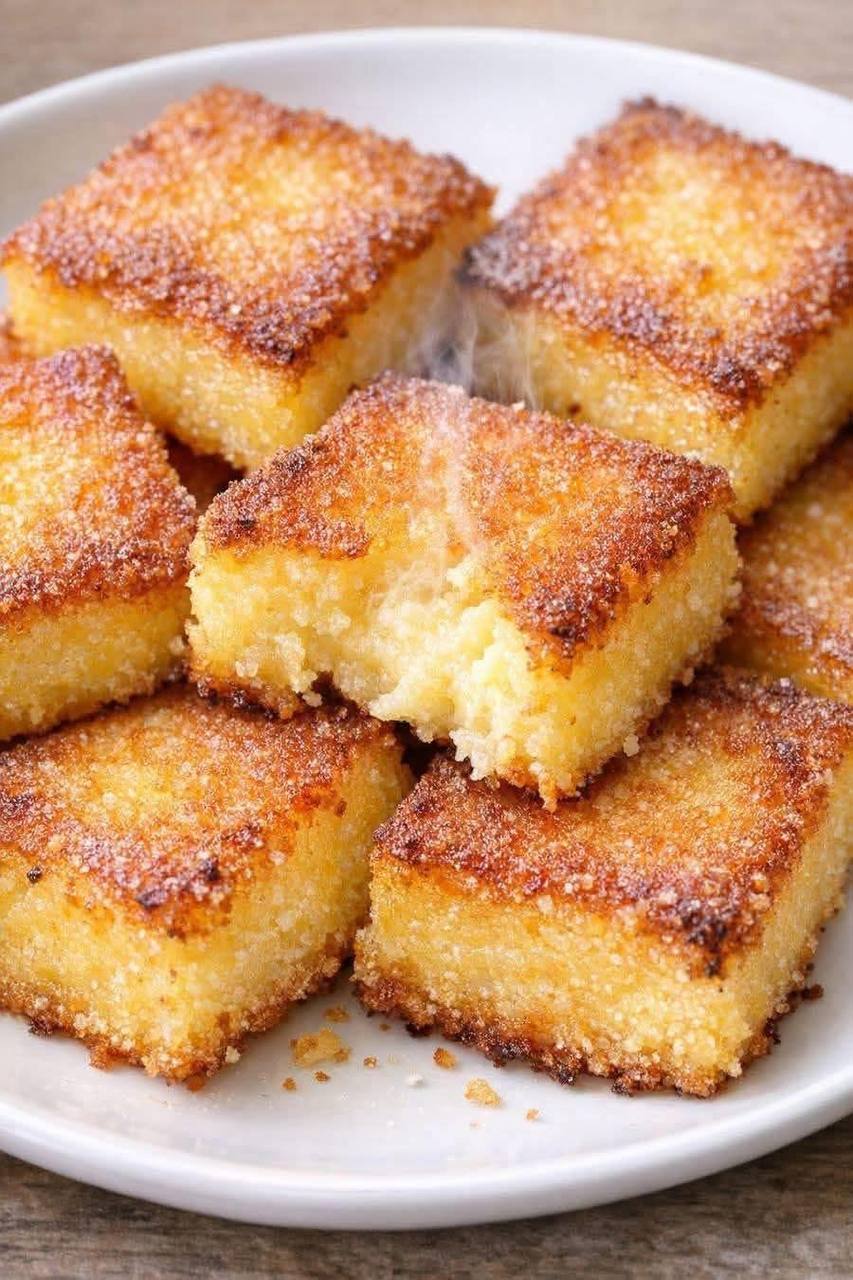
- Achieve Golden Crispness: Fry the slices for 4-6 minutes per side, or until they are beautifully golden brown and crispy. The interior will remain soft and creamy.
- Drain and Serve: Remove the fried slices from the skillet and place them on a plate lined with paper towels to drain any excess fat.
- Serve Immediately: Serve the fried cornmeal mush hot with your favorite toppings.
Cooking Tips and Variations
Achieving the Perfect Mush Consistency: The ratio of liquid to cornmeal is key. If your mush is too thin, it won’t set properly for frying. If it’s too thick, it might be dry. Start with the recommended 4 cups liquid to 1 cup cornmeal, and if it seems too stiff during cooking, you can add a tablespoon or two of hot liquid at a time. The goal is a thick, pourable, but not runny, consistency.
The Importance of Cooling: Do not skip or rush the cooling and setting step. Refrigerating the mush for several hours or overnight is absolutely critical. If the mush isn’t firm and completely chilled, it will fall apart when you try to slice and fry it, resulting in a crumbly mess instead of distinct, crispy pieces.
For Maximum Crispiness: Don’t skimp on the fat when frying. Butter adds wonderful flavor, but oil (like vegetable, canola, or even bacon grease for a savory twist) has a higher smoke point and can help achieve a crispier crust. Ensure the skillet is hot enough before adding the slices, and don’t overcrowd the pan, as this lowers the temperature and steams the mush instead of frying it.
Sweet Variations: For a classic sweet breakfast, add 1-2 tablespoons of sugar to the liquid when making the mush. Serve the fried slices drizzled with maple syrup, honey, molasses, or a dusting of powdered sugar. A dollop of fruit preserves or stewed apples also makes a fantastic topping.
Savory Variations: To lean into a savory profile, omit the sugar and add 1/2 teaspoon of salt to the mush. You can also incorporate a pinch of black pepper or a dash of garlic powder into the mush. Serve savory fried cornmeal with a fried egg, crispy bacon, sausage gravy, or a sprinkle of shredded cheese and chopped chives. It makes an excellent side dish for a hearty breakfast or brunch.
Herb Infusion: For a more gourmet savory twist, infuse the liquid with fresh herbs like thyme or rosemary during the initial boiling stage. Strain them out before adding the cornmeal, or finely chop and add them directly to the mush.
Spice It Up: A pinch of cinnamon or nutmeg can be added to the sweet version of the mush for extra warmth and flavor.
Pan Choice: A cast-iron skillet is ideal for frying cornmeal mush because it retains heat exceptionally well, leading to a more even and crispy crust.
Alternative Fats: While butter and oil are common, lard or bacon grease were traditional choices during the Depression era and impart incredible flavor and crispiness to the fried mush. If you have some on hand, give it a try for an authentic taste.
Storage and Reheating
Storing Uncooked Mush: The prepared cornmeal mush can be made several days in advance. Once it has cooled and set in the pan, cover it tightly with plastic wrap and store it in the refrigerator for up to 3-4 days. This makes it a fantastic make-ahead option for quick breakfasts throughout the week.
Storing Cooked Fried Mush: Leftover fried cornmeal mush can be stored in an airtight container in the refrigerator for 2-3 days. While it’s best enjoyed fresh, it reheats reasonably well.
Reheating: The best way to reheat fried cornmeal mush and restore some of its crispiness is in a skillet.
- Heat a small amount of butter or oil in a non-stick or cast-iron skillet over medium heat.
- Place the leftover slices in the hot skillet and cook for 2-3 minutes per side, or until heated through and the exterior is re-crisped.
- You can also reheat them in a toaster oven or air fryer at 350°F (175°C) for 5-10 minutes, flipping halfway, until hot and crispy.
- Avoid reheating in a microwave, as this will make the mush soft and lose its desirable crispy texture.
Frequently Asked Questions
Can I use instant cornmeal for this recipe?
While instant cornmeal will cook faster, it may not yield the same texture or flavor as regular medium or fine-ground cornmeal. Instant cornmeal tends to be finer and can result in a gummier, less substantial mush. For the best results and an authentic Depression-era experience, it’s recommended to use traditional cornmeal.
My cornmeal mush isn’t firming up. What went wrong?
The most common reasons for mush not firming up are an incorrect liquid-to-cornmeal ratio (too much liquid), not cooking it long enough to thicken sufficiently, or not chilling it for a long enough period. Ensure you cook it until it’s very thick and pulls away from the sides of the pan, and then give it ample time (at least 4 hours, preferably overnight) in the refrigerator to set completely.
Can I make this recipe gluten-free?
Yes, cornmeal is naturally gluten-free! This recipe is inherently gluten-free, making it a great option for those with gluten sensitivities or celiac disease. Just ensure that your cornmeal is certified gluten-free if cross-contamination is a concern.
What’s the difference between cornmeal mush, polenta, and grits?
While all three are made from ground corn, the primary differences lie in the type of corn used and the grind. Grits are typically made from hominy (corn treated with alkali) and are a coarser grind, popular in the Southern US. Polenta is usually made from yellow flint corn, often a coarser grind, and is a staple of Italian cuisine. Cornmeal mush can be made from various types of dried corn, typically yellow or white, and can range from fine to medium grind. This recipe uses standard cornmeal, making it a versatile base that can resemble aspects of all three depending on the preparation and grind.