Introduction
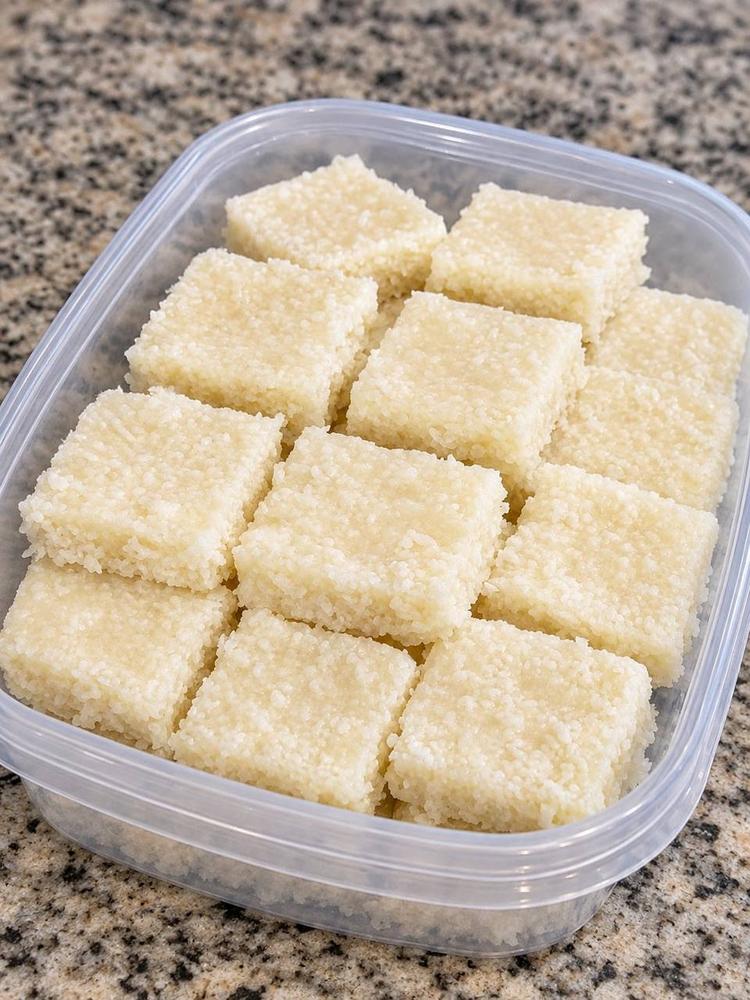
Prepare to meet your new favorite sweet escape: 3-Ingredient Creamy Coconut Milk Squares! In a world bustling with complex recipes and endless ingredient lists, there’s something truly magical about a dessert that delivers incredible flavor and satisfaction with minimal effort. This recipe is exactly that – a testament to the power of simplicity, transforming just three humble ingredients into a luxurious, melt-in-your-mouth treat that will have everyone asking for more. Imagine biting into a perfectly soft, rich square, bursting with the tropical essence of coconut, so creamy it almost dissolves on your tongue. These delightful confections are not just easy to make; they’re a revelation for anyone seeking a quick sweet fix, a delightful snack, or an impressive yet effortless dessert to share.
What makes these coconut milk squares so special isn’t just their incredible ease, but the way they perfectly balance sweetness with the natural richness of coconut. The star of the show, full-fat coconut milk, lends an unparalleled creaminess and depth of flavor, making every bite feel like a mini-vacation to a sun-drenched beach. Paired with fine shredded coconut, which provides that delightful texture and intense coconut aroma, and a simple sweetener, these squares come together in what feels like mere minutes. Whether you’re a seasoned baker or a kitchen novice, this recipe is designed for success, promising a batch of perfectly set, utterly delicious coconut squares every single time. Their firm yet tender consistency makes them ideal for make-ahead treats, perfect for packing in lunchboxes, serving at parties, or simply indulging in whenever a craving strikes.
Beyond their irresistible taste and straightforward preparation, these creamy coconut milk squares offer incredible versatility. Naturally gluten-free and easily adaptable to be vegan, they cater to a wide range of dietary preferences without compromising on flavor or texture. They’re the kind of treat that appeals to everyone, from children who adore their sweet simplicity to adults who appreciate the pure, unadulterated taste of coconut. So, if you’re ready to unlock the secret to effortless indulgence and discover a dessert that’s as satisfying as it is simple, grab your three ingredients, and let’s create some culinary magic. You’re just a few steps away from experiencing the pure joy of these creamy, dreamy coconut milk squares!
Nutritional Information
Per serving (approximate values, based on 16 squares from a 8×8 inch pan):
- Calories: 250 kcal
- Protein: 2g
- Carbohydrates: 25g
- Fat: 17g
- Fiber: 3g
- Sodium: 20mg
Ingredients
- 1 can (13.5 oz / 400ml) full-fat coconut milk
- 1 cup (200g) granulated sugar (or sweetened condensed milk for extra creaminess and binding)
- 3 cups (250g) unsweetened shredded coconut, plus extra for dusting (optional)
Instructions
- Line an 8×8 inch (20×20 cm) baking pan with parchment paper, leaving an overhang on two sides to easily lift the squares out later. Lightly grease the parchment paper if desired, though it’s often not necessary.
- In a medium saucepan, combine the full-fat coconut milk and granulated sugar. If using sweetened condensed milk, you might reduce the sugar slightly or omit it depending on your desired sweetness level, as condensed milk is already very sweet.
- Place the saucepan over medium heat. Stir continuously until the sugar is completely dissolved and the mixture begins to simmer gently. This should take about 3-5 minutes. Do not let it boil vigorously; a gentle simmer is sufficient. The goal is to dissolve the sugar and slightly warm the coconut milk.
- Reduce the heat to low. Add the 3 cups of unsweetened shredded coconut to the saucepan. Stir thoroughly to ensure all the shredded coconut is fully coated and saturated with the coconut milk mixture. Continue to cook on low heat, stirring frequently, for another 5-7 minutes. During this time, the mixture will thicken considerably and start to pull away from the sides of the pan when stirred, indicating it’s ready. The shredded coconut will absorb much of the liquid, becoming soft and pliable.
- Remove the saucepan from the heat. Immediately transfer the warm coconut mixture into the prepared 8×8 inch baking pan.
- Using a spatula or the back of a spoon, press the mixture down firmly and evenly into the pan. Make sure the surface is as smooth and compact as possible. The firmer you press, the more cohesive your squares will be.
- Once pressed, you can optionally sprinkle a little extra shredded coconut over the top for added texture and visual appeal. Gently press it into the surface.
- Place the pan in the refrigerator and chill for at least 2-3 hours, or until the squares are completely firm and set. For best results, chill overnight.
- Once thoroughly chilled and firm, use the parchment paper overhangs to carefully lift the entire slab of coconut squares out of the pan and onto a cutting board.
- Using a sharp knife, cut the slab into 16 even squares (4 rows by 4 rows). For cleaner cuts, you can wipe your knife with a damp cloth between cuts.
- Serve immediately and enjoy your creamy, delicious 3-ingredient coconut milk squares!
Cooking Tips and Variations
Achieving perfect 3-Ingredient Creamy Coconut Milk Squares is incredibly simple, but a few tips can elevate your results from great to truly exceptional. First and foremost, always opt for full-fat coconut milk. The fat content is crucial for that luxurious creaminess and helps the squares set firmly. Light coconut milk simply won’t yield the same rich texture or stability. When cooking the coconut milk and sugar mixture, be patient and stir continuously until the sugar fully dissolves. This prevents crystallization and ensures a smooth, even sweetness throughout your squares. Once the shredded coconut is added, continue to cook on low heat, stirring often, until the mixture visibly thickens and starts to pull away from the sides of the pan. This step is vital for evaporating excess moisture and creating a firm, sliceable square. Don’t rush it; a well-cooked mixture will set beautifully.
Pressing the mixture firmly into the pan is another key step. The more compact you make the coconut layer, the less crumbly your squares will be, resulting in clean, defined edges when cut. A flat-bottomed glass or a second piece of parchment paper over the top can help you achieve an incredibly even and dense layer. And finally, adequate chilling time is non-negotiable. While 2-3 hours might seem sufficient, chilling overnight truly allows the flavors to meld and the squares to set to their optimal firmness, making them much easier to cut and handle without falling apart. If you’re short on time, you can place the pan in the freezer for about 30-45 minutes to speed up the setting process, but monitor it closely to prevent freezing solid.
The beauty of such a simple recipe lies in its potential for delicious variations. To enhance the flavor profile, consider adding a teaspoon of vanilla extract or a pinch of salt to the coconut milk mixture when it’s simmering. Vanilla adds a warm, aromatic depth, while salt balances the sweetness and makes the coconut flavor pop. For a brighter, more tropical twist, finely grated lime or lemon zest can be stirred in along with the shredded coconut. The citrus notes pair wonderfully with coconut, adding a refreshing zing.
If you’re a fan of texture, there are several ways to introduce more crunch. After the squares have set, you could drizzle them with melted dark chocolate or white chocolate. A sprinkle of toasted chopped nuts, such as almonds or cashews, or even some extra toasted shredded coconut on top before chilling would also add a delightful contrast. For those who love a bit of spice, a tiny pinch of cardamom or cinnamon can be incorporated into the mixture for an exotic touch. For a more decadent treat, you could even press a layer of melted chocolate at the bottom of the pan before adding the coconut mixture, or sandwich a thin layer of chocolate in the middle. Remember, these variations are best added after the main mixture is cooked and often just before chilling or after the squares are set, to maintain the integrity of the core recipe.
Storage and Reheating
These 3-Ingredient Creamy Coconut Milk Squares are incredibly easy to store, making them a fantastic make-ahead treat or a convenient snack to have on hand. Once cut, the squares should be stored in an airtight container in the refrigerator. Layering them between sheets of parchment paper can prevent them from sticking together, especially if your refrigerator tends to be humid. When stored properly, they will maintain their delicious flavor and creamy texture for up to 5-7 days. The cold helps them retain their firm shape and prevents spoilage, while the airtight container protects them from absorbing other odors from the fridge and keeps them from drying out.
While these squares are best enjoyed chilled straight from the refrigerator, they can also be brought to room temperature for about 15-20 minutes before serving if you prefer a slightly softer, more yielding texture. However, they will soften considerably at room temperature over an extended period, so it’s always best to keep them refrigerated until just before serving. Due to their simple composition and the nature of coconut milk, these squares do not typically require or benefit from reheating. In fact, attempting to reheat them, especially in a microwave, would likely cause them to melt, lose their shape, and become a gooey mess rather than a firm square. They are designed to be a cold or cool treat, and their creamy texture is at its peak when chilled.
If you wish to extend their shelf life even further, these coconut milk squares can also be frozen. Arrange the cut squares in a single layer on a baking sheet and freeze until solid, which usually takes about 1-2 hours. Once frozen, transfer them to a freezer-safe airtight container or a heavy-duty freezer bag, again, layering with parchment paper to prevent sticking. They can be stored in the freezer for up to 1-2 months. To enjoy, simply remove the desired number of squares from the freezer and let them thaw in the refrigerator for a few hours or at room temperature for about 30-60 minutes. Freezing and thawing might slightly alter the texture, making them a little softer, but they will still be delicious.
Frequently Asked Questions
What kind of coconut milk should I use for this recipe?
For the best results and the creamiest texture, it is absolutely essential to use full-fat canned coconut milk. Do not substitute with light coconut milk, as it has a higher water content and less fat, which will prevent the squares from setting properly and achieving that rich, luxurious consistency. Similarly, coconut beverage (the kind found in cartons in the dairy aisle) is too thin and will not work for this recipe. Always look for full-fat coconut milk in a can, typically found in the international or baking aisle of your grocery store.
Can I make this recipe vegan?
Yes, this recipe is inherently vegan if you use granulated sugar. Coconut milk and shredded coconut are both plant-based ingredients. If you choose to use sweetened condensed milk as your third ingredient (which is a common variation for similar recipes), you would need to ensure it is a vegan sweetened condensed milk, which is often made from coconut or oat milk. Otherwise, sticking to granulated sugar as the sweetener ensures the recipe remains vegan-friendly.
My squares aren’t setting firmly. What went wrong?
There are a few common reasons why your squares might not be setting properly. The most frequent culprit is using light coconut milk instead of full-fat coconut milk. The fat content is critical for structure. Another reason could be insufficient cooking time – you need to simmer the mixture with the shredded coconut long enough for the coconut to absorb the liquid and for the mixture to thicken considerably, pulling away from the sides of the pan. If the mixture is too wet when transferred to the pan, it won’t set. Lastly, ensure you’ve given the squares adequate chilling time, preferably overnight, in the refrigerator. Rushing the chilling process can result in soft, crumbly squares.
How can I make these squares less sweet?
If you prefer a less sweet treat, you can absolutely reduce the amount of granulated sugar. Start by reducing it by a quarter cup and taste the mixture before adding the shredded coconut. However, keep in mind that sugar not only provides sweetness but also contributes to the texture and acts as a binding agent. Reducing it too much might slightly affect the firmness of the squares. If you’re using sweetened condensed milk, which is very sweet, you might consider using unsweetened coconut milk and then adding only a portion of the condensed milk, tasting as you go, or opting for a brand of condensed milk that is less intensely sweetened if available.