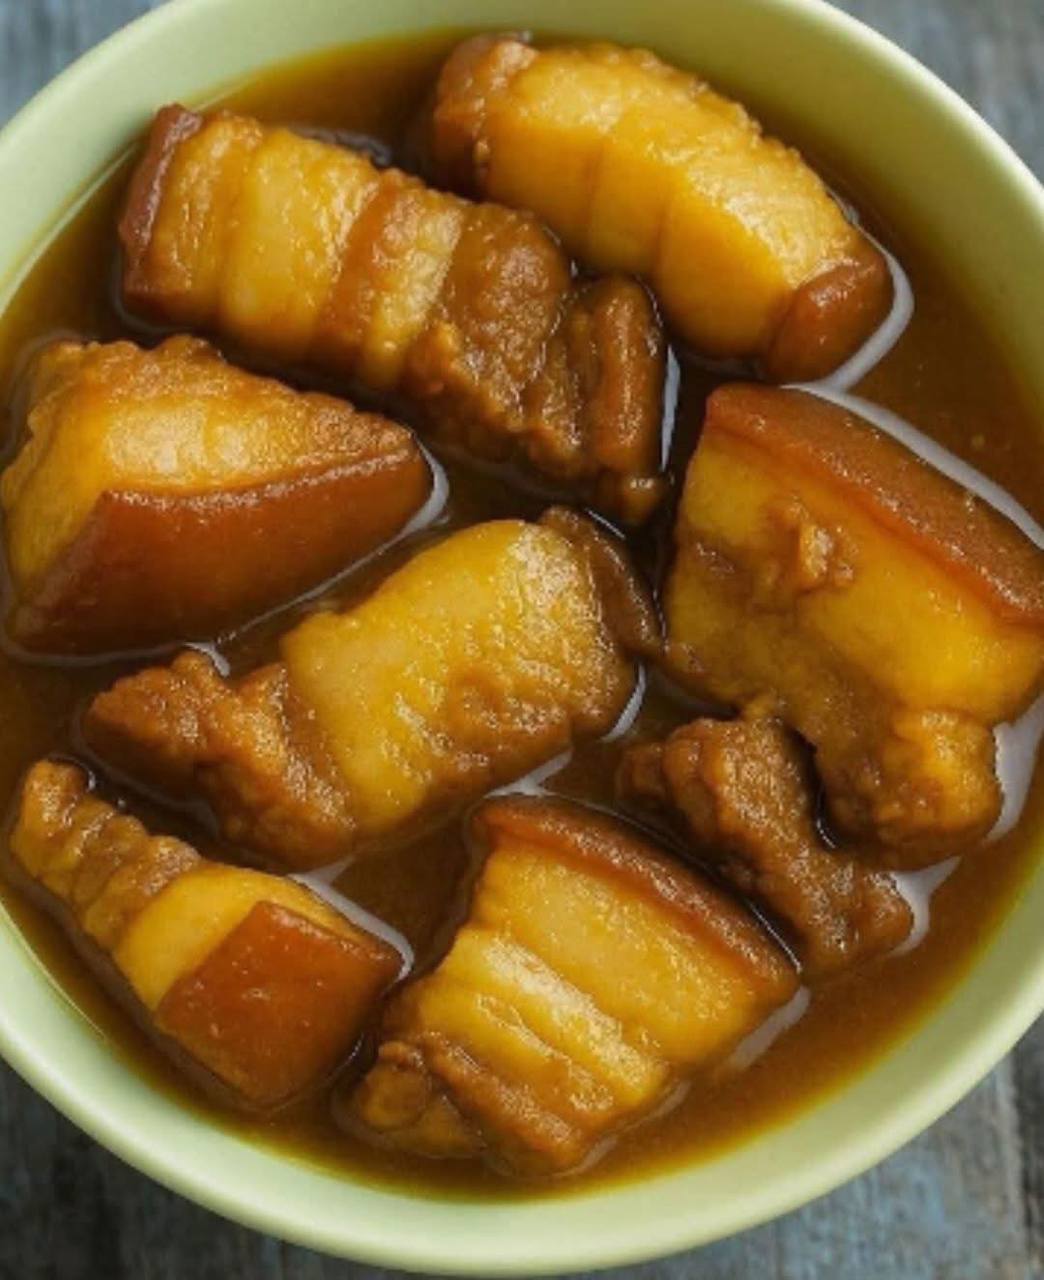
Braised Pork Belly
Prepare to embark on a culinary journey that will tantalize your taste buds and leave you utterly satisfied. Braised pork belly is more than just a dish; it’s an experience, a symphony of textures and flavors that has captivated food lovers for centuries. Imagine succulent, melt-in-your-mouth pork belly, slow-cooked to perfection in a rich, glossy sauce, each bite a harmonious blend of tender meat, luscious fat, and a sticky, savory glaze. This isn’t just food; it’s comfort, it’s tradition, and it’s pure culinary magic.
Hailing from various Asian cuisines, particularly celebrated in Chinese, Japanese, and Vietnamese culinary traditions, braised pork belly has earned its place as a beloved classic. Its popularity stems from its incredible ability to transform a humble cut of meat into something truly extraordinary through the art of slow braising. Our recipe honors this rich heritage, focusing on creating a dish with unparalleled depth of flavor and that signature fall-apart tenderness that makes braised pork belly so irresistible. Get ready to discover why this dish is a staple in so many cultures and why it will quickly become a favorite in your own kitchen.
What makes *this* particular braised pork belly recipe special? We’ve meticulously balanced the sweet, savory, and umami notes, ensuring that each ingredient plays its part in building a complex and incredibly addictive sauce. The pork belly itself is treated with the utmost care, from the initial searing that locks in flavor and renders excess fat, to the patient, low-and-slow braising that coaxes out every ounce of tenderness. The result is a dish that is both deeply satisfying and surprisingly straightforward to achieve at home. Expect a recipe that guides you with clarity, promises delicious results, and delivers a truly memorable meal that will impress everyone at your table.
Nutritional Information
Per serving (approximate values):
- Calories: 550 kcal
- Protein: 35g
- Carbohydrates: 18g
- Fat: 38g
- Fiber: 1g
- Sodium: 1200mg
Ingredients
- 2 lbs (about 900g) skin-on, boneless pork belly
- 2 tablespoons vegetable oil (or other neutral cooking oil)
- 6-8 slices fresh ginger, about 1/4 inch thick
- 4 cloves garlic, smashed
- 2-3 whole star anise
- 1 cinnamon stick (about 2-3 inches)
- 1/2 cup Shaoxing wine (or dry sherry)
- 1/2 cup light soy sauce
- 1/4 cup dark soy sauce
- 1/4 cup rock sugar (or granulated sugar)
- 3 cups hot water or unsalted chicken broth
- 2-3 scallions, green parts only, for garnish (sliced)
- Cooked rice or steamed buns, for serving
- Blanched bok choy or other green vegetables, for serving (optional)
Instructions
- Prepare the Pork Belly: Cut the pork belly into 1.5 to 2-inch cubes or rectangular pieces. Ensure the skin is intact.
- Blanch the Pork Belly (Optional but Recommended): Place the pork belly pieces in a large pot and cover with cold water. Bring to a boil over high heat. Boil for 5-7 minutes, skimming off any foam or impurities that rise to the surface. This step helps remove any “porky” smell and results in a cleaner flavor. Drain the pork belly and rinse thoroughly under cold water. Pat dry very well with paper towels.
- Sear the Pork Belly: Heat the vegetable oil in a large heavy-bottomed pot or Dutch oven over medium-high heat. Once hot, add the dried pork belly pieces, skin-side down first if possible, in a single layer. Do not overcrowd the pot; work in batches if necessary. Sear for 5-7 minutes per side, until deeply golden brown and crispy. This renders some fat and builds crucial flavor. Once seared, remove the pork belly from the pot and set aside. Pour out all but about 1 tablespoon of the rendered fat.
- Sauté Aromatics and Spices: Reduce the heat to medium. Add the ginger slices, smashed garlic, star anise, and cinnamon stick to the pot. Sauté for 1-2 minutes until fragrant, being careful not to burn the garlic.
- Deglaze and Add Liquids: Pour in the Shaoxing wine, scraping the bottom of the pot with a wooden spoon to loosen any browned bits. Let the wine simmer for about 30 seconds to cook off the alcohol.
- Add Soy Sauces and Sugar: Stir in the light soy sauce, dark soy sauce, and rock sugar (or granulated sugar) until the sugar dissolves.
- Return Pork and Add Water/Broth: Return the seared pork belly to the pot. Pour in the hot water or chicken broth until the pork belly is just submerged. If needed, add a little more hot water to ensure coverage.
- Braise the Pork Belly: Bring the liquid to a gentle simmer. Once simmering, reduce the heat to low, cover the pot tightly, and braise for 1.5 to 2 hours.
- Check for Tenderness: After 1.5 hours, check the pork belly for tenderness. It should be very tender, easily pierced with a chopstick or fork, and almost falling apart. If it’s not tender enough, continue braising for another 30-60 minutes, checking periodically.
- Reduce the Sauce: Once the pork belly is tender, remove the lid. Increase the heat to medium-high and simmer, stirring occasionally, for 15-25 minutes, or until the sauce has thickened to a glossy, syrupy consistency that coats the back of a spoon. Be careful not to burn the sauce. You can remove the ginger, garlic, star anise, and cinnamon stick at this point if desired, or leave them in for presentation.
- Serve: Garnish with sliced scallions and serve immediately with hot steamed rice, fluffy steamed buns, and blanched green vegetables like bok choy to complete the meal.
Cooking Tips and Variations
Achieving the perfect braised pork belly is all about patience and attention to detail. For the best results, always opt for good quality pork belly with a balanced ratio of lean meat to fat and an intact skin. The skin provides that wonderful gelatinous texture when properly braised. Don’t skip the blanching step; it makes a noticeable difference in the final flavor profile, resulting in a cleaner, less “porky” taste. When searing, ensure your pork belly pieces are thoroughly dry—this is crucial for achieving that beautiful golden-brown crust and rendering fat effectively. A hot pan and not overcrowding the pot are also key. The braising process is where the magic truly happens; “low and slow” is the mantra. Resisting the urge to rush will reward you with incredibly tender, melt-in-your-mouth pork. Towards the end, when reducing the sauce, keep a close eye on it. The goal is a thick, glossy glaze, not a burnt mess. Stir frequently to prevent sticking and burning.
To add more depth to your braised pork belly, consider a few variations. For a spicier kick, add a few dried chilies along with the aromatics. A touch of fermented bean curd (red or white) can introduce an extra layer of savory umami. If you prefer a slightly sweeter profile, increase the amount of rock sugar or add a tablespoon of honey or maltose during the last 30 minutes of braising. For an earthier flavor, incorporate a few dried shiitake mushrooms (rehydrated) into the braising liquid. You can also experiment with different aromatic additions like bay leaves or a small piece of dried tangerine peel. Some recipes call for a splash of rice vinegar at the very end to cut through the richness with a subtle tang. Feel free to adjust the balance of sweet and savory to your personal preference; this dish is incredibly forgiving in that regard.
Storage and Reheating
Braised pork belly, like many braised dishes, often tastes even better the next day as the flavors have more time to meld and deepen. To store leftovers, allow the pork belly and sauce to cool completely to room temperature. Transfer them to an airtight container and refrigerate for up to 3-4 days. For longer storage, you can freeze braised pork belly for up to 2-3 months. Portion it into individual servings before freezing for easy reheating.
When reheating, if frozen, thaw it overnight in the refrigerator first. The best method for reheating is gently on the stovetop. Transfer the pork belly and sauce to a small saucepan or pot. Add a splash of water or broth if the sauce appears too thick. Heat over medium-low heat, stirring occasionally, until the pork belly is heated through and the sauce is simmering gently. Avoid reheating at very high temperatures or for too long, as this can dry out the pork. You can also reheat individual portions in the microwave, covered, on medium power, stirring halfway through, until hot. The goal is to warm it through without overcooking and maintaining its tender texture.
Frequently Asked Questions
Can I make this dish in a slow cooker or Instant Pot?
Yes, absolutely! For a slow cooker, follow steps 1-6 on the stovetop, then transfer everything to the slow cooker. Cook on low for 6-8 hours or on high for 3-4 hours, until the pork is tender. For an Instant Pot, follow steps 1-6 using the “Sauté” function. Then, seal the lid, set to “Manual” or “Pressure Cook” on high for 40-45 minutes, followed by a natural pressure release for 10-15 minutes, then quick release any remaining pressure. Finish by using the “Sauté” function to reduce the sauce if needed.
Why is my pork belly not tender enough?
The most common reason for tough pork belly is not braising it for long enough. Patience is key with this dish! Ensure the heat is low and consistent during the braising period, and the pot is tightly covered to prevent moisture loss. If it’s still not tender after the recommended time, simply continue braising for another 30-60 minutes, checking every so often, until it reaches that desirable fall-apart tenderness.
How do I get the sauce to be glossy and thick?
The glossiness and thickness come from the reduction process at the end. After the pork belly is tender, remove the lid and increase the heat to medium-high. Simmer, stirring occasionally, allowing the liquid to evaporate and concentrate. The sugar in the sauce will caramelize slightly as it reduces, contributing to the glossy finish. If your sauce isn’t thickening enough, you can add a cornstarch slurry (1 tablespoon cornstarch mixed with 2 tablespoons cold water) during the last few minutes of reduction, stirring constantly until it reaches your desired consistency.