Introduction
As the days grow longer and the world bursts into a symphony of color, there’s no better way to celebrate the arrival of spring and the joy of Easter than with a dessert that’s as vibrant and cheerful as the season itself. Enter the Easter Cheesecake Pie – a visually stunning, incredibly delicious, and surprisingly simple no-bake masterpiece that promises to be the star of your holiday table. Forget the stress of oven-baked desserts; this pie delivers all the creamy, dreamy satisfaction of cheesecake without ever needing to turn on your oven (for the filling, that is!). It’s a true showstopper that combines the comforting crunch of a graham cracker crust with a luscious, tangy cheesecake filling, all brought to life with a dazzling rainbow swirl that will captivate both young and old.
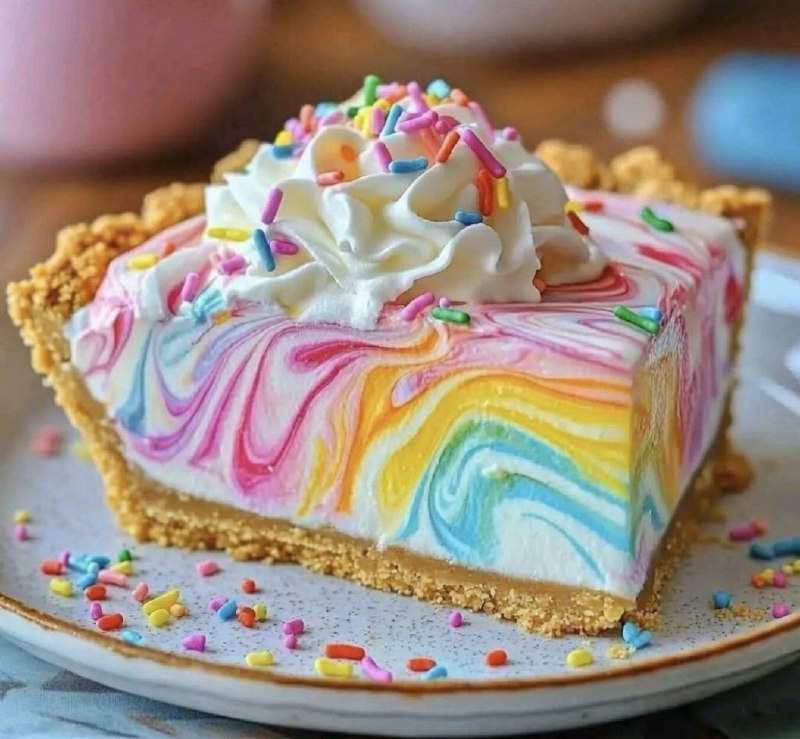
This Easter Cheesecake Pie isn’t just a dessert; it’s an experience. Imagine cutting into a slice and revealing a kaleidoscope of pastel hues – pinks, yellows, blues, and greens – all gracefully swirled together in a creamy, cloud-like filling. Each bite offers a perfect balance of sweet and tangy, with the rich cream cheese beautifully complemented by a hint of vanilla. The sturdy graham cracker crust provides a delightful textural contrast, while a generous topping of fluffy whipped cream and a cascade of rainbow sprinkles adds that final touch of festive charm. It’s a dessert that screams celebration, making it absolutely perfect for Easter brunch, a spring potluck, or any occasion where you want to bring a little extra brightness to the table.
What makes this particular cheesecake pie so special is its effortless elegance. While it looks incredibly impressive, the no-bake nature of the filling means it’s a breeze to put together, making it an ideal project for even novice bakers or a fun activity to do with kids. The vibrant colors are not only aesthetically pleasing but also invite a sense of playfulness and joy, perfectly embodying the spirit of Easter. Plus, it’s a fantastic make-ahead dessert, freeing up precious time on the big day. So get ready to impress your guests and delight your family with a dessert that tastes as good as it looks – a true springtime sensation that will have everyone asking for the recipe!
Nutritional Information
Per serving (approximate values):
- Calories: 450-500
- Protein: 7-9g
- Carbohydrates: 45-55g
- Fat: 28-35g
- Fiber: 1-2g
- Sodium: 250-300mg
Ingredients
For the Graham Cracker Crust:
- 1 ½ cups (about 10-12 full sheets) graham cracker crumbs
- ¼ cup granulated sugar
- ½ cup (1 stick) unsalted butter, melted
For the No-Bake Cheesecake Filling:
- 2 (8-ounce) packages full-fat cream cheese, softened
- 1 ½ cups powdered sugar (confectioners’ sugar), sifted
- 2 teaspoons vanilla extract
- 1 ½ cups heavy cream, very cold
- Gel food coloring: red/pink, orange, yellow, green, blue, purple (or colors of your choice)
For the Topping:
- 1 ½ cups heavy cream, very cold (for homemade whipped cream) OR 1 (8-ounce) container store-bought whipped topping
- ¼ cup powdered sugar (if making homemade whipped cream)
- ½ teaspoon vanilla extract (if making homemade whipped cream)
- ¼ cup rainbow sprinkles, plus more for garnish
Instructions
- Prepare the Graham Cracker Crust:
- In a medium bowl, combine the graham cracker crumbs and granulated sugar.
- Pour in the melted butter and stir until the crumbs are evenly moistened and resemble wet sand.
- Press the mixture firmly and evenly into the bottom and up the sides of a 9-inch pie dish. Use the bottom of a glass or a measuring cup to help create a compact and smooth crust.
- Place the pie dish in the refrigerator to chill for at least 30 minutes while you prepare the filling.
- Make the No-Bake Cheesecake Filling:
- In a large bowl, using an electric mixer (handheld or stand mixer with a paddle attachment), beat the softened cream cheese on medium speed until smooth and creamy, about 2-3 minutes. Make sure there are no lumps.
- Gradually add the sifted powdered sugar to the cream cheese, beating until fully incorporated and smooth. Scrape down the sides of the bowl as needed.
- Beat in the vanilla extract until combined. Set this mixture aside.
- In a separate, very cold bowl (preferably a metal bowl chilled in the freezer for 10-15 minutes), combine the very cold heavy cream (and powdered sugar/vanilla if making homemade whipped cream for the filling).
- Using an electric mixer with a whisk attachment, beat the heavy cream on medium-high speed until stiff peaks form. Be careful not to overbeat, as it can turn grainy.
- Gently fold about one-third of the whipped cream into the cream cheese mixture using a spatula, just until combined. This will lighten the cream cheese mixture.
- Then, gently fold in the remaining whipped cream until no streaks remain and the mixture is light and airy. Do not overmix.
- Tint the Cheesecake Filling Colors:
- Divide the cheesecake filling evenly into 6-7 small bowls. Leave one bowl plain white if desired, or tint all bowls.
- Add a small amount of gel food coloring to each bowl (e.g., red/pink, orange, yellow, green, blue, purple). Start with a tiny drop and add more if needed to achieve your desired vibrant pastel shades.
- Gently stir each bowl of filling with a separate spoon until the color is evenly distributed.
- Assemble the Swirl Pie:
- Retrieve the chilled graham cracker crust from the refrigerator.
- Begin dolloping spoonfuls of each colored cheesecake mixture randomly over the bottom of the crust. Vary the placement and size of the dollops to create an interesting pattern.
- Continue layering and dolloping the different colors until all the filling has been used, covering the entire crust.
- Once all the colors are in place, take a skewer, a thin butter knife, or a toothpick and gently swirl through the colors. Move the skewer in S-shapes or figure-eight patterns across the top of the pie. Do NOT over-swirl; a few gentle passes are enough to merge the colors without completely blending them into one muddy shade. The goal is distinct, colorful streaks.
- Gently smooth the top of the pie with an offset spatula or the back of a spoon if needed, being careful not to disturb the swirl too much.
- Chill and Set:
- Cover the pie loosely with plastic wrap (try not to let the plastic touch the surface of the pie).
- Refrigerate the Easter Cheesecake Pie for at least 6-8 hours, or preferably overnight, until the filling is completely firm and set. This is crucial for clean slices.
- Decorate and Serve:
- Just before serving, prepare the topping. If using store-bought whipped topping, simply dollop or spread it over the chilled pie.
- If making homemade whipped cream for the topping: In a very cold bowl, combine 1 ½ cups cold heavy cream, ¼ cup powdered sugar, and ½ teaspoon vanilla extract. Beat with an electric mixer until stiff peaks form.
- Spread or pipe the whipped cream over the top of the pie.
- Generously sprinkle rainbow sprinkles over the whipped cream.
- Slice with a sharp knife (dipped in hot water and wiped clean between each slice for the cleanest cuts) and serve immediately.
Cooking Tips and Variations
Achieving the perfect Easter Cheesecake Pie involves a few key techniques and offers plenty of room for creative twists. Here are some tips for success and delicious variations:
- The Perfect Swirl is Key: The most common mistake when making a swirl pie is over-swirling. Less is definitely more! You want distinct streaks of color, not a fully blended, muddy result. Use a light hand and make only a few passes with your skewer or knife. Think of it as gently coaxing the colors together, rather than mixing them.
- Room Temperature Cream Cheese: This cannot be stressed enough. For a truly smooth, lump-free cheesecake filling, your full-fat cream cheese MUST be softened to room temperature. Take it out of the fridge at least an hour or two before you plan to start. Cold cream cheese will result in a lumpy filling that is impossible to smooth out.
- Cold Heavy Cream: Just as important as softened cream cheese, your heavy cream needs to be very cold to whip properly into stiff peaks. For best results, chill your mixing bowl (especially if it’s metal) and whisk attachment in the freezer for 10-15 minutes before whipping. This helps the cream hold its structure.
- Sift Your Powdered Sugar: Powdered sugar can clump easily. Sifting it before adding it to the cream cheese mixture will ensure a silky-smooth filling without any grainy bits.
- Gel Food Coloring for Vibrancy: While liquid food coloring works, gel food coloring is highly recommended. It provides much brighter, more concentrated colors with just a tiny amount, without adding excess liquid that could thin out your cheesecake filling. This allows for those truly vibrant pastel hues perfect for Easter.
- Thorough Chilling is Non-Negotiable: Do not rush the chilling process! A minimum of 6-8 hours, or ideally overnight, is essential for the no-bake cheesecake to fully set and become firm enough to slice cleanly. If you try to cut it too soon, it will be messy and won’t hold its shape.
- Clean Slices Every Time: For beautiful, clean slices that show off the rainbow swirl, dip your sharp knife in hot water and wipe it clean with a paper towel between each slice. This warms the blade slightly, allowing it to glide through the cold cheesecake more easily.
- Crust Variations: While a graham cracker crust is classic, feel free to experiment! You could use crushed vanilla wafers for a sweeter, lighter flavor, crushed shortbread cookies for a buttery richness, or even crushed chocolate sandwich cookies (like Oreos) for a fun chocolatey twist, particularly if you’re not strictly adhering to an Easter theme.
- Flavor Boosts and Extracts: Add a touch of fresh lemon zest to the cheesecake filling for a bright, tangy pop that complements the cream cheese beautifully. You could also swap out vanilla extract for almond extract, lemon extract, or even a touch of coconut extract for a different flavor profile.
- Occasion Adaptability: This pie is incredibly versatile! Change the food coloring to suit any holiday or event. Think red and green for Christmas, red and blue for patriotic holidays, or school colors for a graduation party. The concept remains the same, just adjust your palette.
- Individual Servings: For a party-friendly option, consider making mini Easter Cheesecake Pies! Press the crust mixture into muffin tins lined with paper liners, then dollop and swirl the filling into each. Adjust chilling time as needed.
- Garnish Get-Creative: Beyond sprinkles, consider other garnishes. Fresh berries (strawberries, blueberries, raspberries) add a lovely natural sweetness and color. Edible flowers for a truly elegant touch, or even a drizzle of white chocolate or a dusting of powdered sugar can elevate the presentation.
Storage and Reheating
Proper storage is key to keeping your Easter Cheesecake Pie fresh and delicious. Since this is a no-bake dessert, there’s no reheating involved.
Storage:
- Refrigeration: The Easter Cheesecake Pie must be stored in the refrigerator due to its dairy-based ingredients. Once it’s fully set, cover the pie loosely with plastic wrap or aluminum foil. If you have a pie carrier, that’s ideal for protecting it.
- How Long It Lasts: When stored properly in the refrigerator, the pie will remain fresh and delicious for up to 3-4 days. The crust may soften slightly over time, but the filling should maintain its texture and flavor.
- Best Practice: For optimal freshness and to prevent the whipped cream topping from deflating or absorbing refrigerator odors, it’s best to add the whipped cream and sprinkles just before serving. If you know you’ll have leftovers, only top the slices you plan to eat immediately. Store the plain chilled pie, and add fresh whipped cream and sprinkles to individual slices as desired.
Reheating:
This is a chilled dessert and should not be reheated. It is meant to be served cold directly from the refrigerator.
Frequently Asked Questions
What if my cheesecake filling isn’t setting up properly?
The most common reasons for a no-bake cheesecake not setting are often related to the ingredients or chilling time. Ensure you used full-fat cream cheese, as low-fat versions contain more water and can lead to a softer set. Also, make sure your heavy cream was very cold and whipped to stiff peaks; this provides the structure for the filling. Finally, adequate chilling time is crucial. If it’s still too soft after 6-8 hours, give it more time in the refrigerator, even overnight. If it’s still not setting after ample chilling, it might be due to overmixing the whipped cream into the cream cheese, which can break down its structure.
Can I make this pie ahead of time for Easter?
Absolutely, this Easter Cheesecake Pie is an excellent make-ahead dessert! You can prepare the entire pie, including the crust, filling, and swirl, up to 1-2 days in advance. Just be sure to cover it loosely with plastic wrap and store it in the refrigerator. For the best presentation, I recommend waiting to add the whipped cream topping and rainbow sprinkles until about an hour before you plan to serve it. This keeps the whipped cream fresh and fluffy, and the sprinkles vibrant.
My colors bled together and look muddy. What went wrong?
This usually happens from over-swirling! The key to a beautiful rainbow swirl is a gentle touch. You want to merge the colors just enough to create distinct streaks and patterns, not blend them completely. When you use your skewer or knife, make only a few light passes through the dolloped colors. Think of it as creating a marble effect rather than fully mixing paint. Next time, try fewer passes and a lighter hand to maintain those vibrant, distinct color separations.
Can I use a different type of crust?
Yes, absolutely! While a graham cracker crust is traditional and works wonderfully, you can certainly substitute it with other crushed cookie crusts. Vanilla wafers, shortbread cookies, or even chocolate sandwich cookies (like Oreos, if you want a chocolate base) would all make delicious alternatives. Simply follow the same ratio of 1 ½ cups of crushed crumbs to ¼ cup sugar and ½ cup melted butter, and press it into your pie dish before chilling.