Introduction
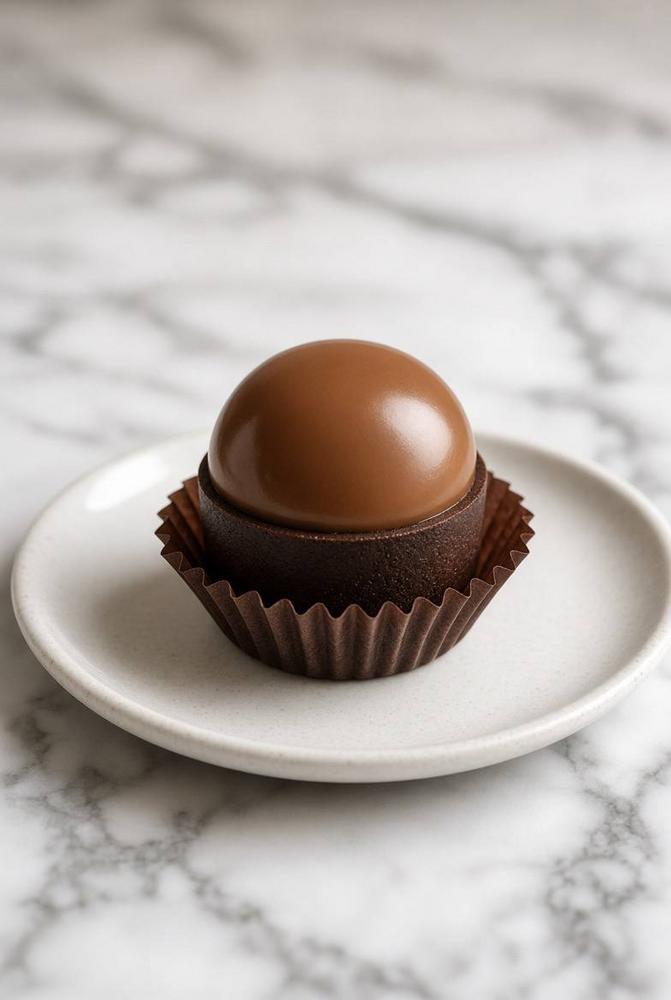
Prepare to embark on a culinary journey that marries the irresistible allure of rich chocolate with the sophisticated charm of salted caramel. Our Salted Caramel Chocolate Cups are not just a dessert; they are a miniature masterpiece, a symphony of textures and flavors meticulously crafted to delight your senses. Imagine a decadent, dark chocolate base cradling a luscious, silky salted caramel filling, all crowned with a perfectly spherical, glossy caramel dome that shimmers with a promise of pure indulgence. This is more than just a sweet treat; it’s an experience, an elegant offering that transforms any moment into a special occasion.
What makes these cups truly special is the exquisite balance they strike. The intense, bittersweet notes of high-quality dark chocolate provide the perfect counterpoint to the buttery, sweet, and subtly salty caramel. Each bite delivers a harmonious blend of deep cocoa, molten gold, and a delicate kiss of sea salt, creating a complexity that keeps you coming back for more. They are surprisingly robust in flavor yet melt-in-your-mouth tender, showcasing a professional polish that belies their homemade charm. Perfect for impressing guests, gifting to loved ones, or simply treating yourself to a moment of gourmet bliss, these Salted Caramel Chocolate Cups are destined to become your new favorite sophisticated dessert.
Beyond their unparalleled taste, the visual appeal of these cups is undeniable. The contrast between the matte, textured chocolate base and the mirror-like, smooth caramel dome is a feast for the eyes, hinting at the delightful layers within. Served in elegant fluted paper liners, they possess an artisanal quality, reminiscent of fine bonbons or petit fours from a high-end patisserie. Get ready to elevate your dessert game and discover the joy of creating these truly decadent and visually stunning salted caramel chocolate cups.
Nutritional Information
Per serving (approximate values):
- Calories: 380
- Protein: 4g
- Carbohydrates: 45g
- Fat: 22g
- Fiber: 3g
- Sodium: 180mg
Ingredients
For the Dark Chocolate Cups:
- 12 oz (340g) high-quality dark chocolate (60-70% cacao), chopped
- 2 tbsp (28g) unsalted butter
- 1 tbsp (15ml) heavy cream
- 1/4 tsp vanilla extract
For the Salted Caramel Filling:
- 1 cup (200g) granulated sugar
- 1/4 cup (60ml) water
- 1/2 cup (120ml) heavy cream, warmed
- 4 tbsp (56g) unsalted butter, cut into cubes, at room temperature
- 1/2 tsp flaky sea salt (such as Maldon), plus extra for garnish
- 1/2 tsp vanilla extract
For the Glossy Caramel Domes (Caramel Ganache & Glaze):
- 1/2 cup (100g) granulated sugar
- 2 tbsp (30ml) water
- 1/4 cup (60ml) heavy cream, warmed
- 2 tbsp (28g) unsalted butter, cut into cubes
- 1/4 tsp flaky sea salt
- 1/2 tsp vanilla extract
- 1/2 tsp unflavored gelatin powder
- 2 tbsp (30ml) cold water (for gelatin)
- 1/4 cup (60g) sweetened condensed milk
- 2 oz (56g) white chocolate, chopped
- 1-2 drops yellow food coloring (optional, for vibrant caramel color)
- 1-2 drops orange food coloring (optional)
Instructions
- Prepare the Chocolate Cups:
- Melt 10 oz (280g) of the chopped dark chocolate in a heatproof bowl set over a saucepan of simmering water (bain-marie) or in a microwave in 30-second intervals, stirring until smooth. Remove from heat and stir in the remaining 2 oz (60g) chopped chocolate until fully melted and smooth (this helps temper the chocolate).
- Stir in the butter, heavy cream, and vanilla extract until fully incorporated and the mixture is glossy.
- Using a silicone mini muffin or truffle mold (approximately 1.5-2 inch diameter cups), spoon about 1-2 teaspoons of melted chocolate into each cavity. Using the back of the spoon or a small brush, spread the chocolate up the sides of the mold to create a cup shape. Ensure the walls are thick enough to hold the filling.
- Place the molds in the refrigerator for at least 30 minutes, or until the chocolate is firm and easily releases from the mold. Gently unmold the chocolate cups and set aside.
- Make the Salted Caramel Filling:
- In a medium, heavy-bottomed saucepan, combine the granulated sugar and 1/4 cup water. Stir gently to moisten all the sugar.
- Cook over medium-high heat without stirring. Watch carefully as the sugar mixture will begin to bubble, then turn amber, and finally a deep golden brown. This usually takes 8-10 minutes. Do not stir, but you can gently swirl the pan to ensure even coloring.
- Once the caramel reaches a deep amber color (around 340-350°F / 170-175°C if using a candy thermometer), immediately and carefully pour in the warmed heavy cream while whisking constantly. The mixture will bubble up vigorously. Continue whisking until smooth.
- Remove from heat. Add the cubed butter, flaky sea salt, and vanilla extract. Whisk until the butter is fully melted and incorporated, creating a smooth and luscious caramel.
- Pour the salted caramel filling into a heatproof bowl. Let it cool at room temperature for about 30-45 minutes, or until it has thickened slightly but is still pourable.
- Prepare the Caramel Domes (Caramel Ganache Base):
- In a small saucepan, combine 1/2 cup granulated sugar and 2 tbsp water. Cook over medium-high heat to a deep amber caramel, similar to step 2.
- Carefully pour in the 1/4 cup warmed heavy cream and whisk until smooth. Remove from heat.
- Whisk in the 2 tbsp cubed butter, 1/4 tsp flaky sea salt, and 1/2 tsp vanilla extract until smooth. This is your caramel ganache.
- Pour the caramel ganache into spherical silicone molds (e.g., half-sphere molds, about 1-1.5 inch diameter), filling each cavity about 3/4 full.
- Refrigerate for at least 1-2 hours, or until completely firm.
- Prepare the Glossy Caramel Glaze:
- Bloom the gelatin: In a small bowl, sprinkle the gelatin powder over 2 tbsp cold water. Let it sit for 5-10 minutes until it thickens.
- In a separate saucepan, combine the remaining 1/2 cup granulated sugar and 1/4 cup water. Cook over medium-high heat until it reaches a light amber caramel color.
- Remove from heat and immediately stir in the sweetened condensed milk.
- Add the bloomed gelatin and stir until completely dissolved.
- Pour the mixture over the chopped white chocolate in a heatproof bowl. Let it sit for 1-2 minutes, then stir until the chocolate is completely melted and the mixture is smooth.
- Add the yellow and orange food coloring, if using, to achieve a rich caramel color.
- Strain the glaze through a fine-mesh sieve to remove any lumps. Let the glaze cool to approximately 90-95°F (32-35°C) before using. It should be warm enough to be pourable but cool enough to coat the domes without melting them.
- Glaze the Caramel Domes:
- Remove the firm caramel ganache domes from their silicone molds. Place them on a wire rack set over a baking sheet (to catch excess glaze).
- Carefully pour the cooled caramel glaze over each caramel dome, ensuring it is fully coated and smooth. Allow excess glaze to drip off.
- Once the glaze has set slightly (a few minutes), use a small offset spatula or knife to gently transfer the glazed domes to a clean surface or back into the refrigerator to fully set.
- Assemble the Salted Caramel Chocolate Cups:
- Spoon about 1-2 tablespoons of the cooled salted caramel filling into each chocolate cup, filling it almost to the top.
- Carefully place one glazed caramel dome on top of the caramel filling in each chocolate cup.
- Garnish with a tiny sprinkle of flaky sea salt on top of each caramel dome for visual appeal and an extra pop of flavor.
- Place the assembled cups into fluted paper liners for elegant presentation.
- Chill and Serve:
- Refrigerate the Salted Caramel Chocolate Cups for at least 30 minutes to allow all the layers to set completely and firm up.
- Serve chilled or at cool room temperature for the best texture and flavor experience.
Cooking Tips and Variations
Achieving perfection with these Salted Caramel Chocolate Cups requires a bit of precision and patience, but the results are incredibly rewarding. When making your caramel, ensure your saucepan is impeccably clean, as any sugar crystals can cause the caramel to seize. Resist the urge to stir the sugar and water mixture once it starts boiling; swirling the pan gently is sufficient. A candy thermometer is highly recommended for consistent caramel results, aiming for a deep amber color, not burnt. For the chocolate cups, using high-quality dark chocolate is paramount; it makes a significant difference in flavor and texture. Tempering the chocolate (as described in step 1, by melting most and then stirring in remaining chopped chocolate off heat) will give your cups a beautiful shine and a satisfying snap. If you struggle with tempering, you can simply melt all the chocolate, but the cups might be softer and less glossy.
For the caramel domes, ensure your spherical silicone molds are perfectly clean and dry for easy release. The key to a flawless mirror glaze is temperature control; applying it when it’s too hot will melt your domes, and when it’s too cold, it will be too thick and uneven. Aim for the specified temperature range and strain it for the smoothest finish. When pouring the glaze, do so in one continuous motion over the chilled domes. If you don’t have spherical molds, you can simply pipe a dollop of the caramel ganache (from step 3) onto the caramel filling and let it set, then spoon a thin layer of the glaze over it, or omit the glaze entirely.
To vary the flavor profile, consider using a milk chocolate base for a sweeter cup or a blend of dark and milk chocolate. You could also infuse your heavy cream with a vanilla bean or a dash of espresso powder before adding it to the caramel for an extra layer of complexity. A pinch of cayenne pepper in the chocolate base can introduce a subtle spicy kick. For texture, finely chopped toasted pecans or almonds can be added to the bottom of the chocolate cup before pouring in the caramel filling. Experiment with different types of sea salt for garnish, such as smoked sea salt for a deeper, more savory note, or fleur de sel for its delicate crunch and briny burst.
Storage and Reheating
These Salted Caramel Chocolate Cups are best enjoyed within 3-4 days of preparation. To store them, place the individual cups in an airtight container. It’s best to arrange them in a single layer to prevent them from sticking together or damaging the delicate caramel domes. If you need to stack them, place a piece of parchment paper between the layers. Store the container in the refrigerator.
Because of their multi-layered structure and delicate glazes, these cups are not suitable for freezing, as freezing can affect the texture of the caramel and cause the chocolate to bloom (develop a whitish film). Freezing can also cause the mirror glaze to lose its shine and potentially weep upon thawing.
These chocolate cups are typically served chilled or at cool room temperature. There is no reheating necessary or recommended for this dessert. Allowing them to sit out of the refrigerator for 15-20 minutes before serving can help the chocolate and caramel soften slightly, enhancing their melt-in-your-mouth texture and allowing the flavors to fully develop. However, avoid leaving them at room temperature for extended periods, especially in warm environments, as the chocolate can melt and the caramel can become too soft.
Frequently Asked Questions
Can I make these Salted Caramel Chocolate Cups ahead of time?
Absolutely! This dessert is actually perfect for making ahead. You can prepare all components – the chocolate cups, the salted caramel filling, and the caramel domes – 1-2 days in advance. Store them separately in airtight containers in the refrigerator. Assemble the cups a few hours before serving, or even the day before, to allow all the flavors to meld beautifully and the layers to set perfectly.
My caramel seized or crystallized. What went wrong?
Caramel seizing or crystallizing is a common issue, usually caused by sugar crystals. Ensure your saucepan is impeccably clean before starting. Avoid stirring the sugar and water mixture once it begins to boil; instead, gently swirl the pan to distribute heat. If crystals form on the sides of the pan, use a clean, wet pastry brush to wipe them down. If your caramel seizes after adding cream, try placing the pan back on low heat and stirring gently until it re-melts and smooths out, being careful not to burn it.
Do I need special molds for this recipe?
For the perfectly shaped chocolate cups and especially the spherical caramel domes, silicone molds are highly recommended. Mini muffin or truffle-sized silicone molds work well for the chocolate cups. For the domes, half-sphere or full-sphere silicone molds (typically 1-1.5 inches in diameter) are ideal. While you can try to free-form some elements, using the molds ensures the elegant, professional appearance seen in the images.