Introduction
There are some dishes that instantly transport you to a place of warmth, family, and celebration. Stuffing is undeniably one of them. That beloved holiday staple, brimming with savory herbs, aromatic vegetables, and comforting bread, holds a special place at countless tables. But let’s be honest, traditional stuffing, while delicious, can sometimes be a bit… rustic. Serving it can be a messy affair, often crumbling into a delicious but ungraceful heap. What if we could capture all that cherished flavor and comfort in a more elegant, portion-controlled, and utterly delightful package? Enter the Stuffing Ball in Gravy – a brilliant reimagining that takes everything you love about classic stuffing and elevates it to a new level of convenience and charm.
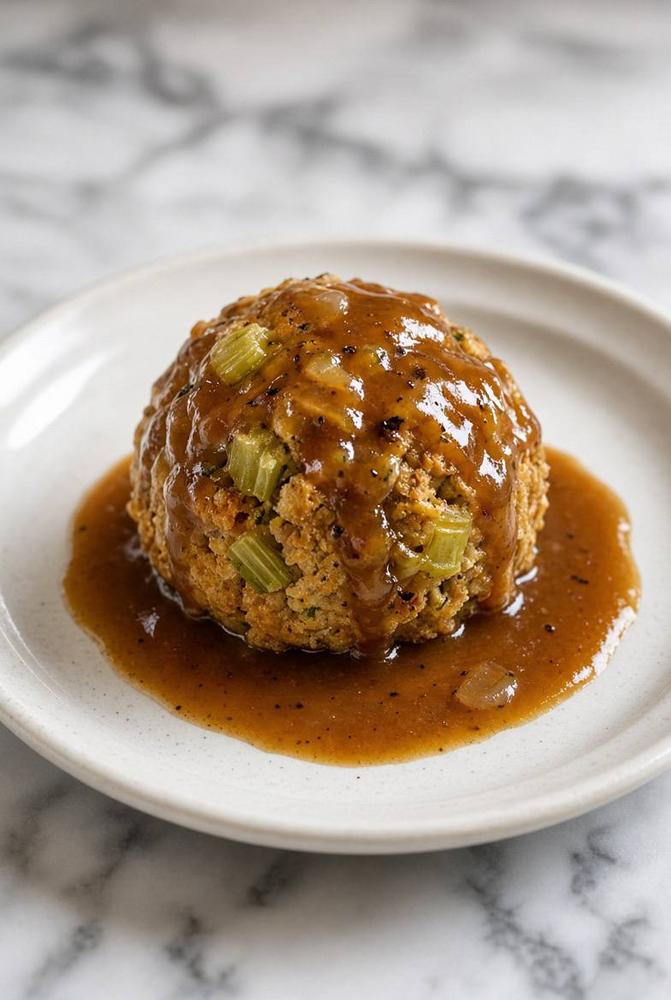
Imagine perfectly golden-brown spheres, each with a slightly crisp exterior giving way to a moist, herbaceous interior, generously bathed in a rich, savory gravy. These individual stuffing balls are not just a pretty face; they’re a practical solution for holiday entertaining or even a simple weeknight meal that feels special. No more struggling to scoop a cohesive portion; each guest gets their own delectable serving, brimming with all the familiar flavors of celery, onion, and fragrant spices. This dish celebrates the essence of comfort food, making it easier to serve and even more enjoyable to eat.
Whether you’re hosting a grand Thanksgiving feast, a cozy Christmas dinner, or simply craving that nostalgic taste, our Stuffing Balls in Gravy recipe is designed to impress with minimal fuss. It’s a dish that promises to be a crowd-pleaser, delivering deep, comforting flavors and an elegant presentation that will have everyone asking for the recipe. So, get ready to transform your stuffing experience and discover your new favorite way to enjoy this timeless classic.
Nutritional Information
Per serving (approximate values, based on 2 stuffing balls and 1/2 cup gravy):
- Calories: 420 kcal
- Protein: 12g
- Carbohydrates: 45g
- Fat: 22g
- Fiber: 4g
- Sodium: 850mg
Ingredients
For the Stuffing Balls:
- 12 cups day-old bread, cut into 1/2-inch cubes (about 1.5 lbs, sourdough or white bread recommended)
- 1 cup unsalted butter, melted, plus 2 tablespoons for sautéing
- 2 large yellow onions, finely chopped
- 4 stalks celery, finely chopped
- 4 cloves garlic, minced
- 1/2 cup fresh parsley, chopped
- 2 tablespoons fresh sage, chopped
- 1 tablespoon fresh thyme, chopped
- 1 teaspoon salt
- 1/2 teaspoon black pepper
- 3 cups low-sodium chicken or vegetable broth, plus more if needed
- 2 large eggs, lightly beaten
For the Gravy:
- 1/4 cup unsalted butter
- 1/4 cup all-purpose flour
- 4 cups low-sodium chicken or turkey broth (or pan drippings from roasted turkey/chicken)
- 1 small yellow onion or 2 shallots, finely minced
- 2 cloves garlic, minced
- 1 teaspoon fresh sage, chopped (optional)
- 1/2 teaspoon black pepper, plus more to taste
- Salt to taste
- 1 tablespoon Worcestershire sauce (optional, for umami depth)
Instructions
For the Stuffing Balls:
- Prepare the Bread: If your bread isn’t day-old, spread the cubes on a large baking sheet and bake at 275°F (135°C) for 15-20 minutes, or until lightly toasted and dry. This prevents soggy stuffing. Let cool completely.
- Sauté Aromatics: In a large skillet or Dutch oven, melt 2 tablespoons of butter over medium heat. Add the chopped onions and celery and cook, stirring occasionally, until softened and translucent, about 8-10 minutes. Add the minced garlic and cook for another 1-2 minutes until fragrant. Remove from heat.
- Combine Ingredients: In a very large mixing bowl, combine the dried bread cubes, sautéed onion and celery mixture, chopped fresh parsley, sage, thyme, salt, and black pepper. Toss gently to combine all ingredients evenly.
- Add Wet Ingredients: In a separate bowl, whisk together the melted butter, chicken broth, and lightly beaten eggs. Pour this wet mixture over the bread mixture in the large bowl.
- Mix Thoroughly: Using your hands (the best tool for this!), gently mix and squeeze the stuffing mixture until all the bread cubes are evenly moistened. Be careful not to overmix, as this can make the stuffing dense. The mixture should be moist but not soggy, holding its shape when squeezed. If it feels too dry, add a little more broth, 1/4 cup at a time, until desired consistency is reached.
- Form the Balls: Preheat your oven to 375°F (190°C). Lightly grease a large baking sheet. Using a 1/4-cup measure or an ice cream scoop, form the stuffing mixture into uniform balls, about 1.5 to 2 inches in diameter. Arrange them in a single layer on the prepared baking sheet, leaving a little space between each ball.
- Bake the Stuffing Balls: Bake for 25-30 minutes, or until the stuffing balls are golden brown on the outside and heated through. For an extra crispy exterior, you can lightly mist them with cooking spray or brush with a little melted butter halfway through baking. Remove from the oven and set aside.
For the Gravy:
- Sauté Aromatics (Optional, if not using pan drippings): In a medium saucepan, melt 1 tablespoon of butter over medium heat. Add the minced onion or shallots and cook until softened, about 3-4 minutes. Add the minced garlic and cook for another minute until fragrant.
- Make a Roux: Add the remaining 3 tablespoons of butter to the saucepan and let it melt. Sprinkle in the all-purpose flour and whisk continuously for 1-2 minutes to create a smooth roux. It should be a pale golden color.
- Whisk in Broth: Gradually whisk in the chicken or turkey broth (or pan drippings) a little at a time, ensuring no lumps form. Continue whisking until the gravy is smooth and begins to thicken.
- Simmer and Season: Bring the gravy to a gentle simmer, stirring occasionally, and let it cook for 5-7 minutes, or until it reaches your desired consistency. It should be thick enough to coat the back of a spoon. Stir in the chopped fresh sage (if using), black pepper, and Worcestershire sauce. Taste and season with salt as needed. Remember, if using pan drippings, they may already be salty.
Assembly:
- Serve: Arrange the warm stuffing balls on individual plates or a large serving platter. Generously spoon the hot, rich gravy over the stuffing balls. Garnish with a sprinkle of fresh parsley if desired. Serve immediately and enjoy!
Cooking Tips and Variations
Achieving the perfect stuffing ball with a golden crust and moist interior, bathed in a flavorful gravy, is easier than you think with a few key tips. First and foremost, the bread is crucial. Using day-old or lightly toasted bread prevents the stuffing from becoming a soggy mess. The drying process allows the bread to absorb the liquid without disintegrating, giving you that ideal texture. When mixing the stuffing, don’t be afraid to use your hands; they are the best tools for ensuring even distribution of moisture and ingredients without overworking the mixture. The stuffing should feel moist and hold together when squeezed, but not be dripping wet. If it’s too dry, add a splash more broth; if too wet, a handful of extra dried bread cubes can help.
For the gravy, patience is a virtue. When making the roux, cook it for at least a minute or two to cook out the raw flour taste, but don’t let it burn. Gradually whisking in the broth prevents lumps, ensuring a silky-smooth gravy. If you find your gravy has lumps, a quick whisk with an immersion blender or pushing it through a fine-mesh sieve will fix it right up. For an extra depth of flavor, consider using a combination of chicken broth and a good quality mushroom broth for the gravy, or even a splash of dry white wine reduced before adding the broth. Pan drippings from a roasted turkey or chicken are a game-changer for gravy, adding unparalleled richness and savory notes; if you have them, definitely use them as part or all of your liquid.
Variations abound for these versatile stuffing balls. To add a meaty element, sauté 1/2 pound of crumbled sausage (pork, turkey, or even vegetarian sausage) with the onions and celery. For a richer, earthy flavor, sauté 1 cup of finely chopped mushrooms (cremini or shiitake) alongside the aromatics. You can also experiment with different herbs – rosemary, marjoram, or even a touch of poultry seasoning can be wonderful additions. For a touch of sweetness and tartness, a handful of dried cranberries or chopped apples can be incorporated into the stuffing mixture. If you prefer a nuttier flavor, toasted pecans or walnuts can be added. For a cheesy twist, stir in 1/2 cup of grated Parmesan or Gruyère cheese into the stuffing mixture before forming the balls. To make them gluten-free, simply use gluten-free bread cubes and ensure your broth and other ingredients are certified gluten-free. For a vegetarian option, use vegetable broth and omit any meat-based additions. The beauty of this recipe lies in its adaptability, allowing you to customize it to your taste and dietary needs.
Storage and Reheating
These Stuffing Balls in Gravy are fantastic for make-ahead purposes, which is a huge bonus, especially during busy holiday seasons. To store leftovers, first ensure the stuffing balls and gravy have cooled completely to room temperature. This is crucial to prevent bacterial growth and maintain food safety. Once cooled, store the stuffing balls and gravy separately in airtight containers in the refrigerator. They will keep well for up to 3-4 days. Storing them separately helps maintain the texture of the stuffing balls, preventing them from becoming overly soggy from sitting in the gravy.
For longer storage, both the stuffing balls and gravy can be frozen. Place cooled stuffing balls in a single layer on a baking sheet and freeze until solid, about 2-3 hours. Then, transfer them to a freezer-safe bag or container, removing as much air as possible to prevent freezer burn. The gravy can be frozen in an airtight container or freezer-safe bags. They will keep in the freezer for up to 2-3 months. Thaw frozen stuffing balls and gravy overnight in the refrigerator before reheating.
When it comes to reheating, there are a few methods to ensure your stuffing balls remain delicious. For the stuffing balls, the best way to reheat them to restore some of their crispness is in the oven. Preheat your oven to 325°F (160°C). Place the stuffing balls on a baking sheet and heat for 10-15 minutes, or until warmed through and the exterior has re-crisped slightly. You can also reheat them in a microwave, but they may become softer. If using a microwave, place them on a microwave-safe plate, cover loosely, and heat in 30-second intervals until hot. For the gravy, reheat it gently on the stovetop over medium-low heat, stirring frequently, until simmering and warmed through. If the gravy has thickened too much, you can add a splash of broth or water to thin it out to your desired consistency. If reheating from frozen, thaw completely in the refrigerator before following these reheating instructions. Always ensure food is heated to an internal temperature of 165°F (74°C) before serving.
Frequently Asked Questions
Can I make the stuffing balls ahead of time?
Absolutely! You can prepare the stuffing mixture up to 24 hours in advance. Form the balls and store them uncooked in an airtight container in the refrigerator. When ready to bake, place them directly on a baking sheet and bake as directed, adding a few extra minutes to the baking time if they are very cold. You can also bake the stuffing balls completely, cool them, and then store them in the refrigerator for 2-3 days, reheating as instructed.
My gravy is too thin/too thick. How can I fix it?
If your gravy is too thin, create a slurry by whisking 1 tablespoon of cornstarch with 2 tablespoons of cold water. Gradually whisk this mixture into the simmering gravy and cook for another 1-2 minutes until it thickens. Repeat if necessary. If your gravy is too thick, simply whisk in a little more chicken broth or water, a tablespoon at a time, until it reaches your desired consistency.
What kind of bread is best for stuffing balls?
For the best texture and flavor, use day-old sturdy bread like sourdough, French bread, or a good quality white sandwich bread. Avoid very soft or fresh bread, as it tends to become mushy. Cutting the bread into uniform 1/2-inch cubes and letting it dry out (or toasting it lightly) is key for a stuffing that holds its shape and has a great texture.
Can I make this recipe vegetarian or gluten-free?
Yes, easily! For a vegetarian version, simply use vegetable broth instead of chicken broth for both the stuffing and gravy. For a gluten-free option, substitute the regular bread with a good quality gluten-free bread, ensuring it’s also day-old or toasted. For the gravy, you can use a gluten-free all-purpose flour blend or use cornstarch as the thickening agent (make a slurry as described above) to ensure it remains gluten-free.