Introduction
There’s something undeniably magical about the combination of sweet and salty. It’s a flavor paradox that tantalizes the taste buds, creating an addictive harmony that keeps you coming back for more. Think of a perfectly ripe melon with a sprinkle of prosciutto, or a decadent dark chocolate bar kissed with sea salt – these unlikely pairings create an explosion of flavor that transcends the ordinary. In the realm of snacks, this dynamic duo reigns supreme, offering a satisfying complexity that a purely sweet or purely savory treat simply can’t match. It’s this irresistible allure that makes our Fsalted Caramel Crackle not just a snack, but an experience.
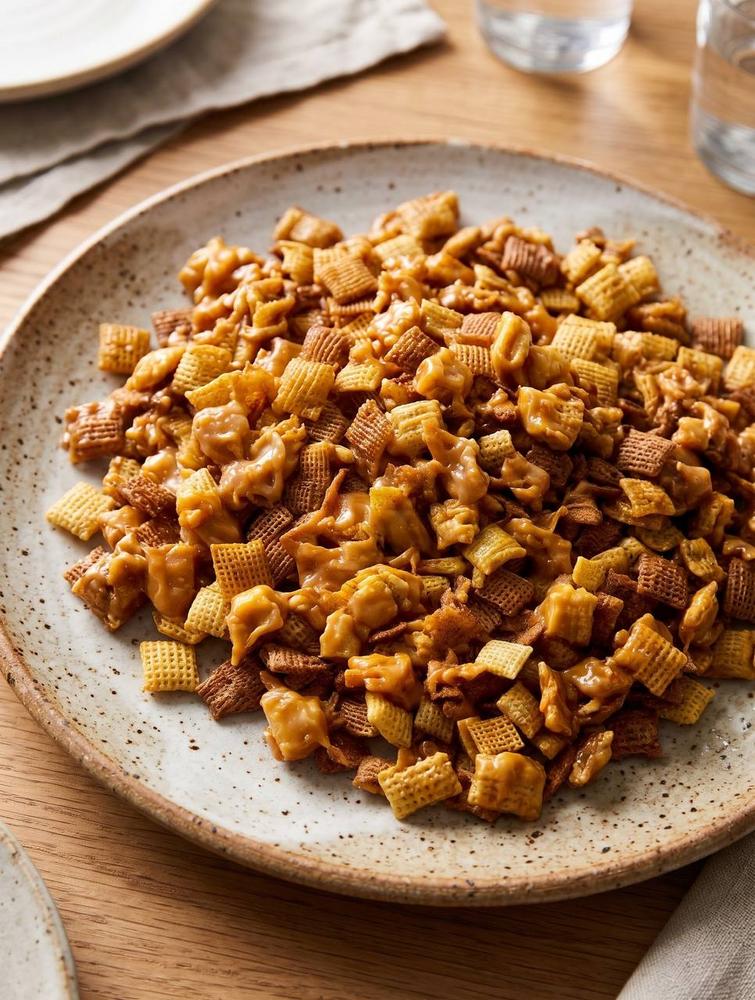
So, what exactly is this Fsalted Caramel Crackle? Picture this: your favorite crunchy cereals, light and airy, generously coated in a luscious, buttery, homemade salted caramel. It’s a quick, easy, and utterly addictive snack mix that delivers on every promise. The “crackle” comes from the delightful crispness of the cereal, providing that satisfying crunch with every bite, while the “salted caramel” envelops it in a rich, chewy, and perfectly balanced sweet-and-salty embrace. This isn’t just another cereal snack; it’s a textural and flavor masterpiece, designed to delight and impress without any fuss.
You’ll fall head over heels for this recipe because it’s incredibly versatile and universally loved. Whether you’re planning a lively party, looking for a thoughtful homemade gift, or simply craving a simple yet extraordinary treat for yourself, the Fsalted Caramel Crackle fits the bill perfectly. It’s the kind of snack that disappears almost as quickly as you make it, a testament to its irresistible charm. Get ready to create a snack that’s crunchy, chewy, sweet, salty, and utterly unforgettable.
Nutritional Information
Per serving (approximate values):
- Calories: 280
- Protein: 3g
- Carbohydrates: 45g
- Fat: 10g
- Fiber: 1g
- Sodium: 250mg
Ingredients
- 8 cups mixed square-shaped cereals (such as 4 cups Rice Chex and 4 cups Corn Chex)
- 1/2 cup (1 stick) unsalted butter
- 1/2 cup packed light brown sugar
- 1/4 cup heavy cream
- 1 teaspoon vanilla extract
- 1/2 teaspoon sea salt flakes, plus more for sprinkling
Instructions
- Prepare your workspace: Line a large baking sheet with parchment paper or a silicone baking mat. Set aside. In a very large heatproof bowl, combine the 8 cups of mixed cereals. Ensure the bowl is large enough to allow for easy mixing once the caramel is added.
- Begin the caramel: In a medium-sized heavy-bottomed saucepan, melt the unsalted butter over medium heat. Once the butter is fully melted, stir in the light brown sugar and heavy cream. Bring the mixture to a gentle boil, stirring constantly to dissolve the sugar.
- Cook the caramel: Reduce the heat to medium-low and continue to simmer the caramel mixture for 3-5 minutes, stirring occasionally. The mixture should thicken slightly and achieve a deep amber color. Be careful not to let it burn.
- Remove from heat and flavor: Take the saucepan off the heat. Immediately stir in the vanilla extract and 1/2 teaspoon of sea salt flakes. Stir well until all ingredients are fully incorporated and the salt has dissolved into the caramel.
- Coat the cereal: Carefully pour the hot caramel mixture over the cereals in the large bowl. Using a sturdy spatula or a large spoon, gently but thoroughly fold and toss the cereal until it is as evenly coated with the caramel as possible. Work quickly before the caramel starts to set too much. You may find it easier to use your hands (once the caramel has cooled slightly, but is still warm and pliable) to ensure even distribution and break up any large clumps.
- Spread and cool: Transfer the coated cereal mixture onto the prepared baking sheet, spreading it out into a single layer. This allows for even cooling and helps prevent the mixture from clumping excessively.
- Add extra salt (optional but recommended): While the caramel is still warm and slightly sticky, sprinkle an additional pinch or two of sea salt flakes over the entire mixture. This enhances the “salted” aspect and provides a beautiful visual contrast.
- Set and break apart: Allow the Fsalted Caramel Crackle to cool completely at room temperature, which will take about 30-60 minutes. As it cools, the caramel will harden and become brittle, creating that signature “crackle” texture. Once completely cool and firm, break the mixture into bite-sized pieces or clusters.
- Serve and enjoy: Transfer the Fsalted Caramel Crackle to a serving bowl or container. It’s now ready to be enjoyed!
Cooking Tips and Variations
For the absolute best Fsalted Caramel Crackle, consistency is key, especially with your caramel. To achieve that perfect balance of chewy and crunchy, ensure your caramel simmers for the recommended 3-5 minutes after coming to a boil. This allows it to thicken sufficiently without becoming too hard or brittle once cooled. If your caramel doesn’t cook long enough, it might remain too soft and sticky, making your crackle less “crackle-y.” Conversely, overcooking can lead to a burnt taste and a caramel that’s too hard to chew. A good visual cue is to look for a rich, deep golden-brown color. Don’t be afraid to use a candy thermometer if you’re nervous; aiming for a soft-ball stage (around 235-240°F / 112-115°C) will give you excellent results.
Achieving an even coating on your cereal can sometimes be a challenge, but it’s crucial for consistent flavor and texture. The trick is to use a very large bowl, one that gives you plenty of room to toss and fold. Pour the caramel slowly over the cereal while continuously stirring. A sturdy rubber spatula works wonders here, allowing you to scrape the bottom and sides of the bowl to ensure every piece gets some caramel love. If you find the caramel starting to set too quickly, you can very briefly warm the mixture in the microwave for 10-15 seconds to make it more pliable, but be careful not to overheat. Alternatively, for a truly even coating, consider dividing the cereal and caramel into two batches. Once coated, spread the mixture thinly on parchment paper; this allows air to circulate around each piece, promoting a crispier finish and preventing large, impenetrable clumps.
Beyond the classic, this recipe is a fantastic canvas for creativity! For a nutty crunch, try adding 1 cup of toasted pecans, walnuts, or peanuts to the cereal mix before coating. If you’re a chocolate lover, sprinkle 1/2 cup of mini chocolate chips over the warm crackle right after spreading it on the baking sheet; the residual heat will slightly melt them, creating delightful chocolatey pockets. For a truly decadent twist, drizzle melted dark or white chocolate over the cooled and broken crackle. Holiday-themed sprinkles can add a festive touch, making this a perfect treat for any celebration. You can also experiment with different cereals – pretzels or even small crackers can be added for an extra layer of savory crunch. The possibilities are endless, so feel free to make this recipe uniquely yours!
Storage and Reheating
Proper storage is essential to maintain the delightful crunch and freshness of your Fsalted Caramel Crackle. Once completely cooled and broken into pieces, transfer the crackle to an airtight container. A sturdy plastic container with a tight-fitting lid or a heavy-duty resealable bag works perfectly. Store the container at room temperature, away from direct sunlight or heat sources. Stored this way, your Fsalted Caramel Crackle will stay wonderfully fresh and crunchy for up to one week. Humidity is the enemy of crispness, so ensure your container is sealed well to prevent moisture from getting in and making the cereal soggy. Avoid storing it in the refrigerator, as the cold, moist environment can make the caramel sticky and less “crackly.”
Given that this is a “no-bake” snack designed to be enjoyed at room temperature, reheating is generally not necessary or recommended. The beauty of the Fsalted Caramel Crackle lies in its crunchy, set caramel coating. Reheating it, especially in a microwave, would likely melt the caramel, turning your crisp snack into a sticky, gooey mess. If you find your crackle has lost a bit of its crispness due to humidity, you can try spreading it out on a baking sheet and baking it in a very low oven (around 200°F / 95°C) for 5-10 minutes, then letting it cool completely. However, this method carries the risk of burning the caramel, so proceed with caution. The best approach is simply to store it correctly and enjoy it as is!
Frequently Asked Questions
Can I use store-bought caramel sauce instead of making it from scratch?
While you can technically use store-bought caramel sauce, it will significantly change the texture and overall quality of the Fsalted Caramel Crackle. Most store-bought sauces are thinner and designed to remain soft, meaning your crackle won’t achieve the same crisp, crunchy texture that comes from a homemade, cooked-down caramel. The “crackle” effect relies on the caramel hardening as it cools. For the best results, it’s highly recommended to make the caramel from scratch as outlined in the recipe; it’s easier than you might think and truly makes all the difference!
My caramel turned out too hard/too soft. What went wrong?
Caramel consistency is all about cooking time and temperature. If your caramel turned out too hard, it was likely cooked for too long or at too high a temperature, causing it to reach a harder candy stage. If it’s too soft or sticky, it probably didn’t cook long enough, meaning not enough moisture evaporated, and it didn’t reach the proper thickening point. For future attempts, pay close attention to the simmering time (3-5 minutes after boiling) and consider using a candy thermometer to ensure it reaches the soft-ball stage (235-240°F / 112-115°C) for perfect results.
Can I make this recipe ahead of time for a party?
Absolutely! The Fsalted Caramel Crackle is an excellent make-ahead snack. In fact, it needs time to cool and set properly, so making it in advance is ideal. Prepare the recipe according to the instructions, allow it to cool completely, break it into pieces, and then store it in an airtight container at room temperature. It will stay fresh and crunchy for up to a week, making it perfect for preparing a few days before your event and having one less thing to worry about on party day.
Is this recipe gluten-free?
The gluten-free status of this recipe depends entirely on the cereals you choose. Traditional Rice Chex and Corn Chex cereals are typically gluten-free, but it’s crucial to check the packaging of your specific brands to confirm. If you use a different type of cereal or a generic brand, always verify the ingredients list to ensure it meets your dietary needs. The caramel itself, when made from scratch with butter, sugar, cream, and vanilla, is naturally gluten-free.