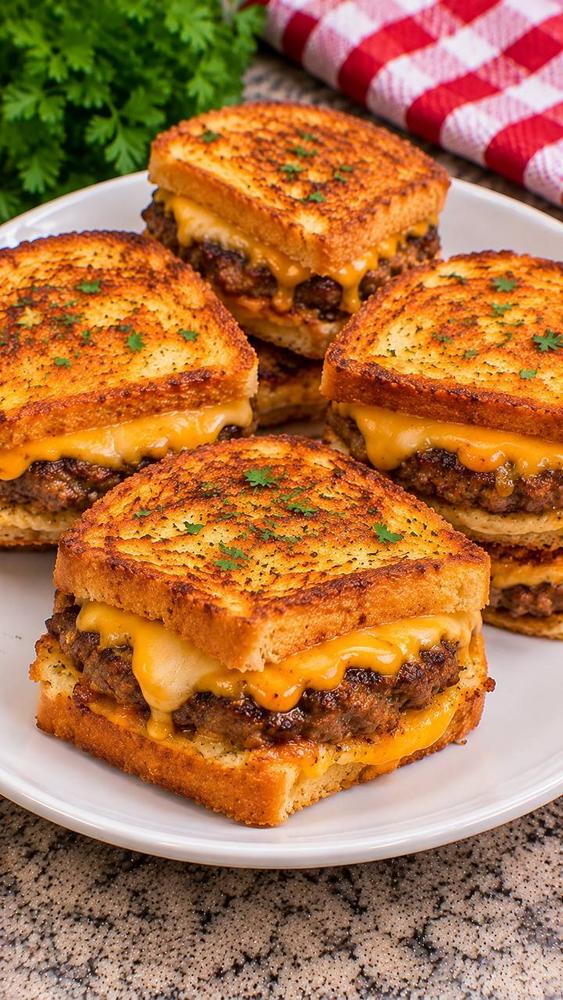
Classic Cheesy Patty Melts
Introduction
Few sandwiches evoke the same level of comfort and nostalgia as a perfectly executed patty melt. It’s more than just a meal; it’s a warm, savory hug between slices of golden-brown bread, a culinary masterpiece that expertly bridges the gap between a classic grilled cheese and a hearty burger. Imagine biting into that crispy, buttery crust, followed by the irresistible pull of gooey, melted cheese, perfectly complementing a juicy, seasoned beef patty. This isn’t just a sandwich; it’s an experience, a diner-style delight that promises satisfaction with every single bite.
What makes the patty melt so utterly captivating? It’s the ingenious combination of textures and flavors. You have the crunch of the toasted bread, the lusciousness of the melted cheese, and the savory depth of the ground beef patty, all working in harmony. Our recipe for Classic Cheesy Patty Melts focuses on highlighting these core elements, ensuring each component shines. We’re talking about generously buttered bread, expertly seasoned ground beef, and an abundance of your favorite melting cheese, all griddled to golden perfection. It’s a straightforward dish that delivers maximum flavor with minimal fuss, making it an ideal choice for a satisfying lunch, a quick weeknight dinner, or a hearty snack that truly hits the spot.
This recipe isn’t just about assembling ingredients; it’s about crafting a truly satisfying meal. We’ll guide you through each step to achieve that coveted golden-brown crust, that perfectly melted cheese pull, and a juicy patty that’s bursting with flavor. While often associated with diners, you’ll discover just how easy it is to recreate this beloved comfort food in your own kitchen. Get ready to elevate your sandwich game and indulge in the ultimate cheesy, savory delight that is the Classic Cheesy Patty Melt.
Nutritional Information
Per serving (approximate values):
- Calories: 680
- Protein: 35g
- Carbohydrates: 30g
- Fat: 48g
- Fiber: 2g
- Sodium: 950mg
Ingredients
- 1 pound ground beef (80/20 fat ratio recommended for flavor)
- 1 teaspoon onion powder
- 1/2 teaspoon garlic powder
- 1/2 teaspoon salt
- 1/4 teaspoon black pepper
- 8 slices sturdy white bread, Texas toast, or rye bread
- 8 slices American cheese or mild cheddar cheese
- 4 tablespoons unsalted butter, softened, plus more for cooking if needed
- 1 large yellow onion, thinly sliced (optional, but highly recommended for classic flavor)
- 1 tablespoon olive oil (for cooking onions)
- Fresh parsley or chives, chopped, for garnish (optional)
Instructions
- Prepare the Patties: In a medium bowl, gently combine the ground beef with onion powder, garlic powder, salt, and black pepper. Be careful not to overmix, as this can make the patties tough. Divide the seasoned beef into four equal portions. Form each portion into a thin, oval-shaped patty that is slightly larger than your slices of bread, as they will shrink slightly during cooking. Make a small indentation in the center of each patty with your thumb to prevent them from bulging while cooking.
- Cook the Onions (Optional but Recommended): If using onions, heat 1 tablespoon of olive oil in a large skillet or cast-iron pan over medium-low heat. Add the thinly sliced onions and cook slowly, stirring occasionally, for 15-20 minutes, or until deeply caramelized, soft, and sweet. If they start to dry out, add a tablespoon of water to deglaze the pan and continue cooking. Remove the onions from the skillet and set aside.
- Cook the Patties: Increase the heat in the same skillet to medium-high. Place the patties in the hot skillet and cook for 3-4 minutes per side for medium doneness, or adjust to your preferred level of doneness. You want a nice sear on the outside. Once cooked, remove the patties from the skillet and set them aside on a plate. If there’s excessive grease in the pan, carefully drain some of it, leaving a small amount for flavor.
- Prepare the Bread: Generously butter one side of each of the eight slices of bread. This buttered side will be the exterior of your sandwich.
- Assemble and Grill the Patty Melts: Reduce the skillet heat to medium-low. Place four slices of bread, butter-side down, into the skillet.
- Immediately place one slice of cheese on each piece of bread in the skillet.
- Top the cheese with a cooked beef patty.
- If using caramelized onions, divide them evenly and place them on top of each patty.
- Place a second slice of cheese on top of the onions (or directly on the patty if not using onions).
- Finally, top with the remaining four slices of bread, butter-side up.
- Grill to Perfection: Cook the patty melts for 4-6 minutes per side, or until the bread is golden-brown and crispy, and the cheese is completely melted and gooey. Use a spatula to carefully flip the sandwiches, ensuring they stay intact. You may need to press down gently with the spatula to ensure good contact with the pan and even melting. If the bread is browning too quickly, lower the heat.
- Serve: Once golden-brown on both sides and the cheese is beautifully melted, remove the patty melts from the skillet. Slice them in half diagonally for that classic diner presentation. Garnish with chopped fresh parsley or chives, if desired. Serve immediately and enjoy your classic cheesy masterpiece!
Cooking Tips and Variations
Achieving the perfect Classic Cheesy Patty Melt is all about balancing textures and flavors. Here are some tips to ensure your sandwich is nothing short of amazing, along with ideas for delicious variations.
Tips for Patty Melt Perfection:
- Choose the Right Bread: A sturdy bread is crucial. While classic rye offers a distinctive flavor, Texas toast or a good quality white sandwich bread works wonderfully, especially for soaking up butter and getting that ideal crisp. Avoid overly thin or soft bread, as it won’t hold up to the fillings.
- Butter, Butter, Butter: Don’t be shy with the butter! Generously buttering the outside of your bread is key to achieving that rich, golden-brown, crispy crust. Softened butter spreads more easily and ensures even coverage.
- Medium-Low Heat is Your Friend: Resist the urge to crank up the heat. Cooking on medium-low allows the bread to toast slowly to a beautiful golden brown without burning, while also giving the cheese ample time to melt into a gooey, irresistible pool and the patty to warm through.
- Season the Patty Well: The beef patty is a major flavor component. Don’t rely solely on the cheese. Season your ground beef generously with salt, pepper, onion powder, and garlic powder before forming the patties. A tiny dash of Worcestershire sauce can also add a subtle umami boost.
- Thin Patties are Best: Form your patties relatively thin (about 1/2 inch thick) and oval-shaped. This ensures they cook quickly and fit neatly on the bread, allowing for a good bread-to-filling ratio in every bite.
- Press Gently: While grilling, lightly press down on the sandwich with a spatula. This helps create better contact between the bread and the pan for even browning, and encourages the cheese to melt and adhere to the patty.
- Caramelized Onions are a Game Changer: While optional, taking the time to slowly sauté onions until they are deeply caramelized adds an incredible depth of sweet and savory flavor that is truly characteristic of a classic patty melt. Don’t rush this step!
- Don’t Overcrowd the Pan: Cook patty melts in batches if necessary to avoid overcrowding your skillet. This ensures each sandwich gets even heat and cooks properly, leading to better browning and melting.
Variations & Customizations:
- Cheese Swaps: While American and mild cheddar are classic for their melt factor, feel free to experiment. Provolone, Swiss, Monterey Jack, or even a smoked gouda can offer unique flavor profiles.
- Patty Alternatives: For a different take, try ground turkey, ground chicken, or a plant-based veggie burger patty. Adjust cooking times accordingly.
- Topping Twists:
- Bacon: Crispy bacon strips can add a fantastic salty crunch.
- Pickles: Thinly sliced dill pickles offer a tangy counterpoint.
- Sauces: A drizzle of Thousand Island dressing, a tangy BBQ sauce, or even a spicy aioli can elevate the flavor.
- Mushrooms: Sautéed mushrooms can add an earthy depth.
- Bread Options: Experiment with different types of bread. Sourdough offers a tangy chew, pumpernickel has a robust flavor, and a hearty whole wheat can add texture and nutrition.
- Spicy Kick: Add a pinch of cayenne pepper to your beef seasoning, or include some thinly sliced jalapeños (fresh or pickled) for a spicy twist.
- Deluxe Patty Melt: Incorporate all the delicious extras – caramelized onions, crispy bacon, and a dollop of special sauce.
Storage and Reheating
While patty melts are always best enjoyed fresh and hot off the griddle, sometimes you might have leftovers or want to prepare components ahead of time. Here’s how to store and reheat them properly to maintain as much of their deliciousness as possible.
Storage:
- Cooked Patties and Onions: You can cook the beef patties and caramelize the onions in advance. Allow them to cool completely. Store cooked patties in an airtight container in the refrigerator for up to 3-4 days. Store caramelized onions separately in an airtight container for up to 5-7 days.
- Assembled Patty Melts (Not Recommended): It’s generally not recommended to assemble and store raw patty melts, as the bread can become soggy.
- Leftover Cooked Patty Melts: If you have a fully cooked and assembled patty melt leftover, let it cool completely to room temperature. Wrap it tightly in plastic wrap or aluminum foil, or place it in an airtight container. Store in the refrigerator for up to 2 days. Be aware that the bread will lose its crispness and the cheese may solidify.
Reheating:
- For Best Results (Skillet/Griddle): This method will give you the closest approximation to a freshly made patty melt, restoring some of the bread’s crispness and melting the cheese beautifully.
- Preheat a dry skillet or griddle over medium-low heat.
- Place the leftover patty melt directly in the skillet. Cover the skillet with a lid for the first few minutes to help warm the patty and melt the cheese through.
- Cook for about 3-5 minutes per side, or until the bread is re-crisped and golden, and the cheese is fully melted and gooey. You may need to flip it a few times. If the bread seems dry, you can add a tiny bit of butter to the pan before reheating.
- Oven/Toaster Oven: This is another good option for reheating, especially if you want to avoid adding more fat.
- Preheat your oven or toaster oven to 350°F (175°C).
- Place the patty melt directly on a baking sheet or oven-safe rack.
- Bake for 10-15 minutes, or until the cheese is melted and bubbly, and the sandwich is heated through. The bread will crisp up nicely.
- Microwave (Least Recommended): While convenient, microwaving is the least ideal method for reheating a patty melt. It will make the bread soft and potentially soggy, and the cheese can become rubbery. If you must use a microwave:
- Place the patty melt on a microwave-safe plate.
- Heat on medium power for 30-60 seconds, checking frequently, until warmed through and the cheese is soft. Do not expect crisp bread.
No matter the reheating method, remember that the quality won’t be quite the same as a fresh patty melt, but these techniques will help you enjoy your leftovers without too much compromise.
Frequently Asked Questions
What kind of cheese is best for a patty melt?
For a classic patty melt, American cheese or mild cheddar are often considered the best choices. They melt incredibly smoothly and achieve that signature gooey, stretchy texture that is synonymous with a great patty melt. Swiss cheese is also a popular choice, especially if you enjoy its slightly nutty flavor, but it may not be quite as gooey as American or cheddar. The key is to choose a cheese that melts well and quickly.
Can I use ground turkey or chicken instead of beef?
Absolutely! While ground beef is traditional, you can certainly use ground turkey or ground chicken for a lighter version of the patty melt. Just be aware that these meats are leaner and may require a little extra oil in the pan to prevent sticking, and they might not have the same rich flavor as beef, so ensure you season them generously. Adjust cooking times as needed, as poultry cooks faster than beef.
Are caramelized onions essential for a patty melt?
While the image doesn’t explicitly show them, caramelized onions are a truly classic and highly recommended component of a traditional diner-style patty melt. They add an incredible depth of sweet, savory, and umami flavor that perfectly complements the beef and cheese. While you can certainly make a delicious patty melt without them, taking the extra time to slowly sauté the onions will elevate your sandwich to a whole new level of flavor and authenticity. If you’re short on time, you can omit them, but we strongly encourage their inclusion!
How do I prevent my bread from getting soggy?
To prevent soggy bread, there are a few key steps. First, ensure you’re using a sturdy bread like Texas toast, sourdough, or a good quality white sandwich bread, as thinner breads can absorb moisture too quickly. Second, generously butter the outside of the bread, which creates a barrier and helps it crisp up. Most importantly, cook the patty melt over medium-low heat. This allows the bread to slowly toast and crisp without burning, creating a golden, crunchy exterior before the interior has a chance to become saturated from the melted cheese or patty juices. Serving immediately also helps ensure maximum crispness.