Introduction
There are some sweet treats that instantly transport you back to childhood, conjuring images of holiday gatherings, bustling bake sales, or simply a quiet moment of pure indulgence. Chocolate Walnut Fudge is undeniably one of those magical confections. This classic dessert, with its irresistibly creamy texture and the perfect marriage of rich chocolate and earthy walnuts, holds a special place in the hearts of dessert lovers everywhere. It’s more than just a candy; it’s a comforting, nostalgic bite that promises pure bliss with every square.
What makes homemade Chocolate Walnut Fudge so utterly special? It’s the unparalleled depth of flavor that comes from a truly decadent chocolate base, often a blend of high-quality chocolate and cocoa, combined with the delightful textural contrast provided by generous amounts of crunchy walnuts. Unlike store-bought varieties, homemade fudge boasts a melt-in-your-mouth creaminess that simply can’t be replicated. Each bite offers a harmonious balance: the intense sweetness of chocolate mellowed by the slight bitterness and satisfying crunch of the walnuts. It’s a treat that feels both luxurious and comforting, making it perfect for sharing with loved ones, gifting during the holidays, or simply enjoying as a well-deserved personal indulgence.
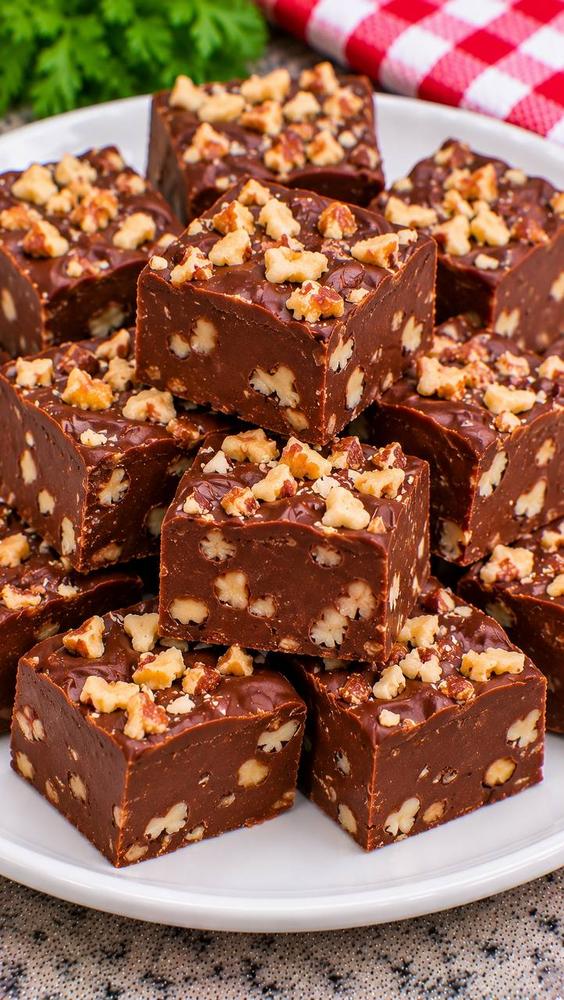
This recipe for Decadent Chocolate Walnut Fudge delivers on all fronts. We’re talking about thick, uniformly cut squares, each one boasting a smooth, rich chocolate foundation generously studded and topped with perfectly chopped walnuts. The visual appeal alone is enough to make mouths water, but it’s the incredible flavor and texture that truly sets this fudge apart. It’s a testament to simple ingredients coming together to create something truly extraordinary – a timeless sweet treat that’s surprisingly straightforward to make, promising perfect results every time with just a little care and attention.
Nutritional Information
Per serving (approximate values):
- Calories: 250 kcal
- Protein: 3g
- Carbohydrates: 30g
- Fat: 15g
- Fiber: 2g
- Sodium: 50mg
Ingredients
- 4 ½ cups granulated sugar
- 1 cup (2 sticks) unsalted butter, cut into pieces
- 1 (12 ounce) can evaporated milk
- 1 (12 ounce) package semi-sweet chocolate chips (about 2 cups)
- 1 (7 ounce) jar marshmallow creme (or 2 cups mini marshmallows)
- 1 teaspoon pure vanilla extract
- 2 cups chopped walnuts, divided
- ½ teaspoon salt
Instructions
- Line a 9×13 inch baking pan with parchment paper, leaving an overhang on all sides to easily lift the fudge out later. Lightly grease the parchment paper with butter or cooking spray.
- In a large, heavy-bottomed saucepan, combine the granulated sugar, butter pieces, evaporated milk, and salt. Place the saucepan over medium heat.
- Bring the mixture to a rolling boil, stirring constantly to ensure the sugar dissolves and the butter melts evenly. Continue to boil, stirring occasionally, for 5 minutes. It is crucial to maintain a steady boil for the full 5 minutes to achieve the correct fudge consistency.
- Remove the saucepan from the heat immediately after the 5-minute boil.
- Add the semi-sweet chocolate chips and marshmallow creme (or mini marshmallows) to the hot mixture. Stir vigorously with a wooden spoon or heat-proof spatula until all the chocolate chips and marshmallow creme are completely melted and the mixture is smooth and well combined. This should take about 2-3 minutes of continuous stirring.
- Stir in the vanilla extract until fully incorporated.
- Add 1 ½ cups of the chopped walnuts to the fudge mixture. Stir gently until the walnuts are evenly distributed throughout the fudge.
- Pour the hot fudge mixture into the prepared 9×13 inch baking pan. Use an offset spatula or the back of a spoon to spread the fudge evenly into the pan.
- Immediately sprinkle the remaining ½ cup of chopped walnuts evenly over the top of the fudge. Gently press the walnuts into the surface of the fudge with your hand or the back of a spoon to ensure they adhere.
- Allow the fudge to cool completely at room temperature for at least 2-3 hours, or preferably in the refrigerator for 1-2 hours, until it is firm and fully set. Do not cut the fudge until it is completely firm.
- Once set, use the parchment paper overhang to lift the entire block of fudge out of the pan and onto a cutting board.
- Using a large, sharp knife, cut the fudge into 1-inch squares. For cleaner cuts, wipe the knife blade clean between each cut, especially if the fudge starts to stick.
- Serve and enjoy!
Cooking Tips and Variations
Achieving perfect fudge every time is surprisingly simple with a few key tips. First, investing in a good heavy-bottomed saucepan is crucial as it helps distribute heat evenly and prevents scorching. When boiling the sugar mixture, maintaining a consistent rolling boil for the full five minutes is non-negotiable for the right texture; don’t rush this step or let the heat fluctuate too much. Stirring constantly during this initial phase ensures the sugar dissolves properly, preventing a grainy texture in your final fudge. Once you remove it from the heat and add the chocolate and marshmallow, stir quickly and vigorously until everything is fully melted and smooth. Any lumps will affect the creamy consistency.
For an extra boost of flavor and crunch, consider toasting your walnuts before adding them to the fudge. Simply spread them on a baking sheet and bake at 350°F (175°C) for 5-7 minutes, or until fragrant. Let them cool completely before chopping and adding to the fudge. This simple step brings out their natural nutty notes beautifully. To ensure clean cuts, use a sharp, warm knife. You can warm your knife by running it under hot water and then wiping it dry between each cut. This helps glide through the fudge without dragging or crumbling.
If you’re looking to experiment, there are several delicious variations you can try. For a richer, darker chocolate flavor, substitute a portion of the semi-sweet chocolate chips with dark chocolate chips. For a touch of mint, add ½ teaspoon of peppermint extract along with the vanilla extract, and perhaps a sprinkle of crushed candy canes on top for a festive twist. A pinch of cayenne pepper can be added to the chocolate mixture for a subtle “Mexican hot chocolate” kick, enhancing the chocolate’s depth without overpowering it. You could also swap out the walnuts for pecans or almonds, or even a mix of nuts for a different textural experience. For a salted caramel variation, drizzle a tablespoon or two of homemade or store-bought caramel sauce over the fudge after pouring it into the pan, swirling it gently with a knife, and then sprinkle with flaky sea salt before it sets. The possibilities are endless, allowing you to customize this classic recipe to your personal taste.
Storage and Reheating
Proper storage is key to keeping your Chocolate Walnut Fudge fresh and delicious for an extended period. Once the fudge is completely set and cut into squares, store it in an airtight container at room temperature. Layer the fudge squares with parchment paper or wax paper between layers to prevent them from sticking together. Stored this way, the fudge will maintain its optimal texture and flavor for up to 1-2 weeks. If your kitchen tends to be very warm, or if you want to extend its shelf life further, you can store the airtight container in the refrigerator. Refrigerated fudge will last for 3-4 weeks. However, be aware that chilling can make the fudge slightly firmer, so it’s often best to let it come to room temperature for about 15-20 minutes before serving to restore its creamy texture.
For longer-term storage, Chocolate Walnut Fudge freezes exceptionally well. Wrap individual squares or small batches tightly in plastic wrap, then place them in an airtight freezer-safe container or a heavy-duty freezer bag. Frozen fudge can be stored for up to 3 months. To thaw, simply transfer the desired amount of fudge from the freezer to the refrigerator overnight, or let it sit at room temperature for a few hours until it softens. Reheating fudge is generally not recommended, as it can alter the texture and make it oily or crumbly. Fudge is best enjoyed at room temperature, allowing its rich flavors and creamy consistency to truly shine.
Frequently Asked Questions
Why is my fudge grainy?
Grainy fudge is a common issue and usually results from sugar crystals not fully dissolving or recrystallizing during the cooling process. To prevent this, ensure you stir the sugar mixture constantly until it comes to a rolling boil and the sugar is completely dissolved. Once it’s boiling, avoid stirring too much, but maintain a steady boil for the specified time. Also, don’t scrape down the sides of the pan after the initial boiling phase, as this can introduce undissolved sugar crystals back into the mixture. If you’re using a candy thermometer, make sure it reaches the correct temperature (usually around 234-238°F for soft ball stage) before removing it from the heat.
Can I make this fudge without a candy thermometer?
Yes, this specific recipe is designed to be made without a candy thermometer, relying on a timed boiling method. By bringing the mixture to a full, rolling boil and maintaining it for exactly 5 minutes while stirring, you’re achieving the necessary temperature and consistency. This makes it a “no-fail” fudge recipe that is accessible for home cooks without specialized equipment. Just ensure your boil is vigorous and consistent for the full duration.
How do I know when the fudge is set and ready to cut?
The fudge is ready to cut when it is completely firm to the touch and no longer warm in the center. If you press gently on the surface, your finger should not leave a deep indentation. This usually takes at least 2-3 hours at room temperature, or 1-2 hours in the refrigerator. Attempting to cut the fudge before it’s fully set will result in a messy, sticky situation and uneven pieces. Patience is key for clean, perfect squares!
Can I use different nuts or add other mix-ins?
Absolutely! This recipe is very versatile. While walnuts are a classic choice, you can easily substitute them with other nuts like pecans, almonds, or even a mixed nut blend. For other mix-ins, consider adding shredded coconut, mini chocolate chips (milk, white, or dark), dried cranberries, or even chopped toffee bits. Just be mindful of the total quantity of mix-ins so as not to overwhelm the fudge base. If adding softer ingredients like dried fruit, stir them in during the final step with the vanilla and walnuts.