Introduction
Get ready to fall head over heels for a dessert that marries two beloved classics into one irresistible treat: Red Velvet Cheesecake Bars! Imagine the rich, subtly chocolatey tang of a vibrant red velvet cake, perfectly paired with the smooth, creamy indulgence of a classic cheesecake. This isn’t just a dessert; it’s an experience, offering a symphony of textures and flavors that will tantalize your taste buds and leave everyone asking for more. We’re taking all the decadent appeal of a towering red velvet cake and the lusciousness of a baked cheesecake, then transforming them into convenient, shareable bars that are perfect for any occasion.
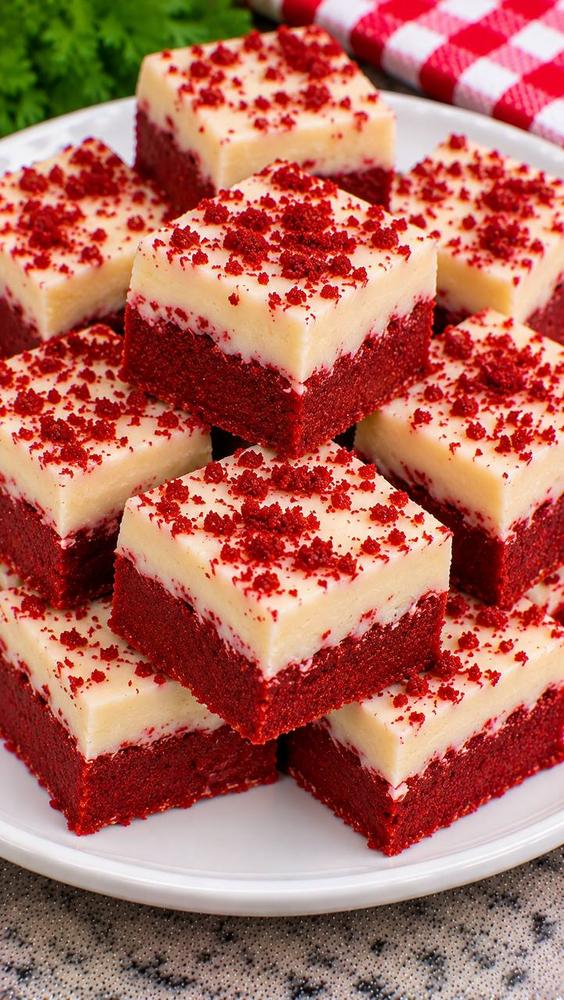
These Red Velvet Cheesecake Bars are truly a showstopper, boasting a striking two-layer appearance that’s as beautiful as it is delicious. The base is a moist, dense red velvet layer, infused with that signature cocoa depth and brilliant crimson hue. Crowned atop this vibrant foundation is a thick, velvety smooth cheesecake layer, offering a delightful creamy contrast. A sprinkle of red velvet crumbs adds a final touch of elegance and texture, making each bar a miniature masterpiece. Whether you’re hosting a holiday gathering, a casual potluck, or simply craving a special treat for yourself, these bars deliver all the celebratory feel of a full cake without the fuss of slicing and serving individual pieces.
What makes these bars truly special is their perfect balance of flavors. The slight tang from the buttermilk and vinegar in the red velvet base cuts through the sweetness, while the creamy cheesecake layer provides a rich, decadent counterpoint. They’re easier to make than a traditional layer cake and less intimidating than a full cheesecake, yet they deliver all the wow factor. Get ready to impress your friends and family with a dessert that’s moist, rich, tangy, and utterly addictive. Let’s dive into creating these delightful Red Velvet Cheesecake Bars!
Nutritional Information
Per serving (approximate values):
- Calories: 350
- Protein: 5g
- Carbohydrates: 40g
- Fat: 20g
- Fiber: 1g
- Sodium: 250mg
Ingredients
- For the Red Velvet Base:
- 1 ½ cups all-purpose flour
- 1 cup granulated sugar
- 1 tablespoon unsweetened cocoa powder
- ½ teaspoon baking soda
- ¼ teaspoon salt
- ½ cup unsalted butter, melted
- 1 large egg
- ½ cup buttermilk
- 1 teaspoon white vinegar
- 1 teaspoon vanilla extract
- 1-2 tablespoons red gel food coloring (or more, to achieve desired color)
- For the Cheesecake Layer:
- 16 ounces (2 blocks) full-fat cream cheese, softened
- ½ cup granulated sugar
- 1 large egg
- 1 teaspoon vanilla extract
- For the Topping:
- ¼ cup reserved red velvet crumbs (from the baked base)
Instructions
- Preheat your oven to 350°F (175°C). Line a 9×13 inch baking pan with parchment paper, leaving an overhang on the sides to easily lift the bars out later. Lightly grease the parchment paper.
- Prepare the Red Velvet Base: In a large bowl, whisk together the all-purpose flour, granulated sugar, unsweetened cocoa powder, baking soda, and salt. Make sure there are no lumps.
- In a separate medium bowl, whisk together the melted unsalted butter, large egg, buttermilk, white vinegar, and vanilla extract until well combined.
- Add the red gel food coloring to the wet ingredients and mix thoroughly until the color is evenly distributed and vibrant. Start with 1 tablespoon and add more if you desire a deeper red.
- Pour the wet ingredients into the dry ingredients. Mix with a spatula or wooden spoon until just combined. Be careful not to overmix; a few streaks of flour are acceptable. The batter will be thick.
- Press about two-thirds of the red velvet batter evenly into the bottom of the prepared 9×13 inch baking pan. Reserve the remaining one-third of the batter.
- Bake the red velvet base for 12-15 minutes, or until it’s set around the edges but still slightly soft in the center.
- While the base is baking, take the reserved one-third of the red velvet batter and crumble it onto a separate small baking sheet lined with parchment paper. This will be your topping. Bake these crumbs alongside the base for the last 5-7 minutes, or until they are lightly set and can be crumbled easily. Remove from the oven and set aside to cool, then gently crumble them further if needed.
- Remove the main red velvet base from the oven once partially baked. Reduce the oven temperature to 325°F (160°C).
- Prepare the Cheesecake Layer: In a large bowl, using an electric mixer on medium speed, beat the softened cream cheese until smooth and creamy, about 2-3 minutes. Make sure there are no lumps.
- Add the granulated sugar to the cream cheese and beat until well combined and fluffy, scraping down the sides of the bowl as needed.
- Beat in the large egg and vanilla extract until just incorporated. Be careful not to overmix once the egg is added, as overmixing can introduce too much air and lead to cracks in the cheesecake.
- Carefully pour the cheesecake batter evenly over the warm, partially baked red velvet base in the pan. Gently spread it with an offset spatula to ensure a smooth, level top.
- Bake and Cool: Return the pan to the preheated oven (now at 325°F / 160°C). Bake for 30-35 minutes, or until the edges of the cheesecake are set and slightly golden, but the center still has a slight jiggle when gently shaken.
- Once baked, turn off the oven and leave the cheesecake bars inside with the oven door slightly ajar for 30 minutes. This slow cooling process helps prevent cracks.
- Remove the pan from the oven and let it cool completely on a wire rack at room temperature for at least 1-2 hours.
- Once cooled to room temperature, transfer the pan to the refrigerator and chill for at least 4 hours, or preferably overnight, to allow the cheesecake to fully set. This step is crucial for clean cuts.
- Finishing Touches: Once thoroughly chilled, use the parchment paper overhang to carefully lift the entire slab of bars out of the pan and onto a cutting board.
- Using a sharp knife, wipe the blade clean with a hot, damp cloth between each cut. This will ensure clean, precise slices. Cut the slab into 24 even bars (or desired size).
- Sprinkle the reserved red velvet crumbs evenly over the top of each bar before serving.
Cooking Tips and Variations
Achieving the perfect Red Velvet Cheesecake Bar is all about attention to detail. For that iconic, vibrant red color, always opt for a high-quality gel food coloring over liquid. Gel coloring is much more concentrated, delivering a deeper hue without adding excess moisture to your batter. Don’t be shy with it; red velvet should be strikingly red! To prevent those dreaded cracks in your cheesecake layer, ensure your cream cheese is at room temperature before you begin mixing. This allows it to blend smoothly without lumps, reducing the need for excessive beating. Also, avoid overmixing once the egg is added, as too much air can cause the cheesecake to puff up and then crack as it cools. The slow cooling process, first in the oven with the door ajar and then at room temperature, is equally vital for a smooth, unblemished surface.
When it comes to cutting clean, professional-looking bars, thorough chilling is your best friend. A well-chilled cheesecake layer will hold its shape beautifully. Before each cut, dip your sharp knife in hot water and wipe it clean. This trick creates a warm, clean blade that slices through the layers effortlessly, preventing dragging and crumbling. For easy removal from the pan, always use parchment paper with an overhang. This creates “handles” that allow you to lift the entire baked slab out in one piece, making cutting a breeze.
For delightful variations, consider adding mini chocolate chips to either the red velvet base or the cheesecake layer for an extra burst of chocolatey goodness. A drizzle of melted white chocolate over the top of the finished bars before sprinkling the crumbs would also add an elegant touch and another layer of sweetness. You could also experiment with different extract flavors in the cheesecake layer; a hint of almond extract or even a touch of orange zest could offer an interesting twist. For a truly decadent experience, serve these bars with a dollop of whipped cream or a scoop of vanilla bean ice cream. The possibilities are endless for customizing these already incredible Red Velvet Cheesecake Bars!
Storage and Reheating
These Red Velvet Cheesecake Bars are best enjoyed chilled. To store any leftovers, place them in an airtight container and refrigerate for up to 5-7 days. The cheesecake layer needs to stay cool to maintain its creamy texture and prevent spoilage. You can also stack them with a piece of parchment paper between layers to prevent sticking.
For longer storage, these bars freeze beautifully. Once completely chilled and cut into individual portions, place them on a baking sheet and freeze until firm, about 1-2 hours. Then, transfer the frozen bars to an airtight freezer-safe container or a heavy-duty freezer bag, again separating layers with parchment paper. They can be stored in the freezer for up to 2-3 months. To thaw, simply transfer the desired number of bars from the freezer to the refrigerator and let them thaw overnight, or for several hours until soft enough to enjoy. Reheating is generally not recommended for cheesecake bars, as it can alter the delicate texture of the cheesecake layer. They are designed to be enjoyed cold or at cool room temperature.
Frequently Asked Questions
What makes red velvet “red velvet”?
Red velvet traditionally gets its distinctive color from a chemical reaction between cocoa powder, buttermilk, and vinegar, which enhances the red anthocyanins in the cocoa. Modern recipes often use red food coloring to achieve the vibrant crimson hue, but the buttermilk and vinegar are still crucial for the characteristic tangy flavor and moist texture.
Can I make these bars ahead of time?
Absolutely! These Red Velvet Cheesecake Bars are an excellent make-ahead dessert. In fact, they require significant chilling time (at least 4 hours, preferably overnight) to properly set, which makes them perfect for preparing a day in advance. This allows the flavors to meld and ensures clean, precise cuts.
Why did my cheesecake crack?
Cheesecake cracks often occur due to sudden temperature changes or overbaking. Overmixing the batter can also incorporate too much air, causing the cheesecake to rise rapidly and then fall, leading to cracks. To prevent this, ensure your ingredients are at room temperature, don’t overmix, and allow the cheesecake to cool slowly, first in the turned-off oven and then at room temperature, before chilling.
Can I use a different size pan?
While a 9×13 inch pan is ideal for the proportions given, you could use an 8×8 inch or 9×9 inch pan for thicker bars. However, keep in mind that baking times will need to be adjusted; thicker bars will require longer baking. Always ensure the cheesecake is set around the edges with a slight jiggle in the center for doneness.