Instructions
- Preheat your oven to 350°F (175°C). Lightly grease and flour a 9×5-inch loaf pan, or line with parchment paper for easy removal. If using disposable aluminum pans, ensure they are lightly greased.
- In a large bowl, mash the very ripe bananas with a fork until mostly smooth but with a few small lumps remaining for texture.
- Add the melted and cooled butter (or oil) to the mashed bananas and stir until well combined.
- Stir in the granulated sugar, egg, and vanilla extract until thoroughly incorporated.
- In a separate medium bowl, whisk together the all-purpose flour, baking soda, salt, cinnamon, and nutmeg (if using). Ensure there are no lumps in the dry ingredients.
- Gradually add the dry ingredients to the wet ingredients, stirring gently with a spatula or wooden spoon until just combined. Be careful not to overmix; a few streaks of flour are acceptable. Overmixing can lead to a tough loaf.
- If using, gently fold in the chopped walnuts, pecans, or chocolate chips until evenly distributed.
- Pour the batter into the prepared loaf pan, spreading it evenly with your spatula.
- Bake for 50-65 minutes, or until a wooden skewer or toothpick inserted into the center of the loaf comes out clean. The top should be golden brown and the edges slightly pulled away from the pan. Baking times can vary depending on your oven and the material of your pan (aluminum pans might bake slightly faster).
- Once baked, remove the loaf pan from the oven and let it cool in the pan on a wire rack for 10-15 minutes. This allows the loaf to set and makes it easier to remove.
- After 10-15 minutes, carefully invert the loaf onto the wire rack to cool completely. Allowing it to cool completely before slicing will ensure a cleaner cut and prevent it from becoming gummy.
Cooking Tips and Variations
Achieving the perfect banana bread is all about a few key techniques and knowing when to make a few tweaks. First and foremost, the bananas are your star ingredient. The darker, the better! We’re talking about bananas that are almost entirely black or heavily speckled with brown spots. These bananas are sweeter and softer, making them easier to mash and imparting a much richer banana flavor and moisture to your bread. Don’t be afraid of bananas that look “too old” for eating; they are absolutely perfect for baking.
Mixing technique is crucial for a tender crumb. When combining your wet and dry ingredients, resist the urge to overmix. Mix just until the flour streaks disappear. Overmixing develops gluten, which can lead to a tough, chewy bread rather than a soft, moist one. A few small lumps in the batter are perfectly fine and will bake out.
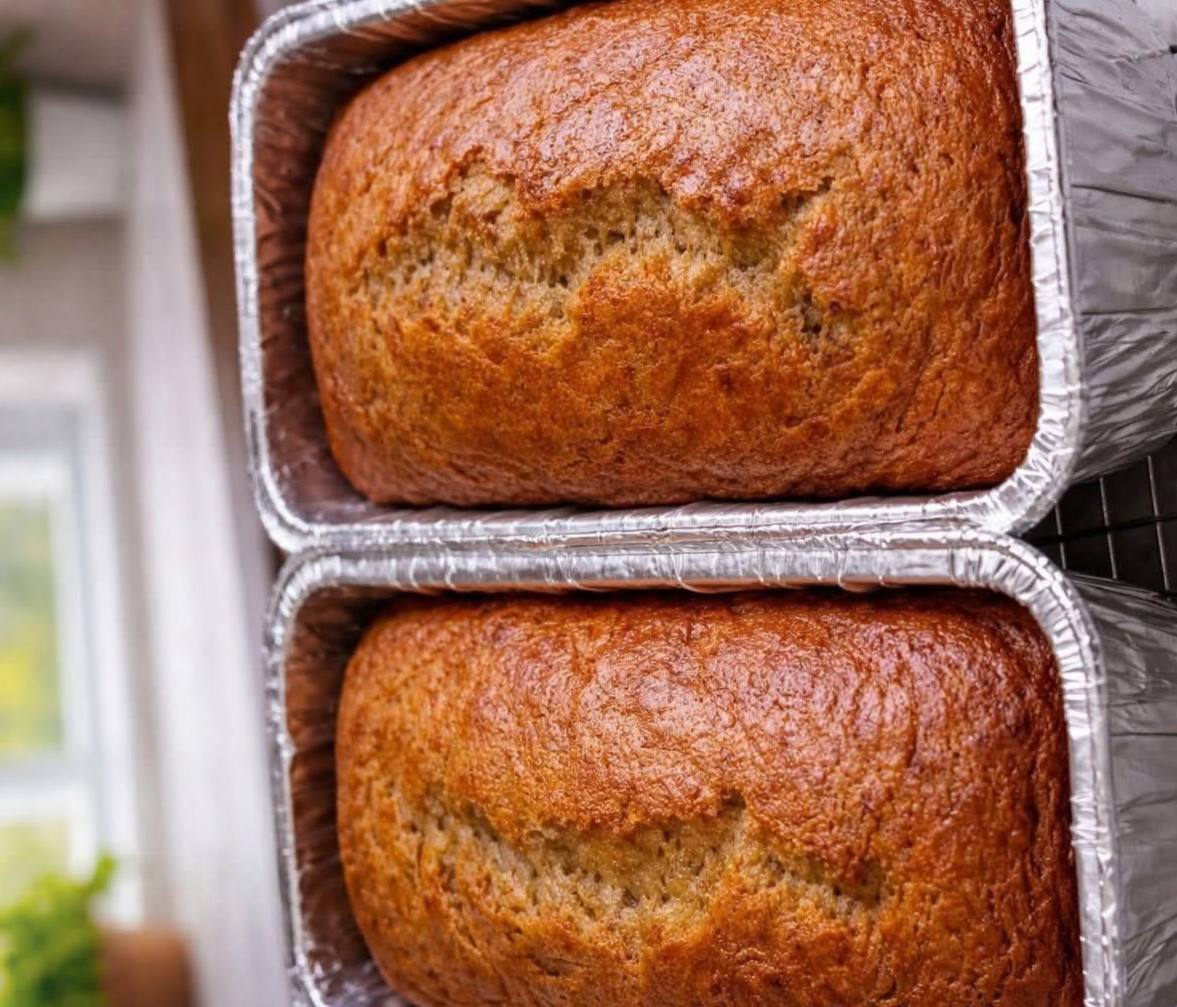
Pan preparation is another small step that makes a big difference. Greasing and flouring your loaf pan thoroughly will prevent sticking. Alternatively, using parchment paper to create a sling can make removal incredibly easy, especially for gifting. If you’re using disposable aluminum foil loaf pans, as seen in the image, they are convenient for easy cleanup or sharing. Just be mindful that baking times might vary slightly compared to traditional metal pans, sometimes baking a little faster or requiring a slightly lower temperature.
To ensure your banana bread is perfectly baked through, always check for doneness with a toothpick or wooden skewer. Insert it into the very center of the loaf; if it comes out clean or with a few moist crumbs attached, your bread is done. If it has wet batter, continue baking for a few more minutes and re-test. Also, if the top is browning too quickly, you can loosely tent the loaf with aluminum foil for the remaining baking time.
For variations, the possibilities are endless! For a richer flavor profile, consider adding a tablespoon of dark rum or bourbon to the wet ingredients. If you love a spicy kick, increase the cinnamon and nutmeg, or add a pinch of ground ginger or cloves. For extra texture and flavor, fold in ½ cup of chopped toasted pecans or walnuts. Chocolate chips are always a welcome addition, and you can even experiment with white chocolate chips or mini chocolate chips. Dried fruits like raisins, cranberries, or chopped dates can also add a delightful chewiness. For a streusel topping, combine ¼ cup flour, ¼ cup brown sugar, 2 tablespoons cold butter, and ½ teaspoon cinnamon, then sprinkle over the batter before baking.
Storage and Reheating
Proper storage is key to keeping your banana bread fresh and moist for as long as possible. Once your banana bread has cooled completely, which is essential to prevent condensation and sogginess, you have a few options.
For short-term storage (1-2 days), you can store the banana bread at room temperature. Wrap the entire loaf or individual slices tightly in plastic wrap, then place it in an airtight container or a large resealable bag. This will help maintain its moisture and prevent it from drying out.
For longer storage (up to a week), it’s best to refrigerate the banana bread. Again, wrap it tightly in plastic wrap and store it in an airtight container. Keep in mind that refrigeration can sometimes alter the texture slightly, making it a bit denser.
Banana bread also freezes beautifully, making it an excellent candidate for meal prep or gifting. To freeze, ensure the loaf is completely cool. Wrap the entire loaf tightly in several layers of plastic wrap, then an additional layer of aluminum foil. You can also slice the loaf first and wrap individual slices for convenient thawing. Frozen banana bread will keep well for up to 3-4 months. To thaw, simply unwrap and let it sit at room temperature for a few hours, or warm individual slices in the microwave or oven.
When it comes to reheating, there are several methods depending on your preference. For a quick warm-up, individual slices can be microwaved for 15-30 seconds until warm and soft. This is great for a speedy breakfast or snack. For a more satisfying experience, especially if you like a slightly crispy exterior, preheat your oven to 300°F (150°C). Wrap a slice or the whole loaf loosely in foil and bake for 10-15 minutes for slices, or 20-30 minutes for a whole loaf, until warmed through. This method helps to revive the texture and aroma. If you enjoy a toasted banana bread, simply pop a slice into your toaster oven for a few minutes until lightly golden and warm. This is particularly delicious with a dollop of cream cheese or a spread of butter.
Frequently Asked Questions
Why are overripe bananas so important for banana bread?
Overripe bananas (those with brown or black spots) are crucial for banana bread because they are much sweeter and have a more intense banana flavor than firm, yellow bananas. As bananas ripen, their starches convert to sugars, making them naturally sweeter. They also become softer and easier to mash, which contributes to the moistness and tender texture of the finished bread. Using underripe bananas will result in a less flavorful and potentially drier loaf.
Can I use frozen bananas for banana bread?
Absolutely! Freezing overripe bananas is an excellent way to store them until you’re ready to bake. When using frozen bananas, first thaw them completely at room temperature or in the microwave. They will release a lot of liquid, which you should drain off before mashing. The texture will be very soft and mushy, which is perfect for banana bread. Just be sure to use them at room temperature for the best results in your batter.
My banana bread came out dry. What went wrong?
A dry banana bread is most commonly a result of overbaking or overmixing the batter. Overbaking causes too much moisture to evaporate, leading to a dry and crumbly texture. Make sure to check for doneness with a toothpick and remove the loaf from the oven as soon as it comes out clean. Overmixing the batter can also lead to a dry and tough loaf because it develops the gluten in the flour too much. Mix only until the dry ingredients are just combined with the wet ingredients, even if there are a few small lumps.
How can I prevent my banana bread from sinking in the middle?
Several factors can cause banana bread to sink in the middle. The most common reasons include using too much leavening agent (baking soda), opening the oven door too early while baking, or underbaking the center. Ensure you measure your baking soda accurately. Avoid opening the oven door during the first 30-40 minutes of baking, as the sudden change in temperature can cause the rising structure to collapse. Always check for doneness by inserting a toothpick into the very center; if it comes out clean, your bread is fully baked.