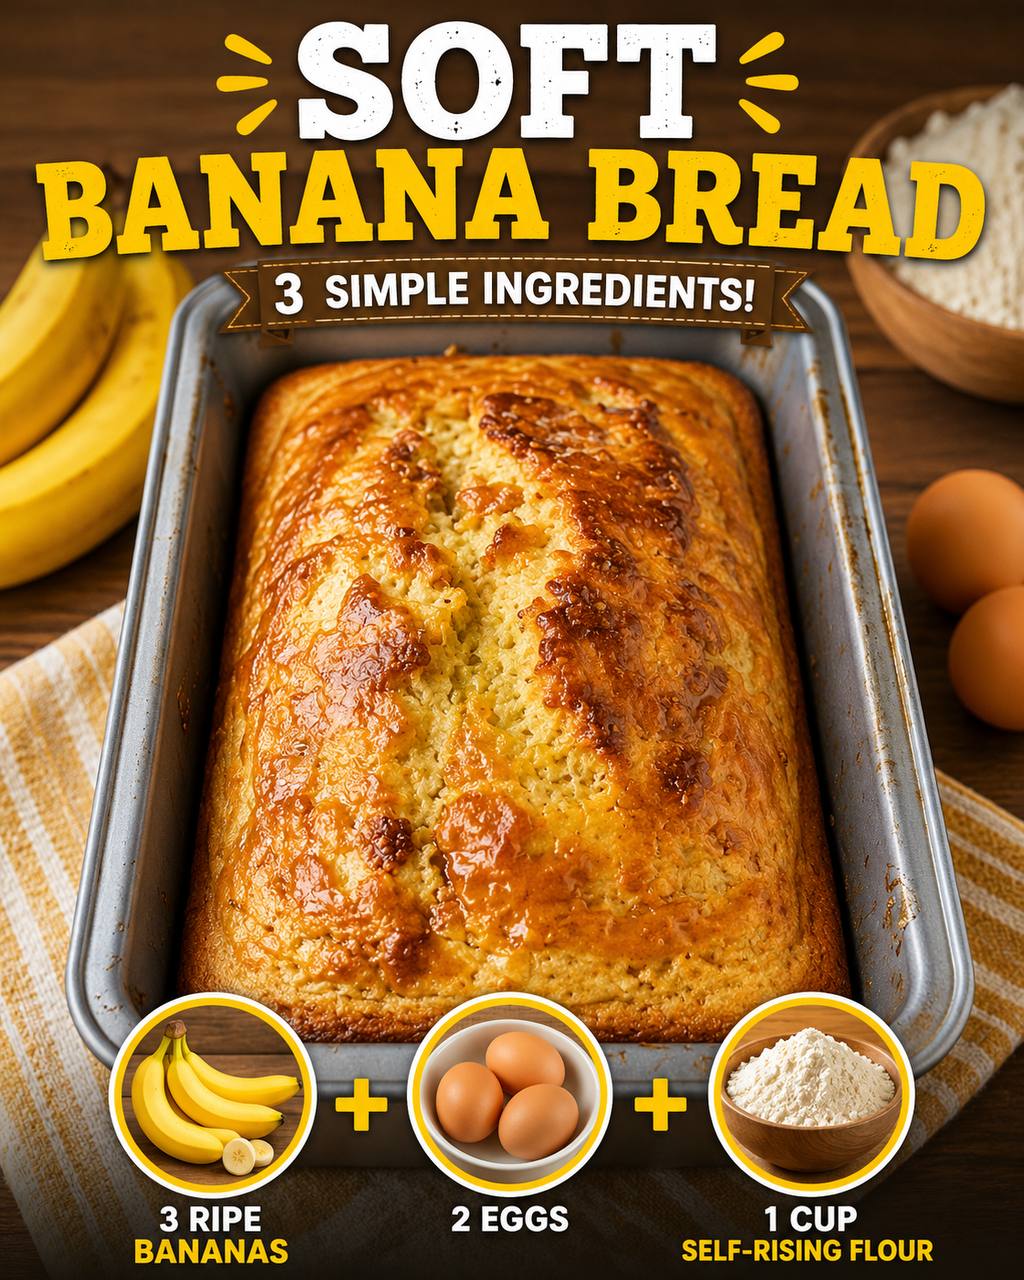
Instructions
- Preheat your oven to 350°F (175°C). Grease and lightly flour a standard 9×5-inch loaf pan, or line it with parchment paper, leaving an overhang on the long sides to easily lift the bread out later.
- In a large mixing bowl, peel your very ripe bananas. Use a fork or a potato masher to mash them thoroughly until mostly smooth with only a few small lumps remaining. The riper the bananas, the easier they will mash and the sweeter and more moist your bread will be.
- Crack the two large eggs into the bowl with the mashed bananas. Whisk the eggs into the banana mixture until well combined. The mixture should be a yellowish, slightly lumpy liquid.
- Gradually add the 1 cup of self-rising flour to the wet ingredients. Using a spatula or a wooden spoon, gently fold the flour into the banana and egg mixture. Mix until just combined and no dry streaks of flour remain. Be careful not to overmix, as this can lead to a tough banana bread. A few small lumps are perfectly fine.
- If you are using any optional add-ins (like chocolate chips, nuts, or spices), gently fold them into the batter at this stage until evenly distributed.
- Pour the batter into your prepared loaf pan, spreading it evenly with your spatula.
- Place the loaf pan in the preheated oven and bake for 45-60 minutes. The baking time can vary depending on your oven and the moisture content of your bananas.
- To check for doneness, insert a wooden skewer or a toothpick into the center of the loaf. If it comes out clean or with only a few moist crumbs attached, the banana bread is done. If it comes out with wet batter, continue baking for another 5-10 minutes and check again.
- Once baked, remove the loaf pan from the oven and let the banana bread cool in the pan for about 10-15 minutes. This allows the bread to set and makes it easier to remove without breaking.
- After 10-15 minutes, carefully lift the banana bread out of the pan using the parchment paper overhang or by gently inverting it onto a wire rack. Let it cool completely on the wire rack before slicing and serving. Cooling completely ensures a better texture and prevents it from being gummy.
Cooking Tips and Variations
For the softest and most flavorful banana bread, the ripeness of your bananas is paramount. Look for bananas with abundant brown spots or even ones that are almost entirely brown. These bananas are sweeter and have a higher moisture content, which translates to a more delicious and tender loaf. If your bananas aren’t quite ripe enough, you can speed up the process by placing them in a paper bag with an apple for a day or two, or by baking them in their skins on a baking sheet at 300°F (150°C) for 15-30 minutes until they are black and soft. Let them cool before mashing.
When mixing the batter, resist the urge to overmix. Once you add the self-rising flour, mix only until no dry streaks of flour are visible. Overmixing develops the gluten in the flour, which can lead to a dense, tough, or rubbery banana bread instead of the soft texture we’re aiming for. A few small lumps from the mashed bananas are perfectly acceptable and even desirable for texture.
Self-rising flour is a key ingredient here, as it contains flour, baking powder, and salt all in one, simplifying the recipe significantly. If you don’t have self-rising flour, you can easily make your own. For every cup of all-purpose flour, add 1.5 teaspoons of baking powder and 1/4 teaspoon of fine salt. Whisk these together thoroughly before using. This substitution maintains the ease and leavening necessary for a light and airy loaf.
Oven temperatures can vary, so it’s always a good idea to keep an eye on your banana bread as it bakes. If you notice the top browning too quickly, you can loosely tent the loaf pan with aluminum foil for the last 15-20 minutes of baking to prevent over-browning while the inside finishes cooking. A good indicator that your bread is baking evenly is the wonderful aroma that will start to fill your kitchen.
While delicious on its own, this 3-ingredient banana bread is also a fantastic base for variations. For a touch of spice, add 1 teaspoon of ground cinnamon or a pinch of nutmeg to the batter along with the flour. If you’re a chocolate lover, fold in 1/2 cup of chocolate chips (milk, semi-sweet, or dark) for pockets of melted goodness. For added texture and a nutty flavor, 1/2 cup of chopped walnuts or pecans can be mixed in. A splash of vanilla extract (about 1/2 teaspoon) can also enhance the overall flavor profile without significantly altering the simplicity of the recipe.
For a slightly richer bread, you can sometimes swirl in a tablespoon or two of melted butter or a neutral oil (like vegetable or canola oil) with the wet ingredients. This can add a little extra moisture and richness, though it technically adds a fourth ingredient. However, the beauty of this recipe is its deliciousness even without these additions.
Storage and Reheating
Once your soft banana bread has cooled completely, proper storage is key to maintaining its freshness and moisture. Store the banana bread at room temperature in an airtight container or wrapped tightly in plastic wrap. It will stay fresh and delicious for 3-4 days. Placing a paper towel at the bottom of the container can help absorb any excess moisture and prevent the bread from becoming soggy.
For longer storage, banana bread freezes exceptionally well. Once completely cooled, you can wrap the entire loaf tightly in plastic wrap, then an additional layer of aluminum foil, and place it in a freezer-safe bag. Alternatively, slice the loaf and wrap individual slices before freezing. This allows you to thaw only what you need. Frozen banana bread will keep for up to 3 months without significant loss of quality.
To reheat, if stored at room temperature, you can simply slice and enjoy. For a warm treat, place a slice in the microwave for 10-20 seconds, or toast it lightly in a toaster oven until warmed through. If reheating from frozen, allow the slices or loaf to thaw at room temperature for a few hours, then warm as desired. Wrapping a frozen slice in a paper towel and microwaving it for 30-60 seconds can also work wonders for a quick warm-up.
Enjoy your banana bread plain, or elevate it with a spread of butter, cream cheese, or a drizzle of honey. It’s incredibly versatile and always a comforting treat.
Frequently Asked Questions
What if my bananas aren’t very ripe? Can I still make this recipe?
While very ripe bananas are highly recommended for the best flavor and moisture, you can still make the bread with slightly less ripe bananas. However, the resulting loaf might be a little less sweet and moist. To compensate, you could add 1-2 tablespoons of brown sugar or honey to the batter along with the eggs, or simply enjoy it as is for a less sweet version.
Can I make this recipe gluten-free?
Yes, you can try to make this recipe gluten-free by substituting the self-rising flour with a 1:1 gluten-free self-rising flour blend. Ensure the blend you choose is specifically formulated for baking and contains leavening agents. Results may vary slightly in texture, but many gluten-free flour blends work well in quick bread recipes.
Why did my banana bread turn out dense or dry?
A dense or dry banana bread is often a result of overmixing the batter once the flour is added. Overmixing develops gluten, leading to a tough texture. It can also be caused by using bananas that aren’t ripe enough (which means less moisture and sweetness), or by baking the bread for too long. Always mix until just combined and rely on the toothpick test for doneness.
Can I bake this in muffins instead of a loaf?
Absolutely! This recipe works wonderfully for banana muffins. Prepare the batter as directed, then divide it among a greased or paper-lined 12-cup muffin tin. Bake at 375°F (190°C) for approximately 20-25 minutes, or until a toothpick inserted into the center of a muffin comes out clean. Muffin baking times are typically shorter than for a loaf.