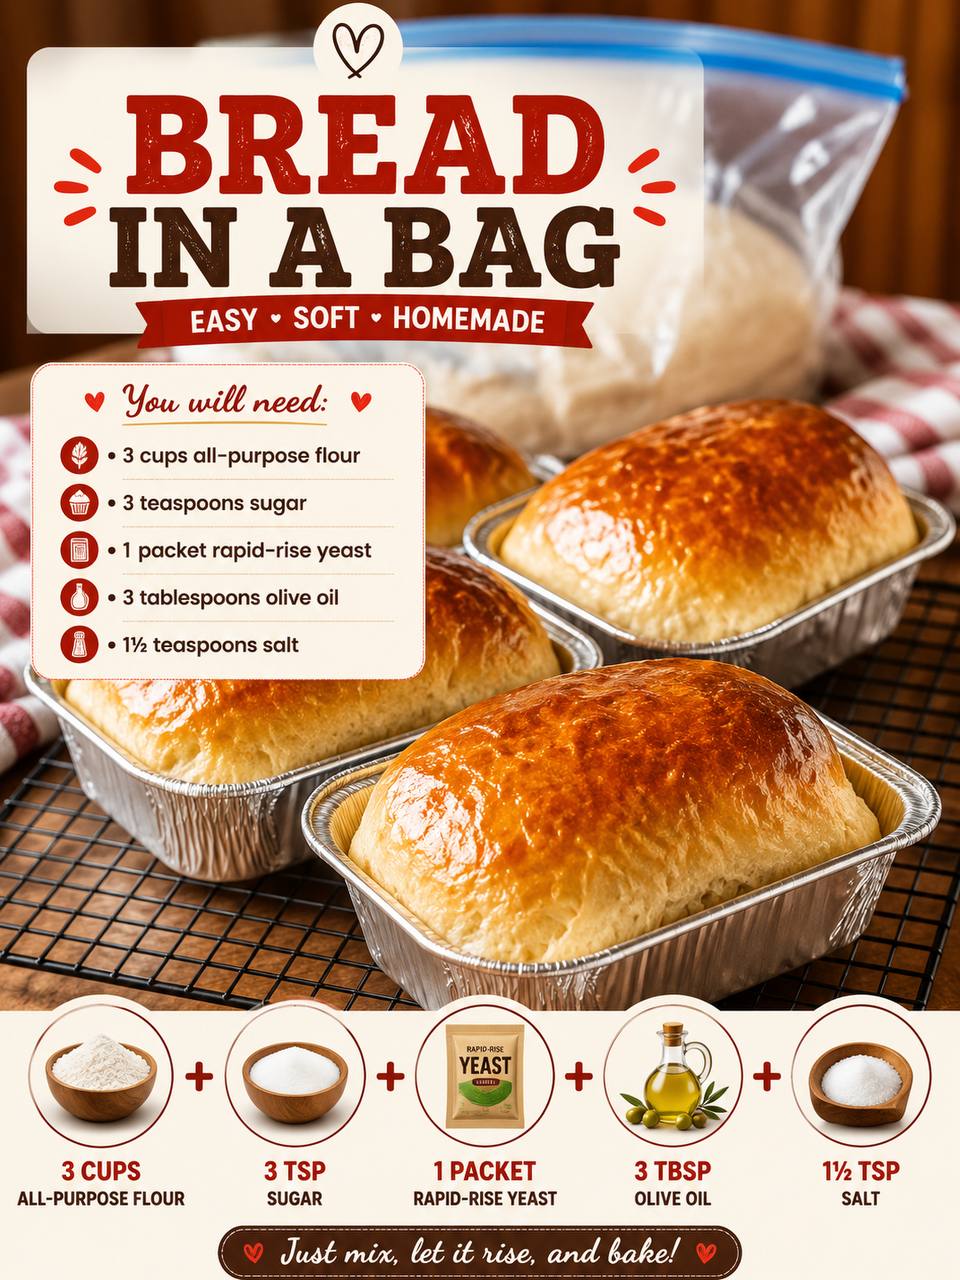
Instructions
- Gather Your Tools: Make sure you have a large, gallon-sized, heavy-duty plastic bag (like a Ziploc freezer bag), a measuring cup, measuring spoons, and four small aluminum foil loaf pans ready.
- Prepare the Dry Ingredients in the Bag: Open the plastic bag and stand it upright. Carefully measure and add the 3 cups of all-purpose flour, 1 packet of rapid-rise yeast, 3 teaspoons of granulated sugar, and 1 ½ teaspoons of salt into the bag.
- Mix Dry Ingredients: Seal the bag, leaving a little air inside. Gently shake and tumble the bag for about 30 seconds to thoroughly combine all the dry ingredients. This ensures the yeast, sugar, and salt are evenly distributed throughout the flour.
- Add Wet Ingredients: Open the bag and pour in the 3 tablespoons of olive oil and the 1 cup of warm water. Be careful to ensure the water is warm, not hot, as excessively hot water can kill the yeast.
- “Knead” in the Bag: Reseal the bag, again leaving a small pocket of air. Now, using your hands, gently press and squeeze the bag from the outside, mixing and “kneading” the dough for about 5-7 minutes. Work the dough through the bag, ensuring all the flour is incorporated and a soft, shaggy dough forms. Continue until the dough feels more cohesive and less sticky. The bag will prevent your hands from getting messy.
- First Rise (Proofing): Once the dough is well-mixed, push it towards the bottom of the bag. Expel most of the air from the bag, but still leave a little room for expansion, then seal it securely. Place the bag in a warm spot in your kitchen (like near a sunny window, on top of a preheating oven, or in a slightly warmed, turned-off oven) for 45-60 minutes, or until the dough has doubled in size.
- Prepare Baking Pans: While the dough is rising, lightly grease the inside of your four small aluminum foil loaf pans with a little olive oil.
- Punch Down and Divide Dough: Once the dough has doubled, gently punch down the dough *through the bag* to release the air. Carefully open the bag and transfer the dough onto a lightly floured surface. Divide the dough into four equal portions.
- Shape the Loaves: Take one portion of dough. Gently flatten it into a rectangle. Fold one long side towards the middle, then fold the other long side over the first, sealing the seam. Pinch the ends closed and gently roll it into a small loaf shape that fits comfortably into one of your prepared aluminum foil pans. Repeat with the remaining three portions of dough.
- Second Rise (Final Proof): Place the shaped dough into the greased aluminum foil pans. Cover the pans loosely with a clean kitchen towel or plastic wrap and let them rise in a warm spot for another 20-30 minutes, or until the loaves look puffy and have nearly doubled in size again.
- Preheat Oven: About 15 minutes before the second rise is complete, preheat your oven to 375°F (190°C).
- Bake the Bread: Once the rolls have risen, carefully place the pans into the preheated oven. Bake for 20-25 minutes, or until the tops are golden brown and the internal temperature reaches 200-210°F (93-99°C) when checked with an instant-read thermometer.
- Cooling: Once baked, carefully remove the pans from the oven. Let the loaves cool in their pans for about 5 minutes before carefully removing them and transferring them to a wire rack to cool completely. Cooling on a wire rack allows air to circulate around the entire loaf, preventing the bottom from becoming soggy.
- Serve and Enjoy: Once cooled, slice and enjoy your incredibly easy, soft, and homemade “Bread in a Bag”!
Cooking Tips and Variations
For the best “Bread in a Bag” experience, attention to a few details can make all the difference. Always ensure your rapid-rise yeast is fresh; old yeast is the most common culprit for dough that doesn’t rise. You can test yeast by mixing a teaspoon with a pinch of sugar in a quarter cup of warm water (105-115°F); if it doesn’t get foamy after 5-10 minutes, it’s likely dead. The water temperature for mixing is also crucial: too cold, and the yeast won’t activate; too hot, and you’ll kill it. Aim for a comfortable bathwater temperature. If your kitchen is cool, finding a warm spot for rising is key – a slightly warmed, turned-off oven or even near a running dishwasher can work wonders. For an extra golden and slightly crispier crust, you can brush the tops of the loaves with a little milk or an egg wash (one egg beaten with a tablespoon of water) before baking. Don’t rush the cooling process; slicing hot bread can lead to a gummy texture.
The beauty of this simple base recipe lies in its versatility. You can easily customize your “Bread in a Bag” to suit your cravings. For a savory twist, consider adding dried herbs like rosemary, thyme, or oregano to the dry ingredients in step 2. A teaspoon or two of garlic powder can also elevate the flavor. For cheesy bread, fold in ½ cup of shredded cheddar, Parmesan, or a blend of Italian cheeses when you transfer the dough to the floured surface before shaping. If you’re feeling adventurous, try adding a tablespoon of dried onion flakes or everything bagel seasoning. For a touch of sweetness, omit the savory additions and instead add a teaspoon of cinnamon and a handful of raisins or dried cranberries when shaping the loaves for a delightful breakfast bread. You can also swap out a quarter cup of the all-purpose flour for whole wheat flour for a slightly nuttier flavor and added fiber, though this might result in a slightly denser loaf. Experiment with different pan sizes too; you can make one larger loaf or even dinner rolls, just be sure to adjust baking times accordingly.
Storage and Reheating
To keep your homemade “Bread in a Bag” fresh and soft, proper storage is key. Once completely cooled, store the loaves in an airtight container or a plastic bread bag at room temperature. They will remain fresh and delicious for 2-3 days. Avoid refrigerating homemade bread, as it tends to dry out and become stale more quickly in the cold environment. If you won’t be eating all the bread within a few days, it freezes beautifully. Wrap individual loaves or slices tightly in plastic wrap, then place them in a freezer-safe bag or aluminum foil. Frozen bread will maintain its quality for up to 3 months.
When you’re ready to enjoy frozen bread, simply remove it from the freezer and let it thaw at room temperature for a few hours. For a quick reheat that brings back that fresh-baked feel, you can warm a whole loaf in a preheated oven at 350°F (175°C) for 10-15 minutes, or until warm through. Individual slices can be toasted in a toaster or toaster oven, or warmed in a microwave for 15-30 seconds (be careful not to overheat, or they can become tough). Reheating in the oven or toaster will help crisp up the crust and soften the interior, making it almost as good as freshly baked.
Frequently Asked Questions
Can I use regular active dry yeast instead of rapid-rise yeast?
Yes, you can, but you’ll need to activate it first. Dissolve the active dry yeast and sugar in the warm water for 5-10 minutes until foamy, then add this mixture to the dry ingredients in the bag along with the olive oil. The rising times might also be slightly longer for active dry yeast.
My dough isn’t rising. What went wrong?
The most common reasons for dough not rising are inactive yeast (it might be old or expired) or water that was too hot or too cold, killing the yeast. Ensure your yeast is fresh and your water temperature is within the 105-115°F (40-46°C) range. A cold kitchen can also slow down rising; try placing the bag in a warmer spot.
Can I make this recipe in advance?
You can prepare the dough and let it go through its first rise, then punch it down, shape it, and place it in the pans. Instead of the second rise, cover the pans tightly and refrigerate overnight. The next morning, take the pans out and let them come to room temperature and complete their second rise (this might take 1-2 hours) before baking as usual.
What kind of plastic bag should I use?
It’s crucial to use a large, heavy-duty, gallon-sized plastic bag, preferably a freezer bag. Thinner storage bags might tear during the mixing and kneading process, leading to a messy situation. A sturdy bag ensures durability and containment.