Introduction
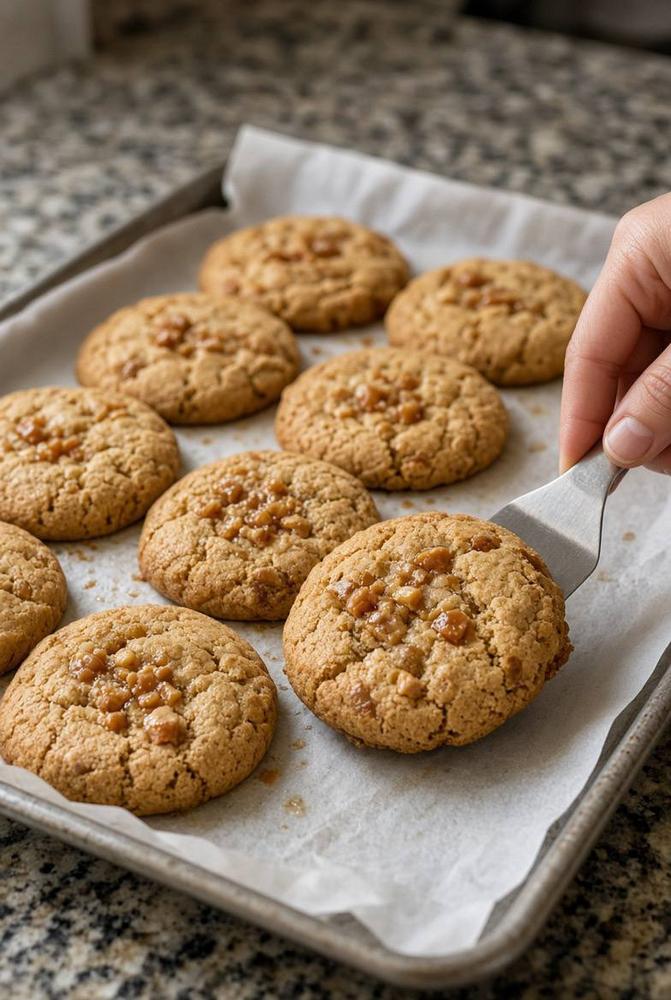
Imagine a cookie that’s more than just a sweet treat; it’s an experience. One bite transports you to a place of comforting warmth, where nutty, caramelized notes dance with the satisfying crunch and chew of buttery toffee. These Brown Butter Toffee Cookies are precisely that – an irresistible symphony of flavors and textures that will make your taste buds sing. They boast a golden-brown hue, delightfully crispy edges, and a gloriously soft, chewy center, each studded with pockets of melted, golden toffee. This isn’t just another cookie recipe; it’s an invitation to elevate your baking game and indulge in pure, unadulterated cookie bliss.
What makes these cookies truly special is the magical transformation of simple butter into a rich, aromatic brown butter. This foundational ingredient introduces an incredible depth, a toasted, almost butterscotch-like flavor that perfectly complements the sweet, buttery crunch of theffee. Combined with the robust sweetness of brown sugar, eggs, and a hint of vanilla, the dough itself is a masterpiece before it even hits the oven. And once baked, the toffee bits soften and melt slightly, creating delightful pockets of chewiness and a beautiful, caramelized sheen on the surface of each cookie, making them as visually appealing as they are delicious.
Whether you’re looking for the perfect dessert to share with loved ones, a delightful treat for your next bake sale, or simply a comforting indulgence for a quiet evening at home, these Brown Butter Toffee Cookies are guaranteed to be a crowd-pleaser. They are surprisingly easy to make, yet deliver a sophisticated flavor profile that belies their simple preparation. Get ready to fill your kitchen with the most incredible aromas and discover your new favorite cookie recipe!
Nutritional Information
Per serving (approximate values):
- Calories: 285
- Protein: 3g
- Carbohydrates: 38g
- Fat: 14g
- Fiber: 1g
- Sodium: 190mg
Ingredients
- 1 cup (2 sticks or 226g) unsalted butter
- 1 ½ cups (300g) packed light brown sugar
- ½ cup (100g) granulated sugar
- 2 large eggs, at room temperature
- 2 teaspoons vanilla extract
- 2 ½ cups (300g) all-purpose flour
- 1 teaspoon baking soda
- ½ teaspoon salt
- 1 ½ cups (about 250g) toffee bits (Heath or Skor bits work great)
Instructions
- Brown the Butter: In a medium-sized, light-colored saucepan, melt the unsalted butter over medium heat. Continue to cook, stirring occasionally, until the butter begins to foam. Tiny brown bits will start to form at the bottom of the pan, and the butter will emit a nutty aroma. This usually takes 5-8 minutes. Watch carefully to prevent burning. Once the butter is a rich amber color with fragrant brown bits, immediately remove it from the heat and pour it into a heatproof bowl to stop the cooking process. Allow it to cool for about 15-20 minutes until it’s slightly solidified but still warm.
- Prepare the Wet Ingredients: In a large mixing bowl, combine the cooled brown butter, packed light brown sugar, and granulated sugar. Beat with an electric mixer on medium speed until light and fluffy, about 2-3 minutes.
- Add Eggs and Vanilla: Beat in the eggs one at a time, ensuring each egg is fully incorporated before adding the next. Scrape down the sides of the bowl as needed. Stir in the vanilla extract until just combined.
- Combine Dry Ingredients: In a separate medium bowl, whisk together the all-purpose flour, baking soda, and salt.
- Combine Wet and Dry: Gradually add the dry ingredients to the wet ingredients, mixing on low speed until just combined. Be careful not to overmix; overmixing can lead to tough cookies.
- Fold in Toffee Bits: Gently fold in 1 cup of the toffee bits using a spatula or wooden spoon until evenly distributed throughout the dough. Reserve the remaining ½ cup for topping.
- Chill the Dough: Cover the bowl with plastic wrap and refrigerate the dough for at least 30 minutes, or up to 2 hours. Chilling helps prevent the cookies from spreading too much and deepens the flavor.
- Preheat Oven and Prepare Baking Sheets: While the dough is chilling, preheat your oven to 375°F (190°C). Line two baking sheets with parchment paper.
- Portion the Dough: Using a 1.5-2 tablespoon cookie scoop, scoop rounded balls of dough onto the prepared baking sheets, leaving about 2 inches between each cookie.
- Add Extra Toffee (Optional but Recommended): Press a few of the reserved toffee bits onto the top of each dough ball. This creates beautiful visible pockets of toffee and enhances the flavor.
- Bake the Cookies: Bake one sheet at a time for 9-12 minutes, or until the edges are golden brown and set, but the centers still look slightly soft and gooey. The exact baking time will depend on your oven and the size of your cookies.
- Cool the Cookies: Remove the baking sheets from the oven and let the cookies cool on the sheets for 5-10 minutes. This allows them to set up and prevents them from breaking when transferred.
- Transfer and Finish Cooling: Carefully transfer the slightly cooled cookies to a wire rack to cool completely.
- Serve and Enjoy: These cookies are absolutely divine served warm, but they are equally delicious once fully cooled.
Cooking Tips and Variations
Achieving the perfect Brown Butter Toffee Cookie is all about a few key techniques and a willingness to experiment with flavor. First and foremost, the brown butter is your secret weapon. Don’t rush this step! Use a light-colored pan so you can clearly see the butter transform from foamy yellow to a rich amber with tiny toasted bits at the bottom. The aroma will shift from milky to nutty and deeply caramelized. As soon as you see those brown bits and smell that incredible scent, take it off the heat immediately and transfer it to a cool bowl to prevent it from burning. Burnt butter will lend a bitter taste, which is not what we’re aiming for.
Another crucial tip is to ensure your eggs are at room temperature. This allows them to emulsify more effectively with the butter and sugar, creating a smoother, more uniform dough. When adding the dry ingredients to the wet, mix only until just combined. Overmixing develops the gluten in the flour, leading to tougher cookies. A few streaks of flour are better than an overmixed dough. The chilling step for the dough is also non-negotiable. It allows the flavors to meld and deepen, and more importantly, it helps prevent the cookies from spreading too much in the oven, ensuring those lovely thick, chewy centers. If your dough is too warm, your cookies will likely be thin and crispy rather than chewy.
For the toffee bits, while Heath or Skor bits are classic, feel free to get creative. You could chop up your favorite toffee candy bar for a more artisanal touch. Pressing extra toffee bits onto the top of the dough balls before baking is a simple trick that yields beautiful, professional-looking cookies with concentrated pockets of melted toffee. And remember, don’t overbake! The cookies should have golden edges but still look slightly soft in the center when you pull them from the oven. They will continue to set as they cool on the baking sheet, ensuring that perfect chewy texture.
When it comes to variations, the possibilities are endless. For a delightful twist, try adding ½ cup of chocolate chips (milk, dark, or white) along with the toffee bits for a double-chocolate-toffee experience. A sprinkle of flaky sea salt on top of the warm cookies just after they come out of the oven can enhance all the flavors, balancing the sweetness with a delightful savory note. For nut lovers, ½ cup of chopped pecans or walnuts folded into the dough would add another layer of texture and nutty flavor that complements the brown butter beautifully. You could even experiment with different types of toffee, like a butterscotch toffee or a toffee with a hint of espresso, to customize the flavor profile to your liking. These cookies are incredibly versatile, so feel free to make them your own!
Storage and Reheating
Proper storage is key to keeping your Brown Butter Toffee Cookies fresh and delicious for as long as possible. Once completely cooled, store the cookies in an airtight container at room temperature for up to 3-5 days. To maintain their soft and chewy texture, you can even place a slice of bread in the container with the cookies; the bread will absorb moisture, preventing the cookies from drying out too quickly. Avoid refrigerating baked cookies, as this can dry them out and make them hard.
If you want to enjoy that fresh-from-the-oven experience, these cookies reheat beautifully. Simply pop a cookie or two into the microwave for 10-15 seconds, or place them on a baking sheet in a preheated oven at 300°F (150°C) for 3-5 minutes. This will warm them through, soften the toffee, and bring back that wonderful chewy texture.
These cookies are also excellent for freezing, both as baked cookies and as raw dough. To freeze baked cookies, ensure they are completely cooled, then arrange them in a single layer on a baking sheet and freeze until solid (about 1-2 hours). Once frozen, transfer them to a freezer-safe airtight container or heavy-duty freezer bag, separating layers with parchment paper to prevent sticking. They will keep well for up to 2-3 months. Thaw them at room temperature or reheat as described above.
For freezing cookie dough, scoop the dough into balls as if you were going to bake them, then place them on a parchment-lined baking sheet and freeze until solid. Once frozen, transfer the dough balls to a freezer-safe bag or container. You can bake them directly from frozen; simply add an extra 2-4 minutes to the baking time. This is a fantastic way to have fresh, warm cookies on demand whenever a craving strikes!
Frequently Asked Questions
Can I use salted butter instead of unsalted butter?
While unsalted butter is generally preferred in baking to control the salt content, you can use salted butter in a pinch. If you do, reduce the amount of added salt in the recipe by about ¼ to ½ teaspoon, depending on how salty your butter is and your personal preference. Keep in mind that the salt content in salted butters can vary, so it might take a little trial and error to get it just right.
Do I really have to chill the dough?
Yes, chilling the dough is highly recommended and makes a significant difference. Chilling allows the butter to firm up, which helps prevent the cookies from spreading too much in the oven, resulting in thicker, chewier cookies. It also gives the flavors, especially the brown butter and toffee, more time to meld and develop, leading to a more complex and delicious cookie. If you skip this step, your cookies might be thinner and spread more than desired.
My cookies spread too much, what went wrong?
Several factors can cause cookies to spread excessively. The most common reasons include not chilling the dough sufficiently, the butter being too warm when mixed, using too much butter or not enough flour, or your oven temperature being too low. Ensure your butter is slightly cooled after browning but not completely solidified before mixing, chill the dough for at least 30 minutes, and measure your ingredients accurately (especially flour, ideally by weight). An oven thermometer can help verify your oven’s true temperature.
Can I make these cookies ahead of time?
Absolutely! These cookies are perfect for making ahead. You can prepare the dough and store it in an airtight container in the refrigerator for up to 3 days. When ready to bake, let the dough sit at room temperature for about 15-20 minutes to soften slightly before scooping and baking. Alternatively, as mentioned in the storage section, you can freeze scooped cookie dough balls for up to 2-3 months and bake them from frozen whenever you crave a fresh, warm cookie.