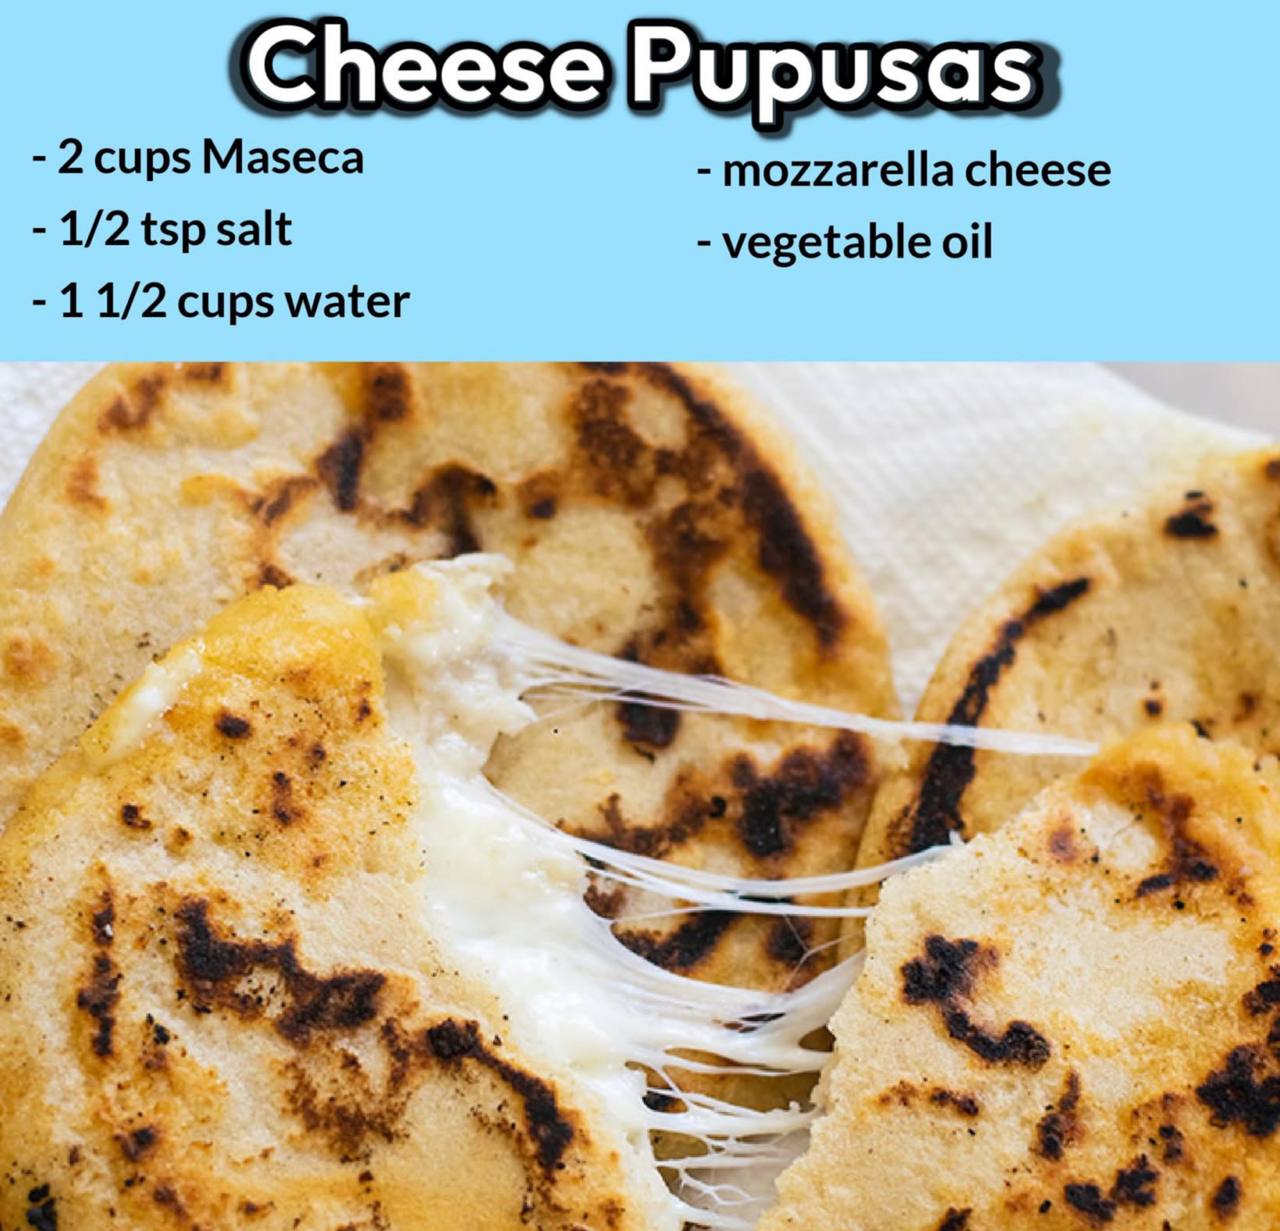
Instructions
- Prepare the Masa Dough: In a large mixing bowl, combine the Maseca and salt. Gradually add the warm water, mixing with your hands until a dough forms. Continue to knead the dough for about 5-7 minutes until it is smooth, soft, and pliable. The dough should not be sticky, nor should it be dry or crumbly. If it feels too dry, add water a tablespoon at a time. If it’s too wet, add a little more Maseca. The consistency should be like play-doh. Cover the dough with a damp cloth and let it rest for 10-15 minutes. This helps the Maseca fully absorb the water and makes the dough easier to work with.
- Prepare the Cheese Filling: While the dough rests, prepare your cheese. If using a block of mozzarella, shred it or dice it into small, manageable pieces. You want the cheese to be able to melt easily and spread evenly within the pupusa. Set aside.
- Heat the Griddle: Place a large griddle or a heavy-bottomed non-stick pan over medium heat. Add about 1-2 tablespoons of vegetable oil, ensuring it coats the surface. The oil helps prevent sticking and gives the pupusas their characteristic golden-brown crust.
- Form the Pupusas (Part 1 – The Dough Ball): Lightly moisten your hands with water or a little oil. This is crucial to prevent the dough from sticking. Take a golf-ball-sized portion of the masa dough (about 2-3 tablespoons) and roll it into a smooth ball between your palms.
- Form the Pupusas (Part 2 – Making the Well): With your thumb, press a deep indentation into the center of the dough ball, creating a cup or well. Gently rotate the dough in your hand, pressing the sides up with your fingers to widen the well and thin the dough walls, much like forming a small bowl. Be careful not to make the walls too thin, or they might tear.
- Form the Pupusas (Part 3 – Adding the Cheese): Spoon about 1-2 tablespoons of shredded or diced mozzarella cheese into the well you’ve created. Don’t overfill, as this will make sealing difficult and can cause the cheese to leak during cooking.
- Form the Pupusas (Part 4 – Sealing): Carefully bring the edges of the dough up and over the cheese, pinching them together at the top to completely enclose the filling. Pinch off any excess dough from the top. Gently re-roll the ball in your hands to smooth out any seams and ensure the cheese is fully encased.
- Form the Pupusas (Part 5 – Flattening): Gently flatten the stuffed dough ball between your palms, carefully pressing and rotating it to form a disc about 1/4 to 1/2 inch thick and about 4-5 inches in diameter. Try to keep the thickness as even as possible to ensure even cooking. If the dough cracks, moisten your fingers and gently smooth it over.
- Cook the Pupusas: Carefully place the formed pupusa onto the hot, oiled griddle. Do not overcrowd the griddle; cook 2-3 at a time, depending on the size of your pan.
- Flip and Cook: Cook for 4-6 minutes on the first side, or until the pupusa is golden brown and slightly crispy. The edges might puff up slightly. Carefully flip the pupusa using a spatula and cook for another 4-6 minutes on the second side, until it’s also golden brown and cooked through. You can gently press down on the pupusa with your spatula to ensure good contact with the griddle. The cheese inside should be fully melted and gooey.
- Serve Immediately: Transfer the cooked pupusas to a plate. Pupusas are best enjoyed hot, straight off the griddle, when the cheese is at its gooey, melty peak. Serve traditionally with curtido (fermented cabbage slaw) and salsa roja, or with your favorite accompaniments.
- Repeat: Continue forming and cooking the remaining pupusas until all the dough and cheese are used. Remember to re-oil the griddle as needed between batches.
Cooking Tips and Variations
For truly authentic and delicious cheese pupusas, attention to a few details can make all the difference. Firstly, the consistency of your masa dough is paramount. It should be soft and pliable, not sticky. If it feels too dry and cracks easily, add a teaspoon of warm water at a time until it’s smooth. If it’s too wet and sticks to your hands, incorporate a little more Maseca until it’s manageable. Always keep your hands lightly moistened with water or oil when handling the dough; this is a game-changer for preventing sticking and achieving a smooth finish. When forming the pupusas, don’t overfill with cheese. While tempting to load them up, too much filling makes sealing difficult and increases the chances of the cheese oozing out during cooking, which can burn on your griddle. Aim for a generous but manageable amount.
Cooking temperature is another key factor. A medium heat is ideal. If the griddle is too hot, the outside will burn before the inside cooks through and the cheese melts. If it’s too low, the pupusas will dry out and become tough. Look for a beautiful golden-brown crust on both sides, which usually takes about 4-6 minutes per side. For the best flavor and texture, serve your pupusas immediately. The warmth keeps the cheese perfectly gooey, and the exterior remains delightfully crispy. If you have a warming plate or a low oven, you can keep cooked pupusas warm while you finish the batch, but they truly shine when fresh.
While mozzarella is fantastic for its meltability, don’t shy away from experimenting with other cheeses. Monterey Jack is another excellent choice, offering a mild flavor and superb melt. Oaxaca cheese, a traditional Mexican string cheese, is also a perfect fit if you can find it, providing an authentic Latin American touch. For a more complex flavor, consider blending cheeses, perhaps a mix of mozzarella with a little sharp cheddar for a tangy kick, or even some crumbled cotija for a salty contrast. Beyond cheese, the world of pupusa fillings is vast. Once you’ve mastered the cheese version, you can venture into adding refried beans, cooked and mashed chicharrón (pork rinds), or even loroco, an edible flower bud popular in Salvadoran cuisine. Just be sure any added fillings are cooked and relatively dry to avoid making the dough soggy or difficult to seal. You can also incorporate finely chopped jalapeños or green chilies into your cheese for a spicy kick.
Storage and Reheating
While pupusas are undeniably at their best when enjoyed fresh off the griddle, you can certainly store leftovers and reheat them. To store, allow cooled pupusas to reach room temperature. Place them in an airtight container or a resealable bag, separating layers with parchment paper to prevent sticking. They can be stored in the refrigerator for up to 3-4 days. For longer storage, pupusas freeze quite well. Wrap each cooled pupusa individually in plastic wrap, then place them in a freezer-safe bag or container. They can be frozen for up to 2-3 months. Thaw frozen pupusas in the refrigerator overnight before reheating.
When it comes to reheating, the goal is to restore that delicious combination of a slightly crispy exterior and gooey interior. The microwave is the quickest option, but it often results in a softer, less crispy pupusa. To reheat in the microwave, place pupusas on a microwave-safe plate and heat for 30-60 seconds per pupusa, or until heated through. For a crispier result, which is highly recommended, use a griddle or a non-stick pan. Heat a lightly oiled griddle over medium heat. Place the pupusas on the griddle and cook for 3-5 minutes per side, or until they are hot, the cheese is melted, and the exterior is golden and slightly crisp again. You can also reheat them in a toaster oven or a conventional oven. Preheat your oven to 350°F (175°C). Place pupusas on a baking sheet and heat for 10-15 minutes, or until warmed through and slightly crisp. This method works well for reheating multiple pupusas at once.
Frequently Asked Questions
What is Maseca and can I substitute it?
Maseca is a specific brand of instant masa harina, which is a finely ground corn flour that has been nixtamalized (cooked and soaked in an alkaline solution, then ground). This process gives it a unique flavor and makes it easier to digest. It is essential for authentic pupusas, tortillas, and tamales. While you might find other brands of masa harina, Maseca is widely available and highly recommended. Do not substitute with regular cornmeal or corn flour, as the texture and flavor will be completely different and will not yield the correct results for pupusas.
Why are my pupusas cracking when I try to flatten them?
Cracking usually indicates that your masa dough is too dry. This can happen if you haven’t added enough water, or if the dough has been sitting uncovered and dried out. To fix this, simply add a teaspoon of warm water at a time to the dough and knead it in until it becomes soft, pliable, and smooth again. Also, ensure your hands are lightly moistened with water or oil when forming and flattening the pupusas, as this helps prevent sticking and keeps the dough from cracking.
What is curtido and is it necessary for pupusas?
Curtido is a traditional Salvadoran fermented cabbage slaw, similar to sauerkraut but with a distinct tangy, slightly spicy flavor, often made with cabbage, carrots, onion, and oregano, marinated in vinegar. While pupusas are delicious on their own, curtido is considered an essential accompaniment, providing a crucial acidic and crunchy counterpoint to the rich, soft pupusas. It cuts through the richness of the cheese and cleanses the palate, making each bite even more enjoyable. While not strictly “necessary” for the pupusa itself, it significantly enhances the overall eating experience and is highly recommended.