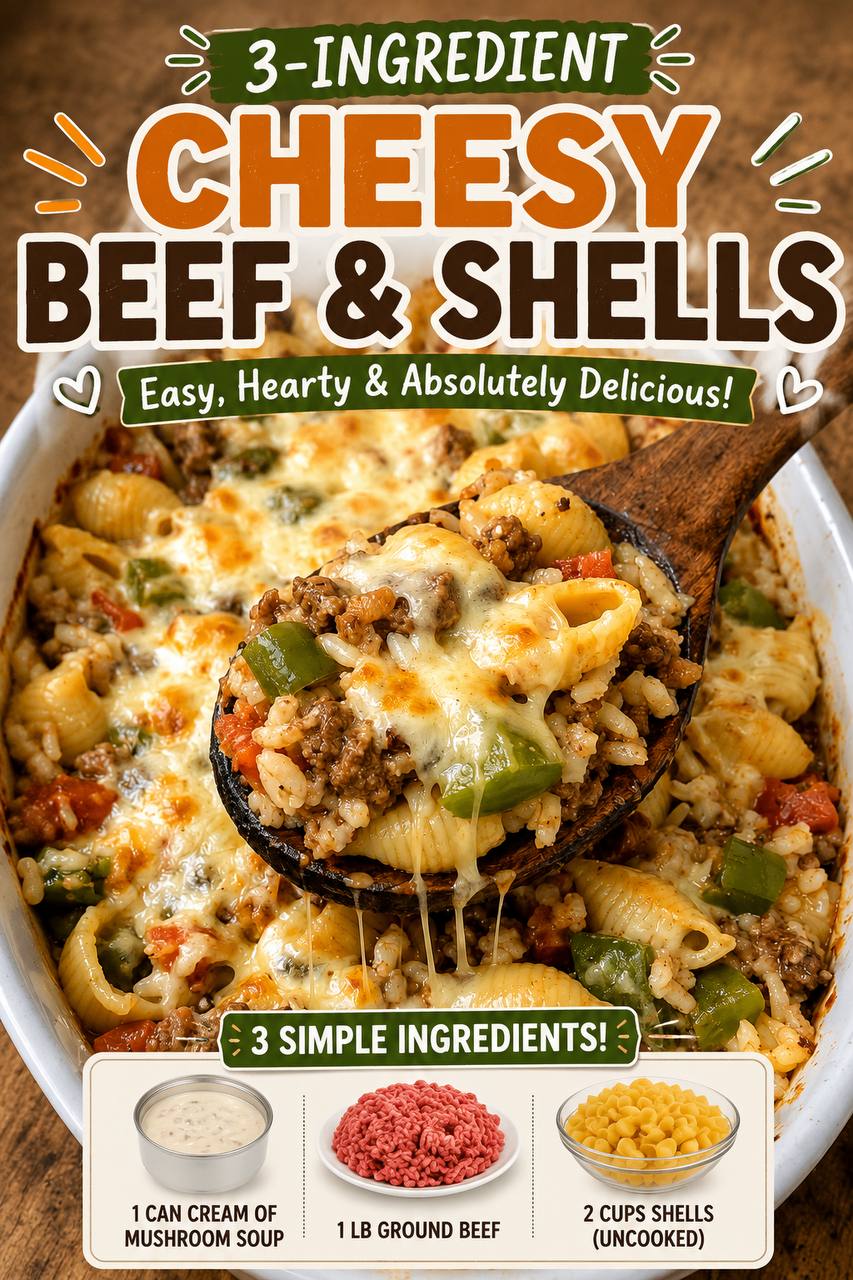
Instructions
- Preheat your oven to 375°F (190°C). Lightly grease a 9×13-inch baking dish.
- In a large skillet or Dutch oven, heat the olive oil over medium-high heat. Add the ground beef and cook, breaking it apart with a spoon, until it is fully browned. Drain off any excess fat.
- If using, add the diced onion, green bell pepper, and red bell pepper to the skillet with the cooked beef. Sauté for 5-7 minutes, or until the vegetables have softened.
- Stir in the condensed cream of mushroom soup, undrained diced tomatoes (if using), water or beef broth, uncooked pasta shells, garlic powder, onion powder, and Italian seasoning. Season generously with salt and black pepper. Stir well to combine all ingredients thoroughly.
- Bring the mixture to a gentle simmer, then immediately transfer it to the prepared 9×13-inch baking dish. Spread it evenly.
- Cover the baking dish tightly with aluminum foil.
- Bake for 25-30 minutes, or until the pasta shells are tender and most of the liquid has been absorbed.
- Remove the baking dish from the oven. Carefully remove the foil. Stir the mixture gently, then sprinkle the shredded cheese evenly over the top.
- Return the dish to the oven, uncovered, and bake for an additional 10-15 minutes, or until the cheese is melted, bubbly, and lightly golden brown. For extra browning, you can broil for the last 1-2 minutes, watching carefully to prevent burning.
- Once out of the oven, let the Cheesy Beef & Shells rest for 5-10 minutes before serving. This allows the sauce to set and prevents it from being too runny.
- Garnish with fresh parsley, if desired, and serve hot.
Cooking Tips and Variations
To achieve the best possible “Cheesy Beef & Shells,” start with quality ingredients. For the ground beef, opt for a leaner cut (85/15 or 90/10) to reduce excess grease, or ensure you drain the fat thoroughly after browning. This prevents the dish from becoming oily. When browning the beef, don’t overcrowd the pan; if necessary, cook it in batches to ensure it browns evenly and develops a rich flavor, rather than steaming. A well-browned beef base is crucial for taste.
The pasta is key. While the recipe specifies shells, you can certainly experiment with other small, sturdy pasta shapes like elbow macaroni, rotini, or even penne. The important thing is to use uncooked pasta, as it will absorb the liquid and cook directly in the casserole, infusing every bite with flavor. To prevent mushy pasta, ensure you cover the dish tightly during the initial baking phase, allowing the steam to cook the shells perfectly. If the mixture seems too dry after the initial bake, add a splash more broth or water before adding the cheese.
Cheese selection is where you can truly make this dish your own. While cheddar or a cheddar-Monterey Jack blend provides that classic gooey, tangy finish, don’t hesitate to experiment. For a sharper flavor, try aged cheddar. For a creamier, milder melt, mozzarella or Colby Jack are excellent choices. A sprinkle of Parmesan cheese mixed in with the other shredded cheeses or on top can add a salty, umami depth. Ensure your cheese is freshly shredded from a block; pre-shredded varieties often contain anti-caking agents that can affect melt and texture.
To boost the flavor profile beyond the basics, consider adding a teaspoon of Worcestershire sauce to the beef mixture for an extra layer of savory depth. A pinch of red pepper flakes can introduce a subtle heat, while a tablespoon of tomato paste, sautéed briefly with the onions and peppers, will deepen the tomato flavor. Smoked paprika can also add a delightful smoky note. If you’re looking to sneak in more vegetables, finely chopped carrots or zucchini can be added alongside the bell peppers, or a handful of fresh spinach can be stirred in during the last few minutes of baking, wilting beautifully into the dish.
For a creamier texture, you can swap out half of the water or broth for milk or even a splash of heavy cream, especially if you prefer a richer sauce. Alternatively, a tablespoon of cream cheese can be stirred into the hot mixture before baking for an incredibly velvety finish. If you’re not a fan of cream of mushroom soup, cream of celery or cream of chicken can be used as substitutes, though they will slightly alter the flavor profile. For a lighter version, consider using low-sodium broth and reduced-fat cheese.
This recipe is also incredibly versatile for meal prepping. You can assemble the entire dish (without the final cheese topping) in advance, cover it tightly, and refrigerate for up to 24 hours. When ready to bake, add an extra 10-15 minutes to the covered baking time to account for the cold temperature, then proceed with adding the cheese and baking until bubbly. For a crispy topping, consider crushing some buttered crackers or breadcrumbs and sprinkling them over the cheese before the final bake. This adds a delightful textural contrast.
Serving suggestions can elevate this simple casserole into a complete meal. A crisp green salad with a light vinaigrette provides a refreshing counterpoint to the rich, hearty dish. Garlic bread or crusty artisan bread is perfect for soaking up any leftover sauce. Steamed green beans or roasted broccoli make excellent vegetable sides, adding color and nutrients. Don’t be afraid to customize and experiment with “Cheesy Beef & Shells”; its adaptability is one of its greatest strengths, allowing you to create a personalized comfort food experience every time.
Storage and Reheating
Leftover Cheesy Beef & Shells can be a delicious and convenient meal for days to come. To store, allow the casserole to cool completely to room temperature. This is crucial to prevent condensation, which can lead to a soggy texture and faster spoilage. Once cooled, transfer the leftovers to an airtight container. It can be safely stored in the refrigerator for up to 3-4 days.
For longer storage, Cheesy Beef & Shells freezes exceptionally well. Again, ensure the dish is completely cooled. You can freeze individual portions in freezer-safe containers or wrap the entire casserole tightly in plastic wrap and then aluminum foil if freezing in the baking dish. It will keep in the freezer for up to 2-3 months. When reheating from frozen, it’s best to thaw it in the refrigerator overnight before proceeding with reheating instructions.
Reheating is straightforward, whether from the refrigerator or thawed from the freezer. For individual portions, the microwave is the quickest method. Place a serving in a microwave-safe dish, cover loosely, and heat on high for 2-3 minutes, stirring halfway through, until heated through. If it seems a little dry, you can add a tablespoon or two of water or broth before microwaving to restore some moisture.
For larger portions or when reheating the entire casserole, the oven is the preferred method as it helps maintain the texture and crispiness of the cheese topping. Preheat your oven to 300-325°F (150-160°C). Place the casserole in an oven-safe dish, cover it loosely with aluminum foil to prevent drying out, and bake for 20-30 minutes (longer if thawing from frozen), or until heated through to the center. For the last 5-10 minutes, you can remove the foil to allow the cheese to crisp up again. Avoid reheating at too high a temperature, as this can dry out the pasta and make the sauce separate.
Always ensure that leftovers are reheated to an internal temperature of 165°F (74°C) to ensure food safety. While reheating, if the dish appears too thick, a splash of milk or broth can be stirred in to achieve the desired consistency. The flavors often meld and deepen overnight, making leftovers just as enjoyable, if not more so, than the freshly made dish.
Frequently Asked Questions
What kind of ground beef is best for this recipe?
For Cheesy Beef & Shells, a lean ground beef (80/20 or 90/10) is generally recommended. This provides enough flavor from the fat but minimizes excess grease, which can make the dish oily. If you use a higher fat content, be sure to drain the fat thoroughly after browning the beef to keep the casserole from being greasy.
Can I make this recipe ahead of time?
Yes, you can absolutely prepare this dish in advance! You can assemble the entire casserole (mixing all ingredients except the final cheese topping) in the baking dish, cover it tightly with plastic wrap or foil, and refrigerate for up to 24 hours. When you’re ready to bake, add an extra 10-15 minutes to the covered baking time to ensure it heats through, then proceed with adding the cheese and baking until bubbly and golden.
What if my pasta isn’t cooking through or the dish is too dry?
If your pasta isn’t cooking through, it’s likely due to insufficient liquid or the dish not being covered tightly enough during the initial bake. Ensure your baking dish is sealed well with foil to trap steam, which helps cook the pasta. If the dish seems too dry after the initial bake (before adding cheese), stir in an additional 1/4 to 1/2 cup of water or beef broth, then re-cover and bake for a few more minutes until the pasta reaches your desired tenderness.
Can I substitute the cream of mushroom soup?
While cream of mushroom soup contributes a specific savory depth to this dish, you can certainly substitute it if needed. Cream of chicken or cream of celery soup are good alternatives and will still provide a creamy base. Keep in mind that these substitutions will slightly alter the overall flavor profile of the casserole. For a different twist, some people use a combination of sour cream and a small amount of milk or broth, along with additional seasonings, to create a creamy sauce from scratch.