Introduction
Imagine a symphony of flavors and textures dancing on your palate: the buttery crunch of a golden crust, the vibrant burst of sweet-tart cherry filling, and the irresistible crumbly topping that melts in your mouth. That’s precisely the magic you unlock with these Cherry Crumble Bars. More than just a dessert, these bars are a celebration of simple pleasures, offering a homemade charm that’s hard to resist. They’re the kind of treat that evokes memories of grandma’s kitchen, yet they’re effortlessly chic enough for any modern gathering. Perfect for a casual afternoon snack, a delightful addition to a potluck spread, or a comforting end to any meal, these Cherry Crumble Bars are designed to bring joy with every single bite.
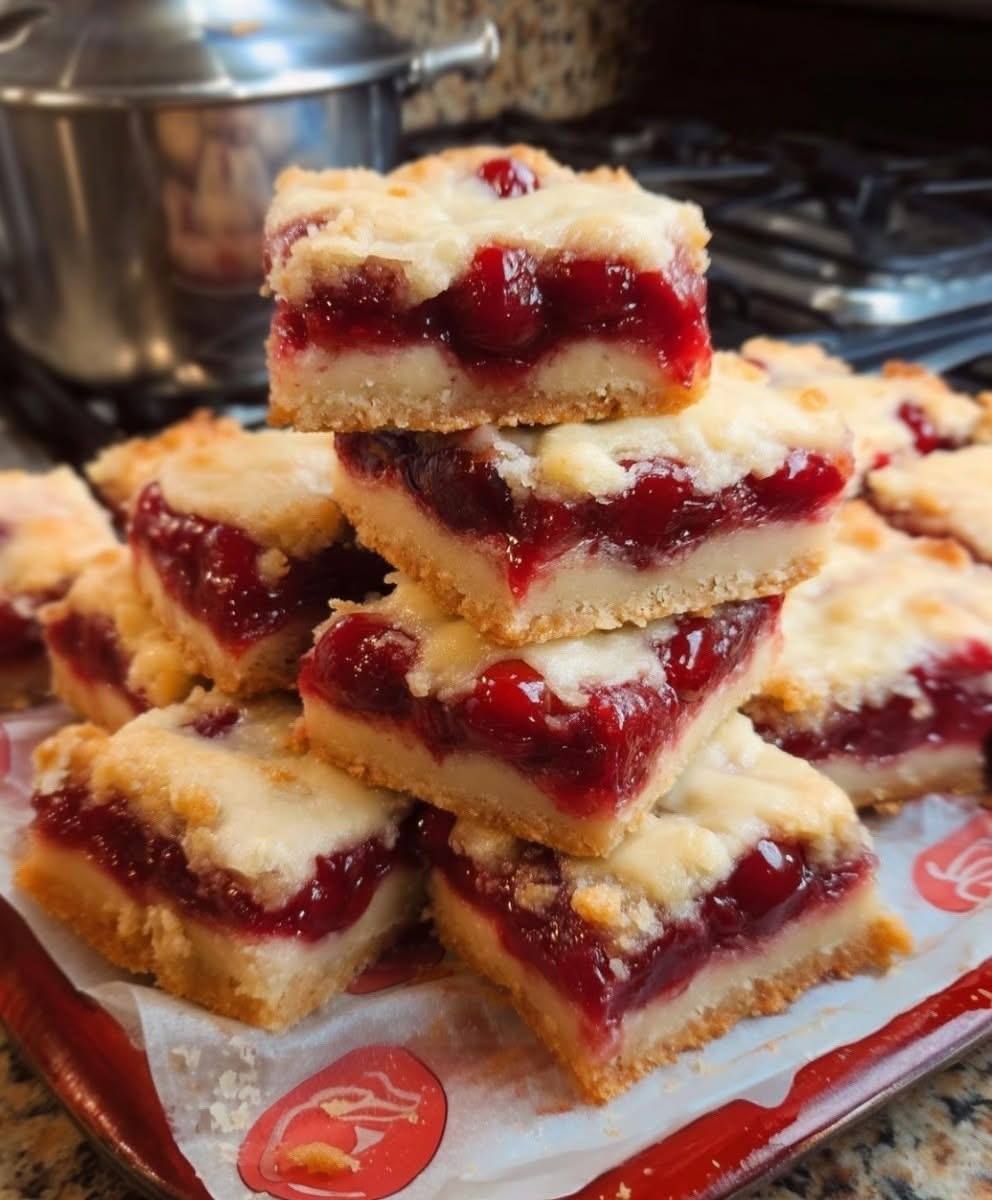
What makes *these* Cherry Crumble Bars truly special is their generous, jewel-toned cherry filling nestled between a substantial, shortbread-like base and a delightfully uneven, golden crumble. Unlike many bar recipes that skimp on the fruit, ours ensures a juicy, vibrant layer that sings with authentic cherry flavor. The contrast between the firm, rich crust and the tender, slightly yielding fruit, all topped with that wonderfully textural crumble, creates an addictive experience. Plus, they’re surprisingly easy to make, even for novice bakers, delivering satisfyingly professional results that will impress everyone who tries them. Get ready to fall in love with your new go-to cherry dessert!
Why You’ll Love These Cherry Crumble Bars
- Perfect Balance of Sweet and Tart: We strike the ideal harmony between the natural tartness of cherries and just enough sweetness to make them utterly delicious, not cloying.
- Buttery Shortbread-Like Crust and Crumble Topping: The foundation and crown of these bars are made from the same versatile dough, resulting in a rich, buttery flavor and an incredible texture that’s both tender and crumbly.
- Generous, Juicy Cherry Filling: No skimping on the good stuff here! Our bars feature a thick, glossy layer of luscious cherry filling, bursting with fruit.
- Relatively Simple to Make: Don’t let their impressive appearance fool you; these bars are straightforward to prepare, making them a fantastic project for bakers of all skill levels.
- Versatile and Make-Ahead Friendly: They’re perfect for sharing at parties, packing in lunchboxes, or simply enjoying at home. They also keep well, making them ideal for prepping in advance.
Nutritional Information
Per serving (approximate values):
- Calories: 350-400
- Protein: 4-5g
- Carbohydrates: 50-60g
- Fat: 15-20g
- Fiber: 2-3g
- Sodium: 150-200mg
Ingredients
For the Crumble Topping & Crust:
- 2 ½ cups all-purpose flour
- ¾ cup granulated sugar
- 1 teaspoon baking powder
- ¼ teaspoon salt
- 1 cup (2 sticks) unsalted butter, very cold and cut into small cubes
- 1 large egg
- 1 teaspoon pure vanilla extract
For the Cherry Filling:
- 4 cups pitted tart cherries (fresh or frozen, thawed and drained if frozen)
- ½ cup granulated sugar (adjust to taste depending on cherry sweetness)
- 2 tablespoons cornstarch
- 1 tablespoon fresh lemon juice
- ½ teaspoon almond extract (optional, but highly recommended)
Instructions
- Preheat your oven to 375°F (190°C). Line a 9×13-inch baking pan with parchment paper, leaving an overhang on the sides to easily lift the bars out later.
- Prepare the Crumble Dough: In a large mixing bowl, whisk together the flour, ¾ cup granulated sugar, baking powder, and salt.
- Add the cold, cubed butter to the dry ingredients. Using a pastry blender, your fingertips, or a food processor, cut the butter into the flour mixture until it resembles coarse crumbs with some pea-sized pieces of butter remaining.
- In a small separate bowl, whisk together the egg and vanilla extract. Add this mixture to the flour and butter mixture. Stir with a fork or your hands until just combined and a crumbly dough forms. Be careful not to overmix.
- Form the Crust: Reserve about 1 ½ cups of the crumble dough for the topping. Press the remaining dough evenly into the bottom of the prepared 9×13-inch baking pan. Use the bottom of a flat glass or your fingers to create a firm, even crust.
- Bake the crust for 12-15 minutes, or until lightly golden brown around the edges. This step helps prevent a soggy bottom. Remove from the oven and set aside while you prepare the filling.
- Prepare the Cherry Filling: In a medium saucepan, combine the pitted cherries, ½ cup granulated sugar, cornstarch, and lemon juice. If using frozen cherries, ensure they are thawed and any excess liquid has been drained before adding to the saucepan.
- Cook over medium heat, stirring constantly, until the mixture thickens and comes to a gentle boil. The cherries will release their juices, and the cornstarch will thicken them into a glossy, jam-like consistency. This usually takes about 5-7 minutes.
- Remove the cherry filling from the heat and stir in the almond extract, if using.
- Assemble the Bars: Pour the warm cherry filling evenly over the pre-baked crust in the pan.
- Evenly sprinkle the reserved 1 ½ cups of crumble dough over the cherry filling.
- Bake the Bars: Return the pan to the oven and bake for another 25-30 minutes, or until the crumble topping is golden brown and the cherry filling is bubbly around the edges.
- Cool and Cut: Once baked, remove the pan from the oven and place it on a wire rack to cool completely. This is a crucial step! The bars need to cool for at least 2-3 hours (or even longer, up to room temperature) for the filling to set properly, making them easier to cut cleanly.
- Once completely cool, use the parchment paper overhang to lift the entire slab of bars out of the pan. Place on a cutting board and cut into 18-24 squares or rectangles.
Cooking Tips and Variations
Tips for Perfect Cherry Crumble Bars
- Cold Butter is Key: For the flakiest crust and crumbliest topping, ensure your butter is very cold and cut into small pieces. This helps create pockets of steam during baking, leading to that desirable texture.
- Don’t Overmix the Dough: Overmixing develops gluten, which can lead to a tough crust and topping. Mix just until the ingredients are combined and a crumbly dough forms.
- Pre-bake the Crust: This step is essential for preventing a soggy bottom. A partially baked crust creates a barrier against the moist cherry filling.
- Thicken the Filling Properly: Ensure the cherry filling comes to a gentle boil and thickens before removing it from the heat. This guarantees a set, not runny, filling once the bars are cooled.
- Cool Completely Before Cutting: Patience is a virtue here! Cutting warm bars will result in a messy, crumbling disaster. Allow them to cool completely at room temperature for several hours, or even chill them in the refrigerator, to achieve clean, crisp cuts.
- Use Parchment Paper: Lining your pan with parchment paper (with an overhang) makes removal and cutting incredibly easy, preventing any sticking.
Variations
- Other Fruit Fillings: This recipe is incredibly versatile! Substitute cherries with other fruits like blueberry, raspberry, peach, apple, or a mix of berries. Adjust sugar levels based on the sweetness of your chosen fruit.
- Add Spices: Enhance the cherry filling with a pinch of cinnamon, nutmeg, or even a tiny amount of ground cloves for a warmer flavor profile.
- Nutty Crumble: Add ½ cup of chopped nuts (like almonds, pecans, or walnuts) to the crumble topping for extra crunch and flavor.
- Citrus Zest: Incorporate the zest of one lemon or orange into the crumble dough or the cherry filling for a brighter, aromatic touch.
- Gluten-Free Option: Experiment with a 1:1 gluten-free all-purpose flour blend for the crust and crumble for a gluten-free alternative.
- Serving Suggestions: These bars are fantastic on their own, but they’re even better served warm with a scoop of vanilla ice cream, a dollop of whipped cream, or a drizzle of crème anglaise.
Storage and Reheating
Storage
- Room Temperature: Cherry Crumble Bars can be stored in an airtight container at room temperature for up to 3 days. Ensure they are completely cool before storing to prevent condensation.
- Refrigerator: For longer storage, place the bars in an airtight container in the refrigerator for up to 5-7 days.
- Freezer: These bars freeze beautifully! Once completely cooled, cut them into individual servings. Wrap each bar tightly in plastic wrap, then place them in a freezer-safe bag or container. They can be frozen for up to 3 months.
Reheating
- From Refrigerator: You can enjoy them cold, or if you prefer them warm, simply microwave individual bars for 20-30 seconds, or warm them in a preheated oven at 300°F (150°C) for 5-10 minutes until heated through.
- From Freezer: Thaw frozen bars at room temperature for a few hours, or overnight in the refrigerator. Once thawed, you can warm them as described above.
Frequently Asked Questions
How do I prevent the bottom crust from getting soggy?
The key to preventing a soggy bottom is to pre-bake the crust before adding the filling. This creates a slightly cooked barrier that helps repel moisture from the cherry mixture. Additionally, ensuring your cherry filling is thickened properly with cornstarch helps prevent excess liquid from seeping into the crust.
Can I use frozen cherries instead of fresh?
Absolutely! Frozen cherries work perfectly in this recipe. Just make sure to thaw them completely and drain off any excess liquid before using them in the filling. This prevents the filling from becoming too watery. You might also want to gently pat them dry with paper towels.
Why did my crumble topping disappear or become too hard?
If your crumble topping disappeared, it might have been pressed down too firmly, causing it to meld with the filling. For a truly crumbly texture, gently sprinkle the topping over the filling without pressing. If it became too hard, it might have been overbaked or the butter wasn’t cold enough, leading to a more cookie-like texture rather than a tender crumble. Ensure your butter is very cold to achieve that perfect, distinct crumble.
How do I get clean cuts when slicing the bars?
The most important tip for clean cuts is to allow the bars to cool completely to room temperature, or even chill them in the refrigerator, before attempting to slice them. The cherry filling needs time to set firm. Once cooled, use a sharp, non-serrated knife and wipe the blade clean between each cut for the neatest results. Using the parchment paper overhang to lift the entire slab out of the pan before cutting also helps immensely.