Instructions
- Preheat your oven to 350°F (175°C). Line a 9×13 inch baking pan with parchment paper, leaving an overhang on the sides to easily lift the bars out later. Lightly grease the parchment paper if desired.
- In a large mixing bowl, using an electric mixer, cream together the softened butter, granulated sugar, and light brown sugar until light and fluffy, about 2-3 minutes.
- Beat in the eggs one at a time, incorporating each egg fully before adding the next. Stir in the vanilla extract until well combined.
- In a separate medium bowl, whisk together the all-purpose flour, baking soda, and salt.
- Gradually add the dry ingredients to the wet ingredients, mixing on low speed until just combined. Be careful not to overmix; stop as soon as no dry streaks of flour remain.
- Gently fold in 1 cup of the semi-sweet chocolate chips and 1 cup of the sweetened shredded coconut into the batter.
- Press the batter evenly into the prepared 9×13 inch baking pan. An offset spatula or the back of a spoon lightly moistened with water can help spread the sticky dough.
- Sprinkle the remaining 1/2 cup of chocolate chips and 1/2 cup of shredded coconut evenly over the top of the pressed dough. Lightly press them into the dough with your fingertips to ensure they adhere and don’t fall off.
- Bake for 25-30 minutes, or until the edges are golden brown and a toothpick inserted into the center comes out with moist crumbs attached (not wet batter). The center should look set and slightly puffed.
- Remove the pan from the oven and place it on a wire rack to cool completely. This is crucial for clean cuts and for the bars to set properly.
- Once completely cool, use the parchment paper overhang to lift the entire slab of bars out of the pan. Place it on a cutting board and cut into 18-24 squares or rectangles, depending on your desired serving size.
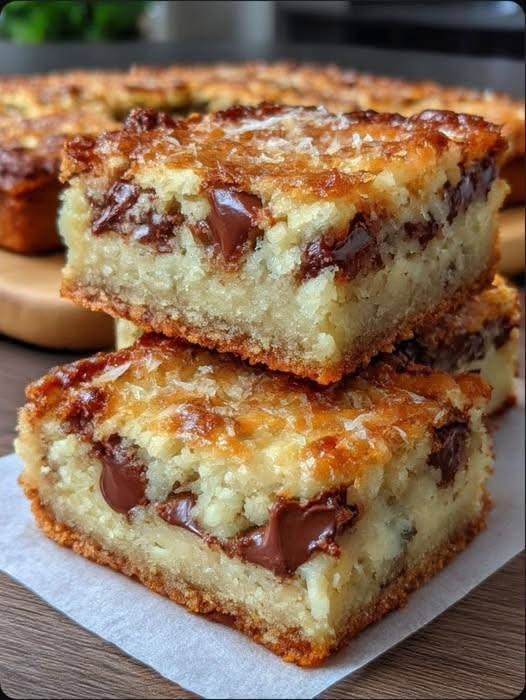
- Serve and enjoy these delicious Chocolate Chip Coconut Bars!
Cooking Tips and Variations
For the chewiest bars, make sure not to overbake them. They should still look slightly soft in the very center when you pull them out of the oven, as they will continue to set as they cool. The edges should be golden, but if the top coconut starts to brown too quickly, you can loosely tent the pan with aluminum foil for the last 5-10 minutes of baking.
To enhance the coconut flavor, you can toast the shredded coconut lightly in a dry skillet over medium-low heat for a few minutes before adding it to the batter. Watch it carefully, as it browns quickly. This adds a deeper, nuttier dimension to the bars.
Experiment with different types of chocolate chips! Milk chocolate chips will make them sweeter and creamier, while dark chocolate chips will add a more intense, slightly bitter contrast. You could also use a mix of chocolate chips or even chopped chocolate bars for a more artisanal feel.
For an extra layer of flavor and texture, consider adding 1/2 cup of chopped nuts like pecans or walnuts to the batter along with the chocolate chips and coconut. A pinch of cinnamon or a tiny dash of almond extract could also complement the flavors beautifully.
If you’re feeling adventurous, a thin drizzle of melted white chocolate or a simple powdered sugar glaze (powdered sugar mixed with a little milk or lemon juice) over the cooled bars can add an elegant touch and extra sweetness.
For those looking for a vegan option, you can substitute the butter with a plant-based butter alternative and use a ‘flax egg’ (1 tablespoon ground flaxseed meal mixed with 3 tablespoons water, let sit for 5 minutes) for each regular egg. Ensure your chocolate chips are dairy-free. For a gluten-free version, use a 1:1 gluten-free baking flour blend that contains xanthan gum in place of all-purpose flour.
Storage and Reheating
Once completely cooled, Chocolate Chip Coconut Bars can be stored in an airtight container at room temperature for up to 3-4 days. For longer storage, you can refrigerate them for up to a week. If stacking, place parchment paper between layers to prevent sticking.
These bars also freeze beautifully! Wrap individual bars tightly in plastic wrap, then place them in a freezer-safe bag or container. They can be frozen for up to 2-3 months. To enjoy, simply thaw them at room temperature for a few hours, or warm them gently in the microwave for 10-15 seconds for a gooey, fresh-baked taste.
While delicious cold, a quick reheat in the microwave for 10-15 seconds brings out the melted chocolate and makes the bars extra soft and gooey, mimicking that warm-from-the-oven experience. They are also fantastic served at room temperature with a glass of milk or a cup of coffee or tea.
Frequently Asked Questions
What kind of coconut should I use?
This recipe calls for sweetened shredded coconut, which provides moisture and a lovely sweet flavor that complements the chocolate perfectly. Unsweetened shredded coconut can also be used if you prefer a less sweet bar, but you might want to increase the sugar in the dough slightly to compensate.
Can I make these bars ahead of time for a party?
Absolutely! These bars are an excellent make-ahead dessert. They keep well at room temperature for several days and can even be frozen. Preparing them a day or two in advance will save you time and stress on the day of your event, and the flavors often meld and deepen over time.
Why did my bars turn out dry or crumbly?
The most common reason for dry or crumbly bars is overbaking. Keep a close eye on them during the last few minutes of baking. They should be set and golden at the edges, but the center should still look slightly soft. Overmixing the dough can also lead to a tougher, drier texture, so mix until just combined.
Can I use different types of chocolate?
Yes, feel free to get creative with your chocolate! Semi-sweet chocolate chips are a classic choice, but milk chocolate chips will make the bars sweeter, and dark chocolate chips will offer a richer, more intense chocolate flavor. You could also use white chocolate chips or a combination of different types for a varied chocolate experience.